
Salesforce
Salesforce
Integrate your Salesforce CRM
About the Integration:
Zipteams is a Generative AI sales acceleration platform that can make your Salesforce CRM super powerful by automatically extracting and updating data from your customer calls.
Connect your Salesforce CRM on Zipteams
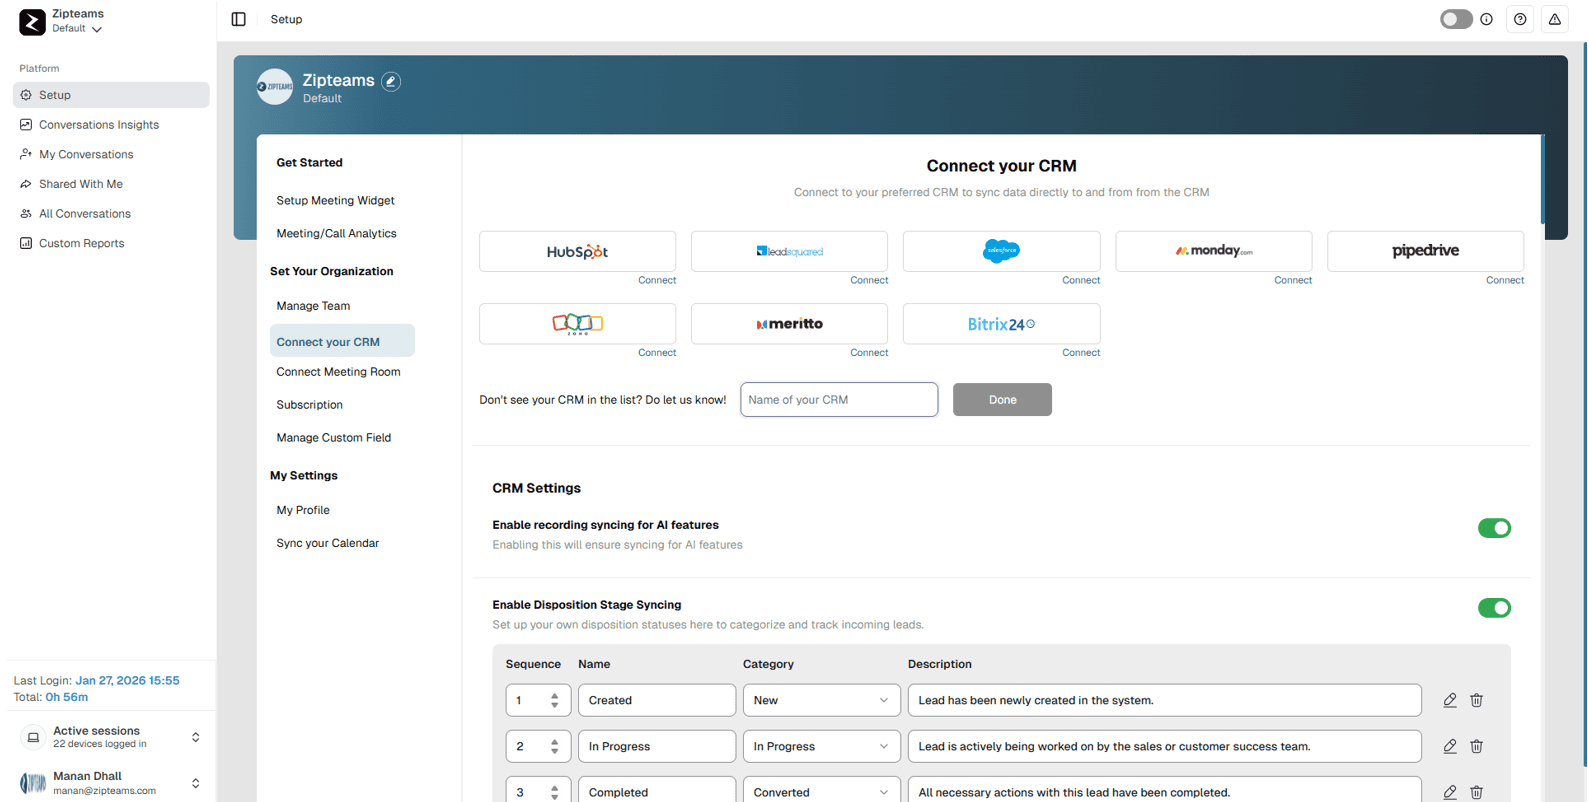
Login onto Zipteams. Go to Connect your CRM page and click on the connect button under salesforce logo on the right side.
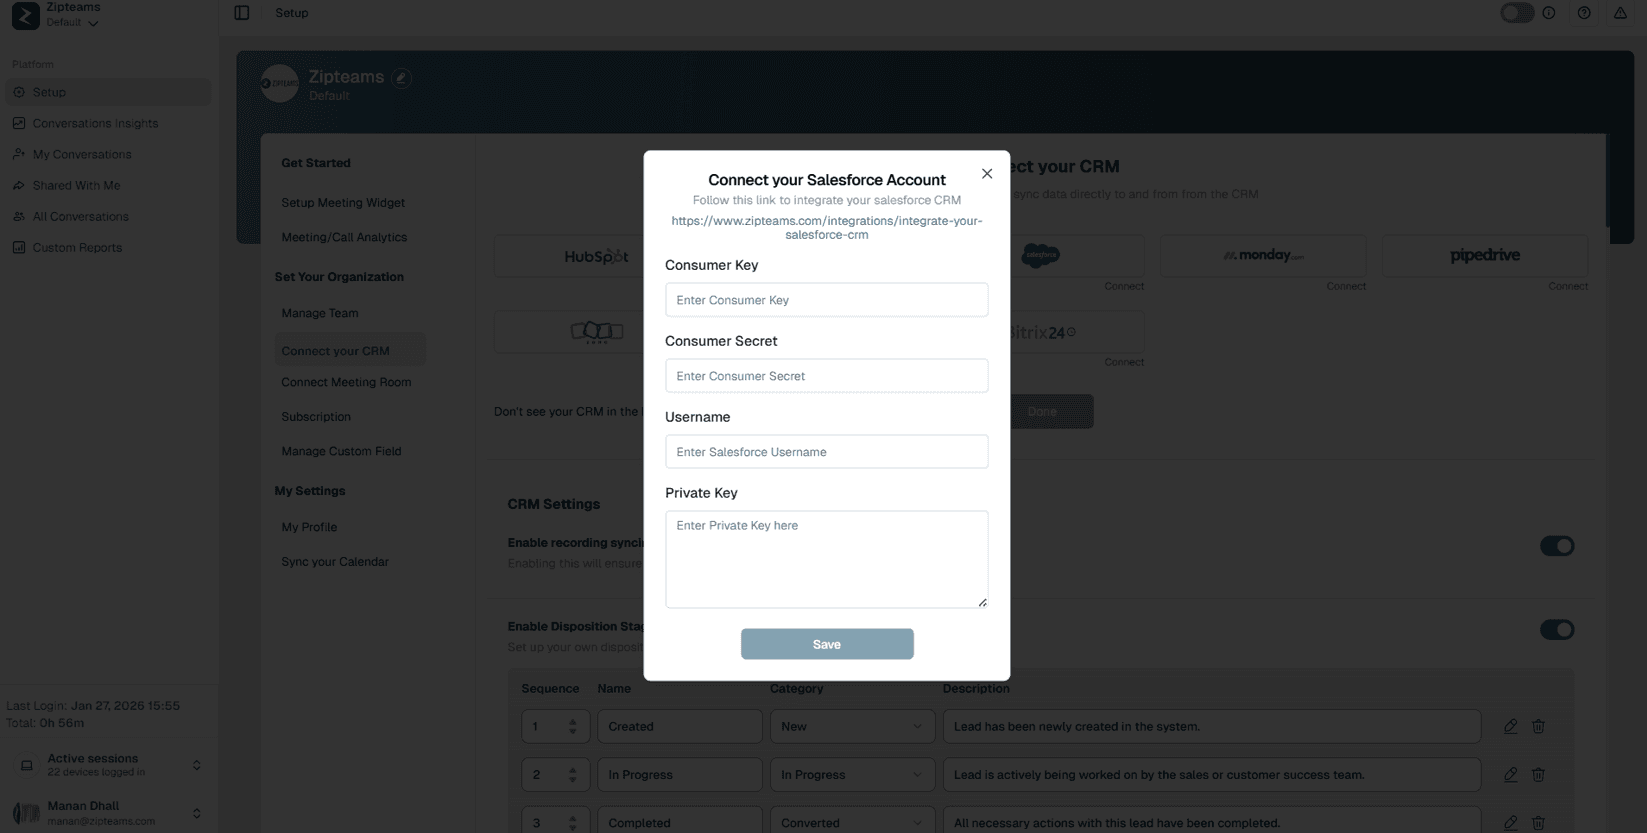
A dialog box will appear where you need to enter details –‘Consumer Key’, ‘Consumer Secret’, ‘Username’ and ‘Private Key’. Click on the link on top of the dialog box to open the documentation for fetching these details from Salesforce.
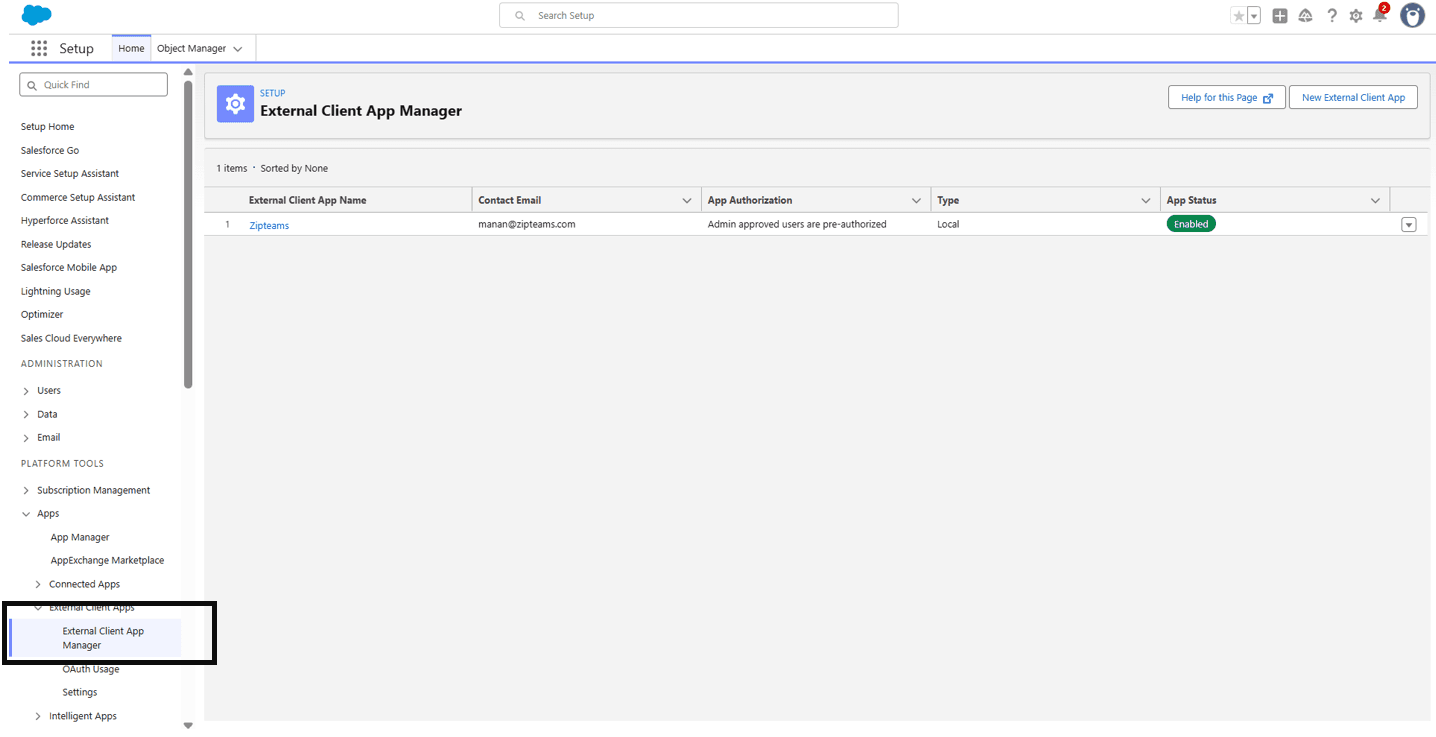
Section 1 - Create an External Client App on Salesforce
Go to Setup > In the Search bar at the top type ‘External Client App Manager’ and click on ‘New External Client App’ button.
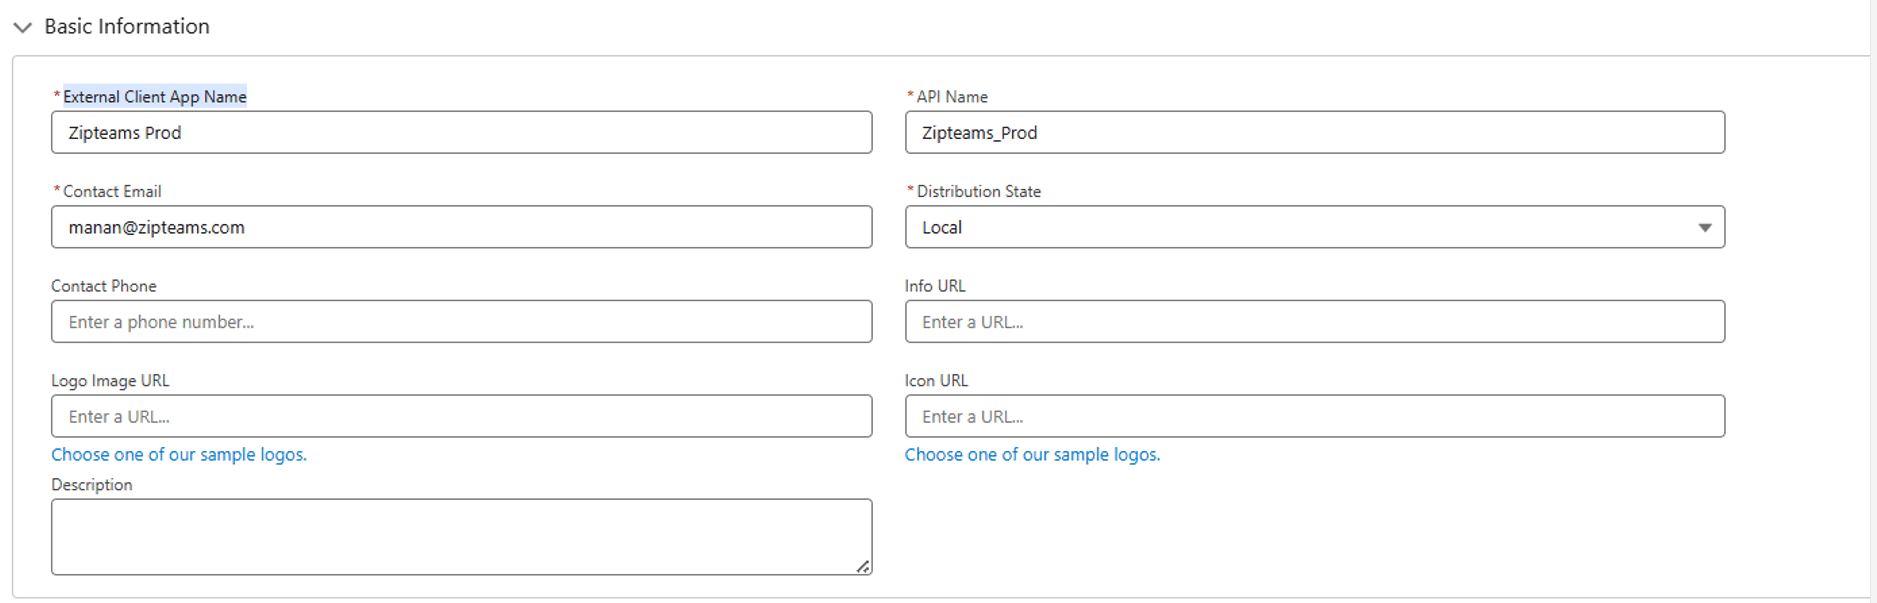
Enter Name ‘Zipteams’ in the ‘External Client App Name’ text box. Add your salesforce email address in the in the ‘Contact Email’ textbox. Refer to the screenshot below.
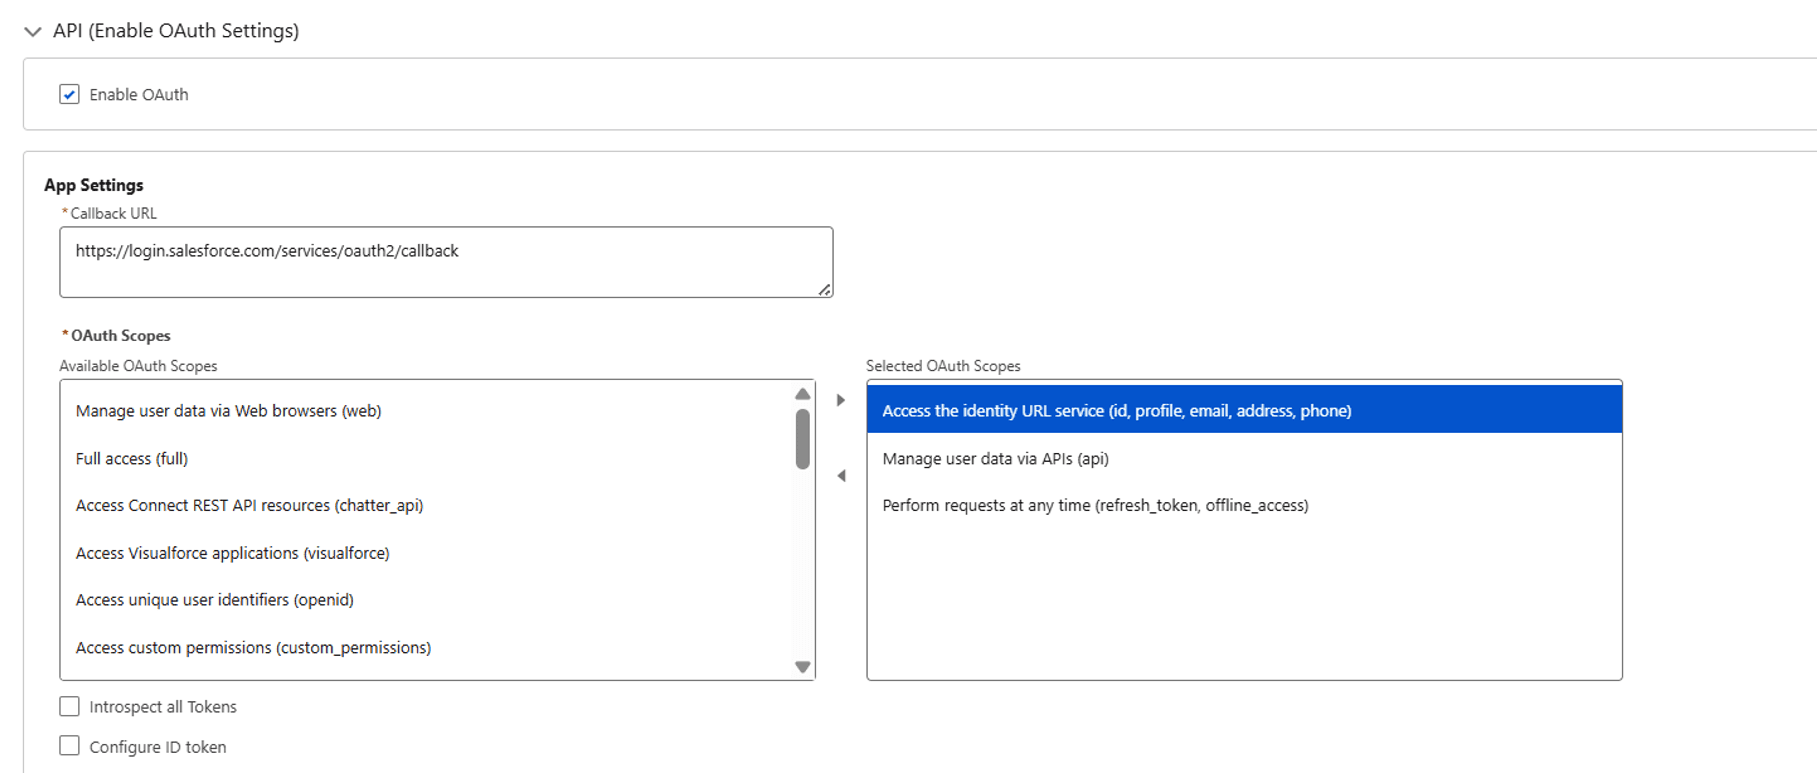
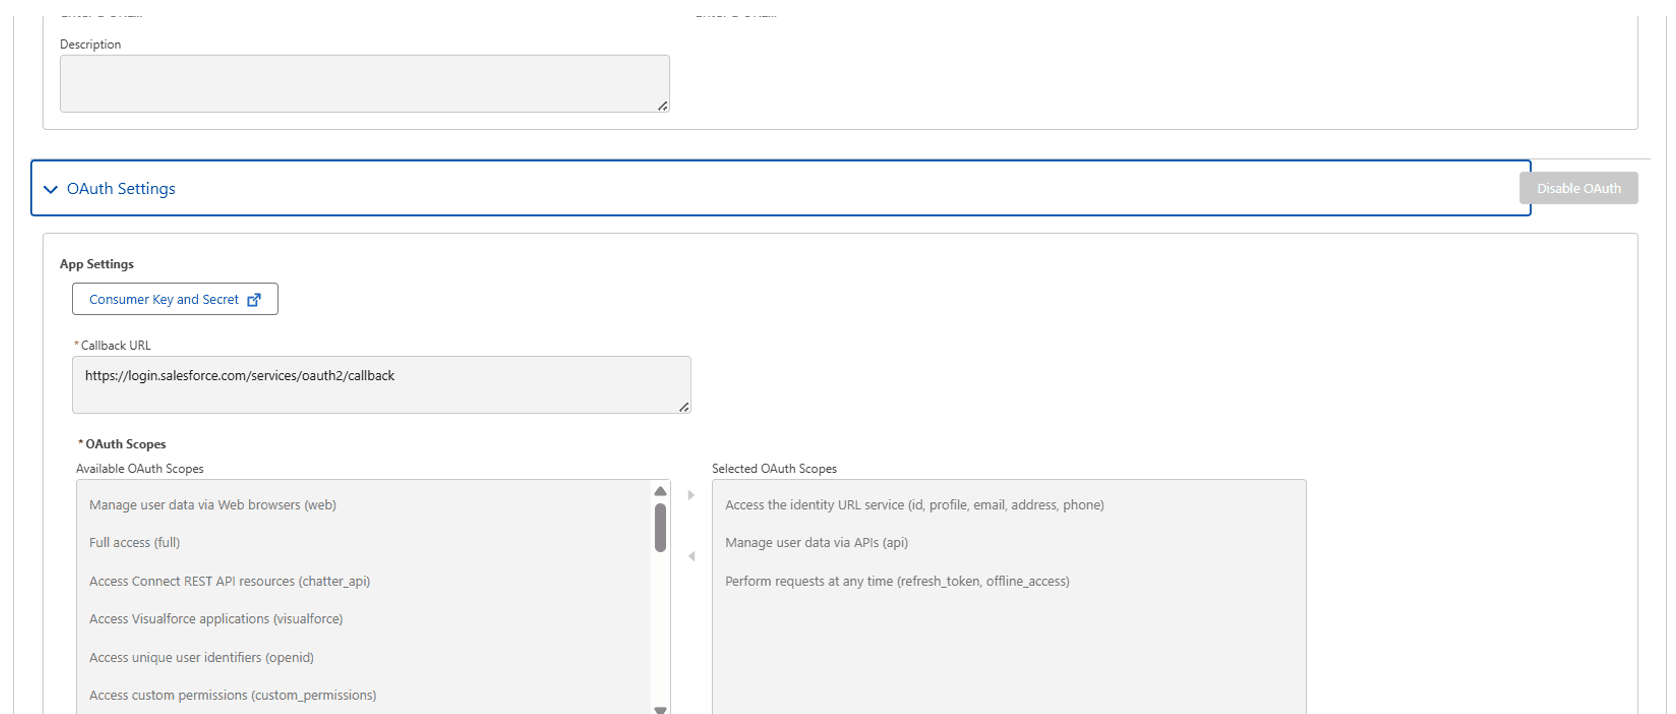
Expand the API (Enable OAuth Setting) setting. Tick the ‘Enable OAuth’ checkbox.
- Add this in the ‘Callback URL’ field:- https://login.salesforce.com/services/oauth2/callback
- Move these 3 scopes from left Available section to Selected Section:-Access the identity URL service (id, profile, email, address, phone)
Manage user data via APIs (api)
Perform requests at any time (refresh_token, offline_access)
In the ‘Flow Enablement ’ section. Tick mark these 2 option:
-Enable Authorization Code and Credentials Flow
-Enable JWT Bearer Flow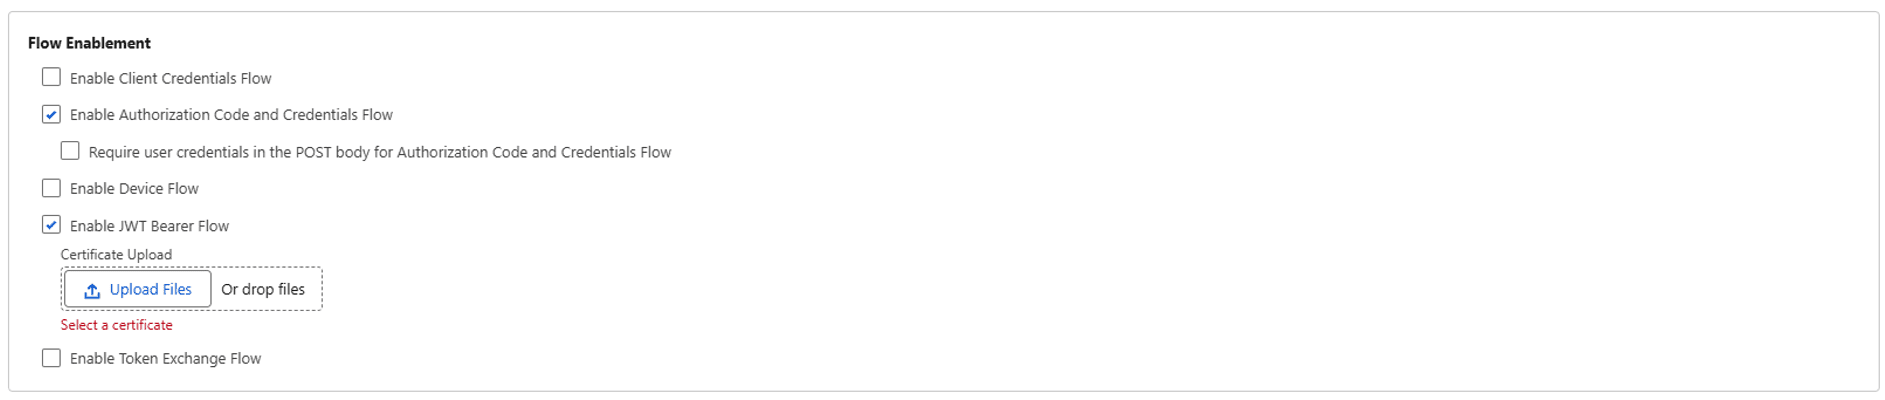
Now to generate a certificate file. You can generate it on your end as well and upload it. Otherwise you can go to this website and create a new certificate and private key:-
https://certificatetools.com/
configs:- Key Size: 2048 Algorithm: RSA Validity: 365
Download both the cert.csr and cert.key files.
Rename the cert.csr file to cert.crt file and upload the cert.crt file on salesforce by clicking on the upload button.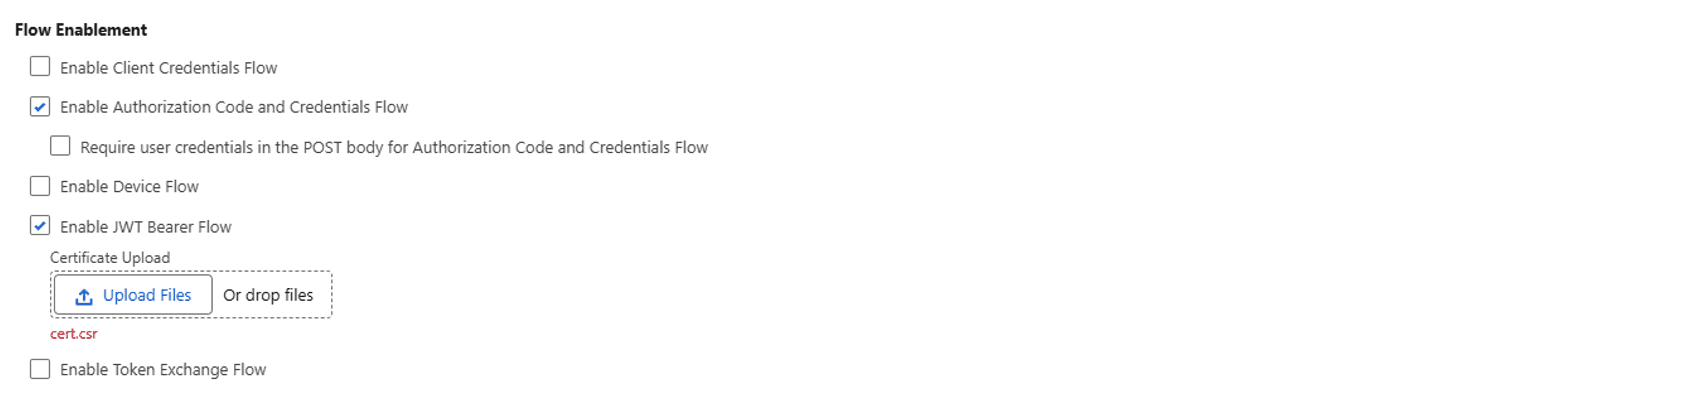
Tick these 2 options in the ‘Security’ section and click on ‘create’ button.

Now you will be redirected to this page
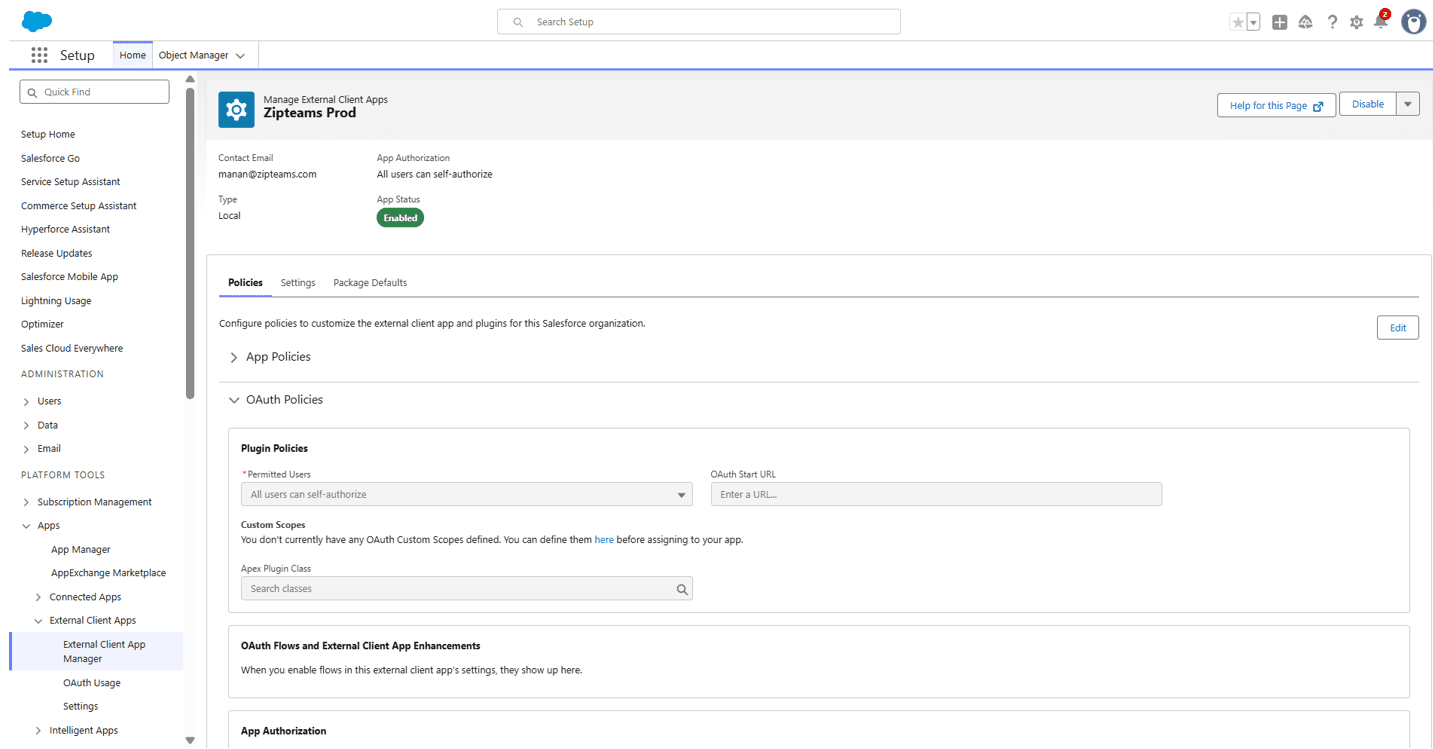
Click on the edit button on the left side.
In the ‘Permitted Users’ dropdown select this option:- ‘Admin approved users are pre-authorized’.
In the App Authorization Section. Tick ‘Refresh token is valid until revoked’ in the ‘Refresh Token Policy’ sub-section and select ‘Relax IP Restrictions’ from the ‘IP Relaxation’ drop-down. Click on save.

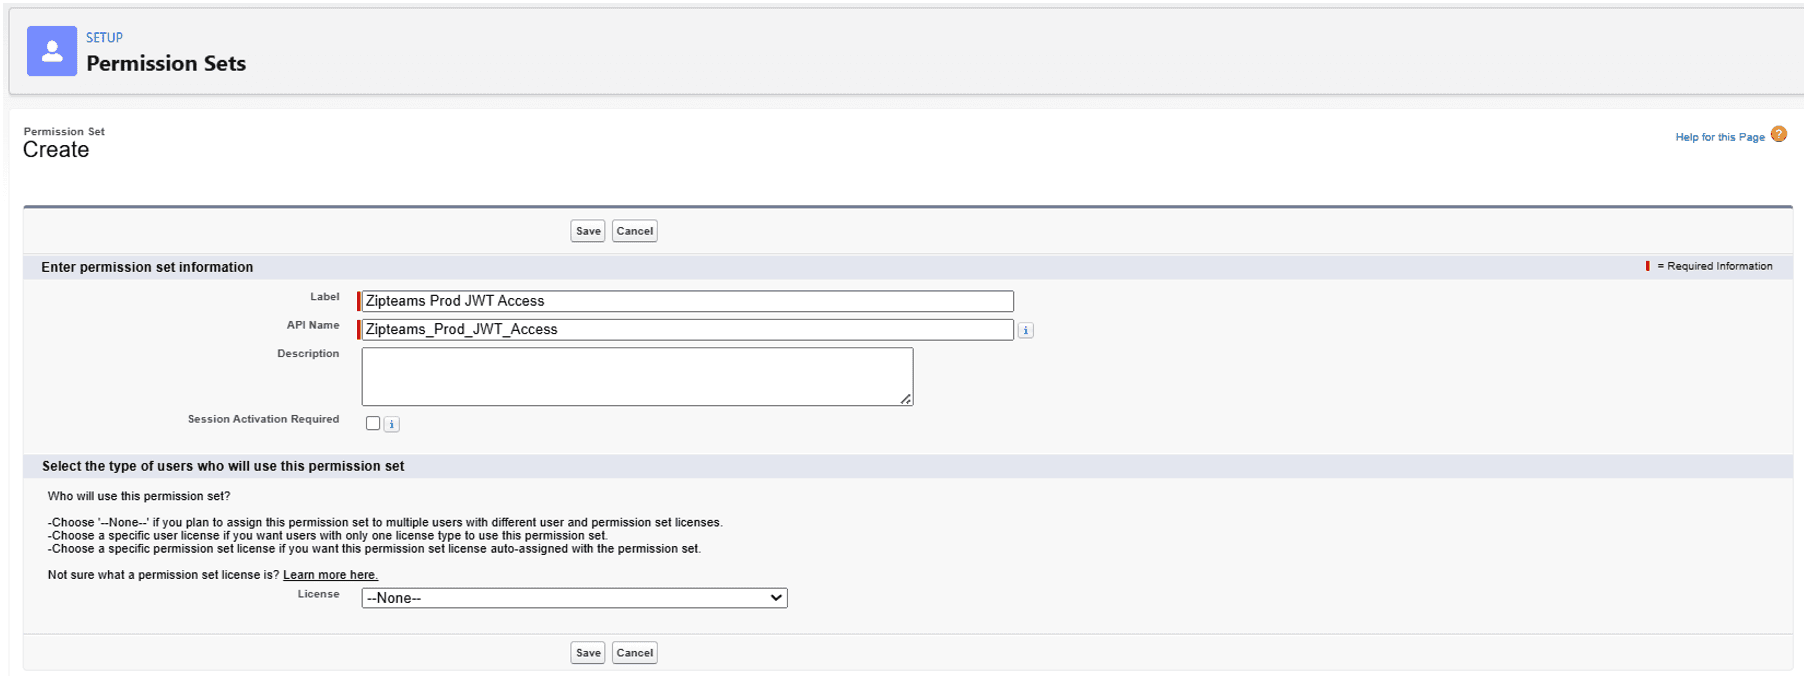
Now in the setup search ‘Permission Sets’. Click on ‘New’ button. Enter any name of the permission in the label field like: ‘Zipteams JWT Access’ and then click on save.
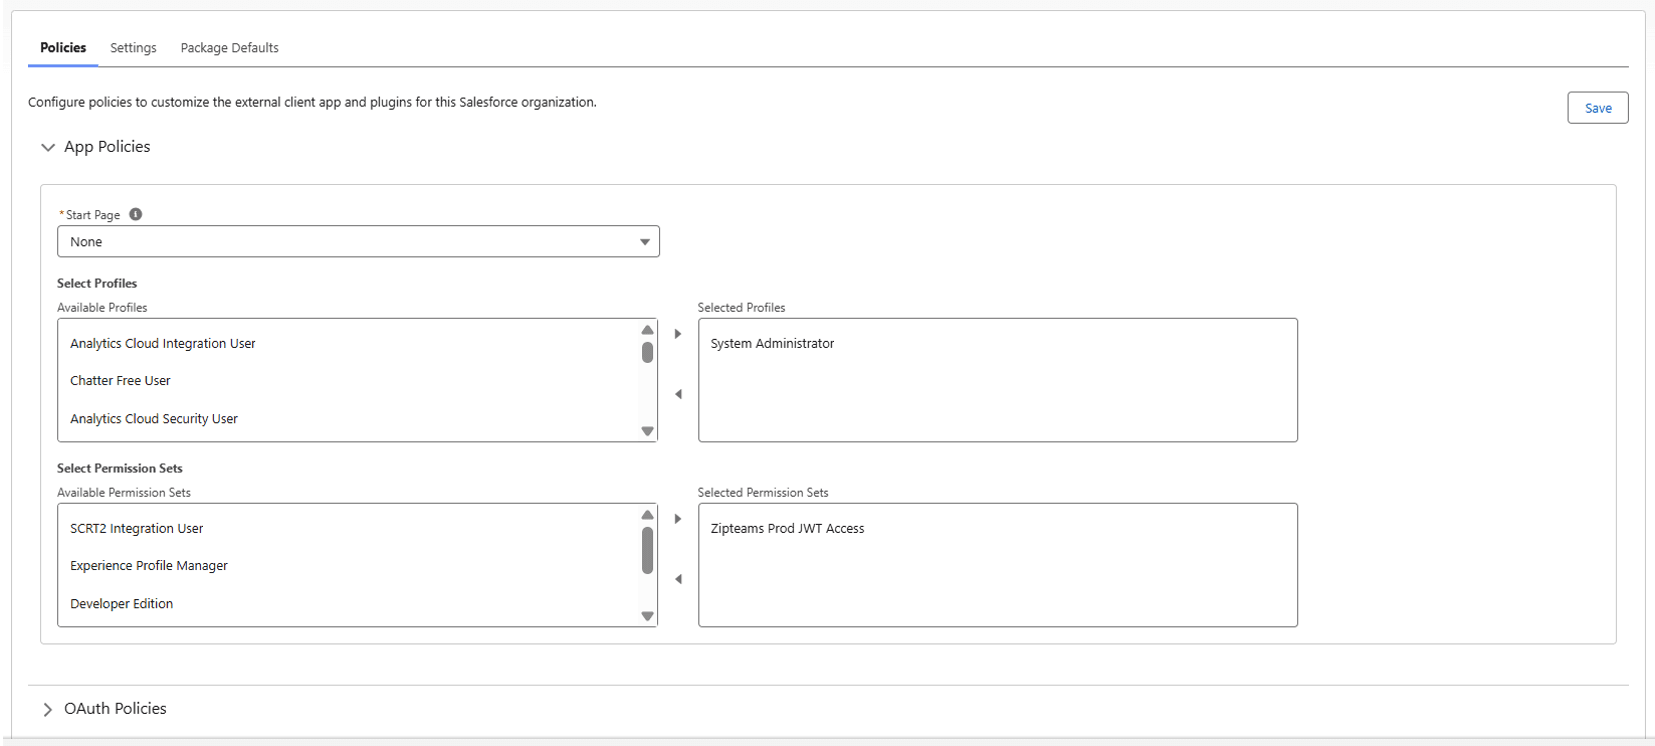
Now go back to ‘External Client App Manager’. Select your App and click on edit. Click on the ‘Policies’ Tab. Move the permission set you just created from Available to Selected. Like in the below screenshot. Then click on save.
Now go the ‘Settings’ tab besides ‘Policies’ tab. In the ‘OAuth Settings’ section and in the ‘App Settings’ sub-section you will see a ‘Consumer key and Secret’ button. Click on it.
After this you will need to verify your identity. Once done you will see Consumer Key and Consumer Secret Values generated. Copy and paste it on the Zipteams Connector in the Consumer Key and Consumer Secret text boxes respectively. And then connect to Zipteams. Also enter the value of
your salesforce username in the same dialog box and also the value of private key you generated earlier when you uploaded the certificate file on Salesforce.
Section 2 - Create Automation Flow to Sync Calls to Zipteams
Go to Setup page and search for ‘Named Credentials’. On this page now select ‘External Credentials’ tab and click on ‘New’ button.
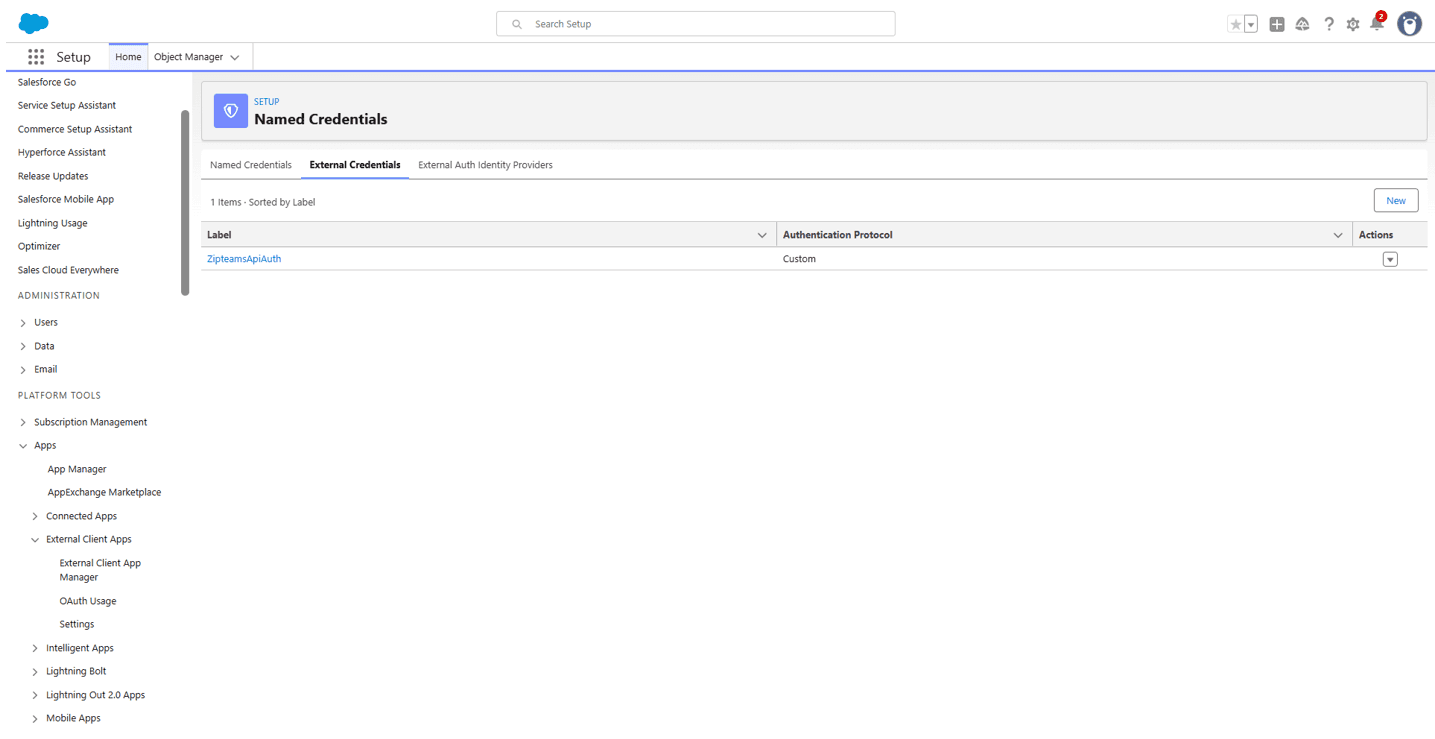
Add a label for your External Credentials like ‘Zipteams’ and select ‘Custom’ from the ‘Authentication Protocol’ Dropdown. Click on save.

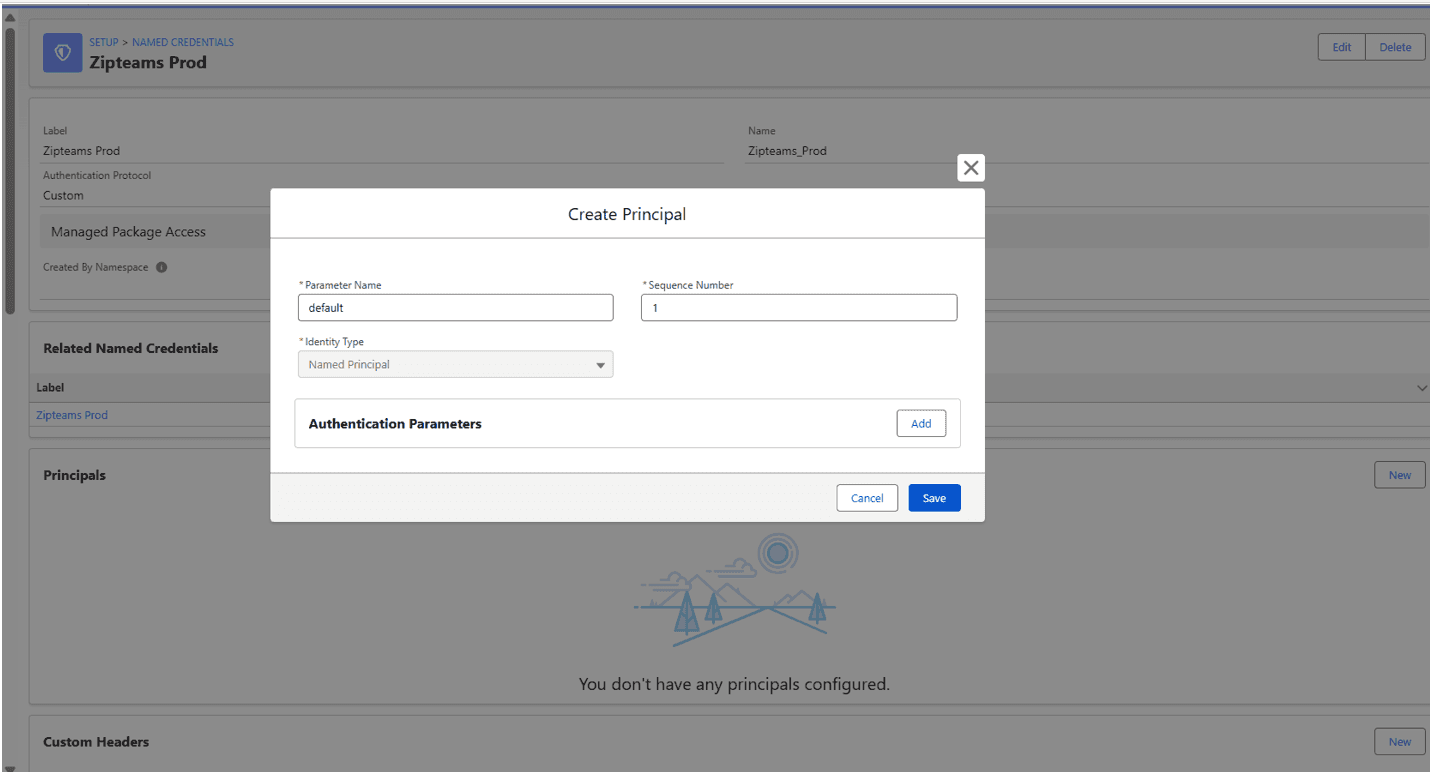
Now create a new Principal for the new External Credential you just created. If you scroll down the page there would be a Principals section. Click on New there.
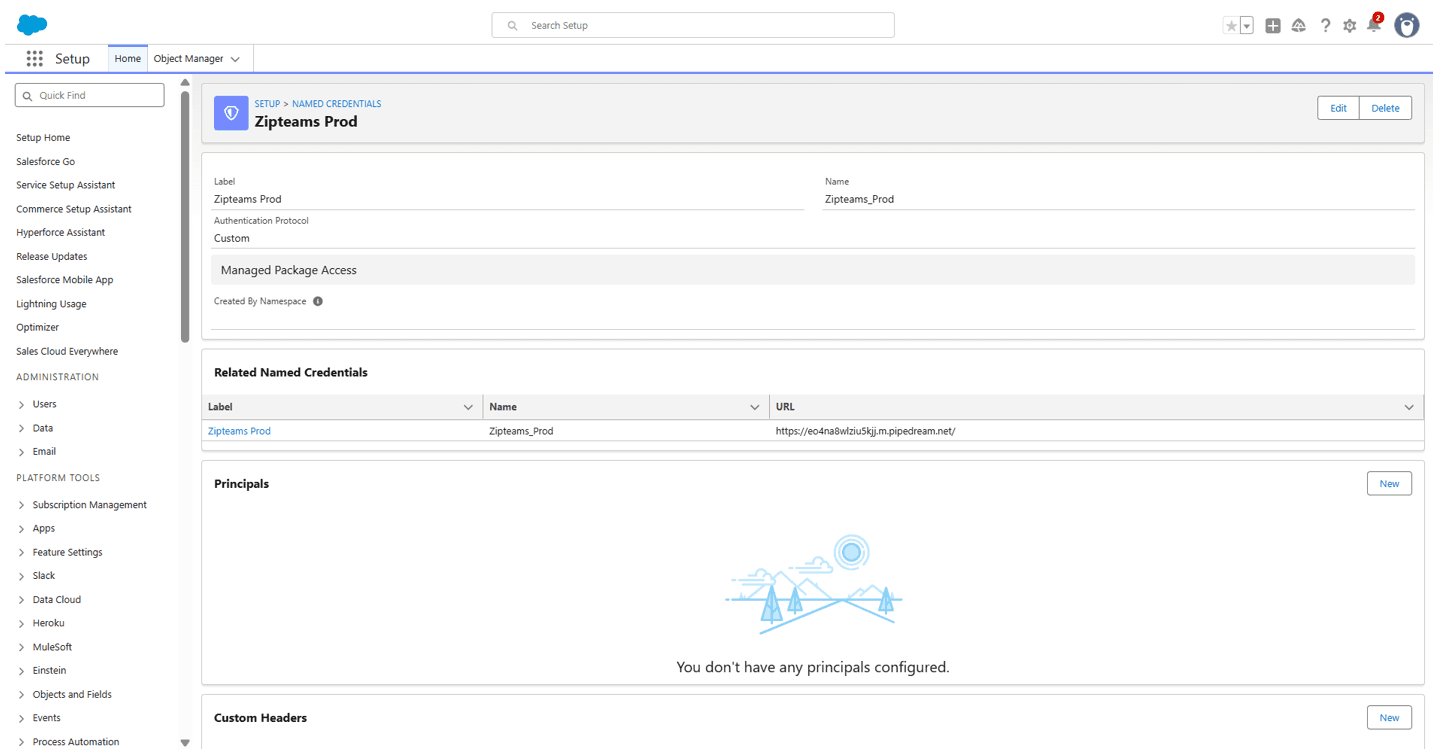
Set ‘Parameter Name’ as ‘default’ and click on save.
Imp: Once done give the user who is creating the flow access to this principal of this external credentials using permission sets.
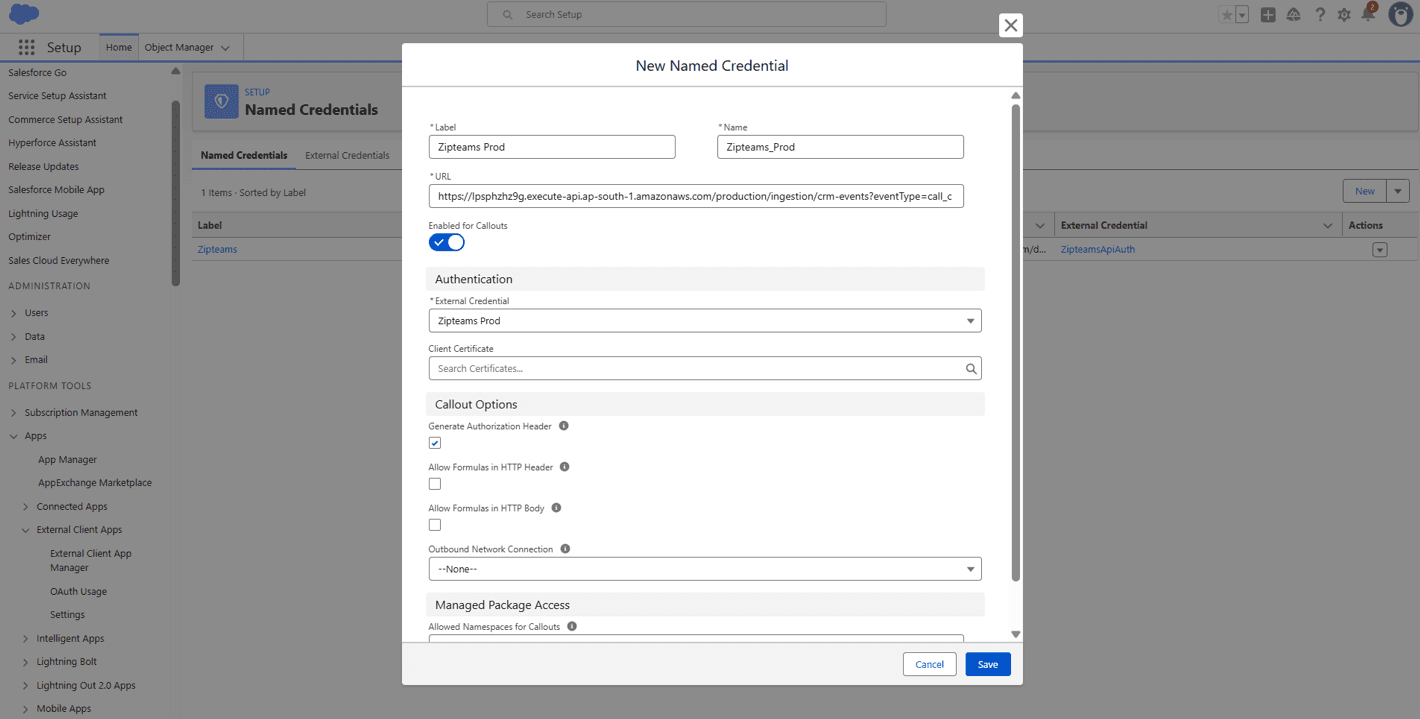
Now go back to the ‘Named Credentials’. Select ‘Named Credentials’ tab. Click on ‘New’. A form will appear. Enter label and name for you Named Credentials like ‘Zipteams’. In the url put this value:- ‘https://lpsphzhz9g.execute-api.ap-south-1.amazonaws.com/production/ingestion/crm-events?eventType=call_creation_webhook’ and select the ‘External Credential’ you just created from the dropdown. Click on save.
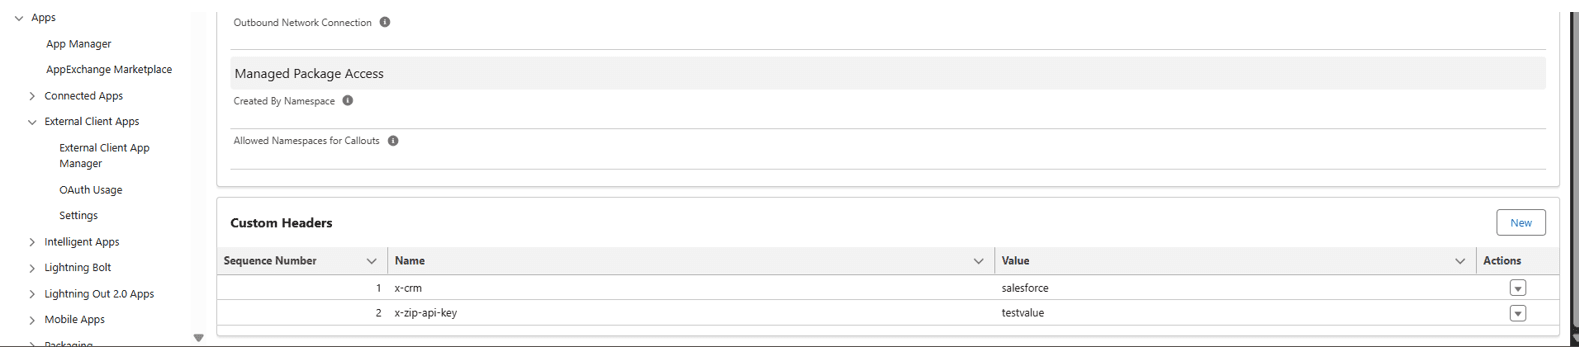
Now after saving scroll down the same page. You will see a ‘Custom Headers’ section. Click on the ‘New’ button on the right hand side and add these 2 header values one by one:-
Name: x-crm – Value: salesforceName: x-zip-api-key - Value: (To be shared by Zipteams Team. Please ask them for the same)
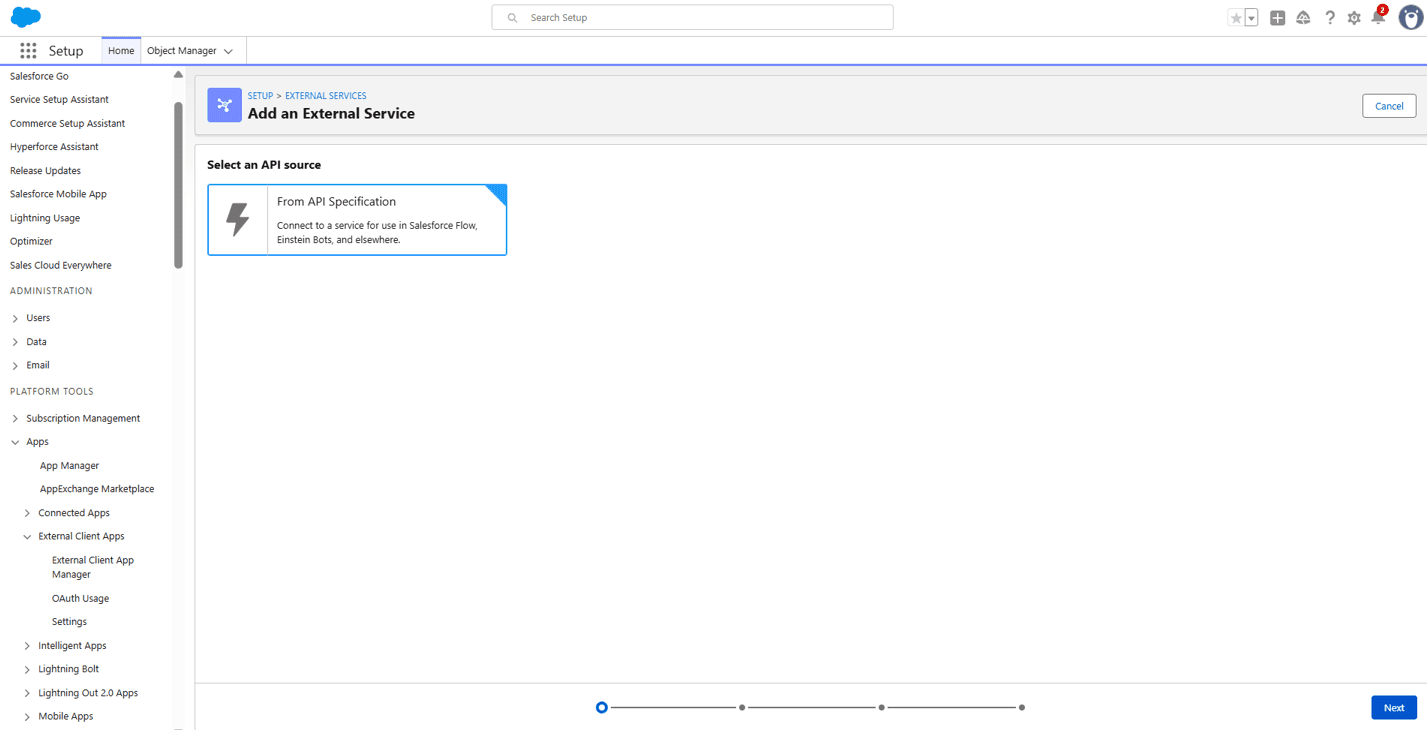
Now go to setup page and search for ‘External Services’. Click on ‘Add an External Service’ button.
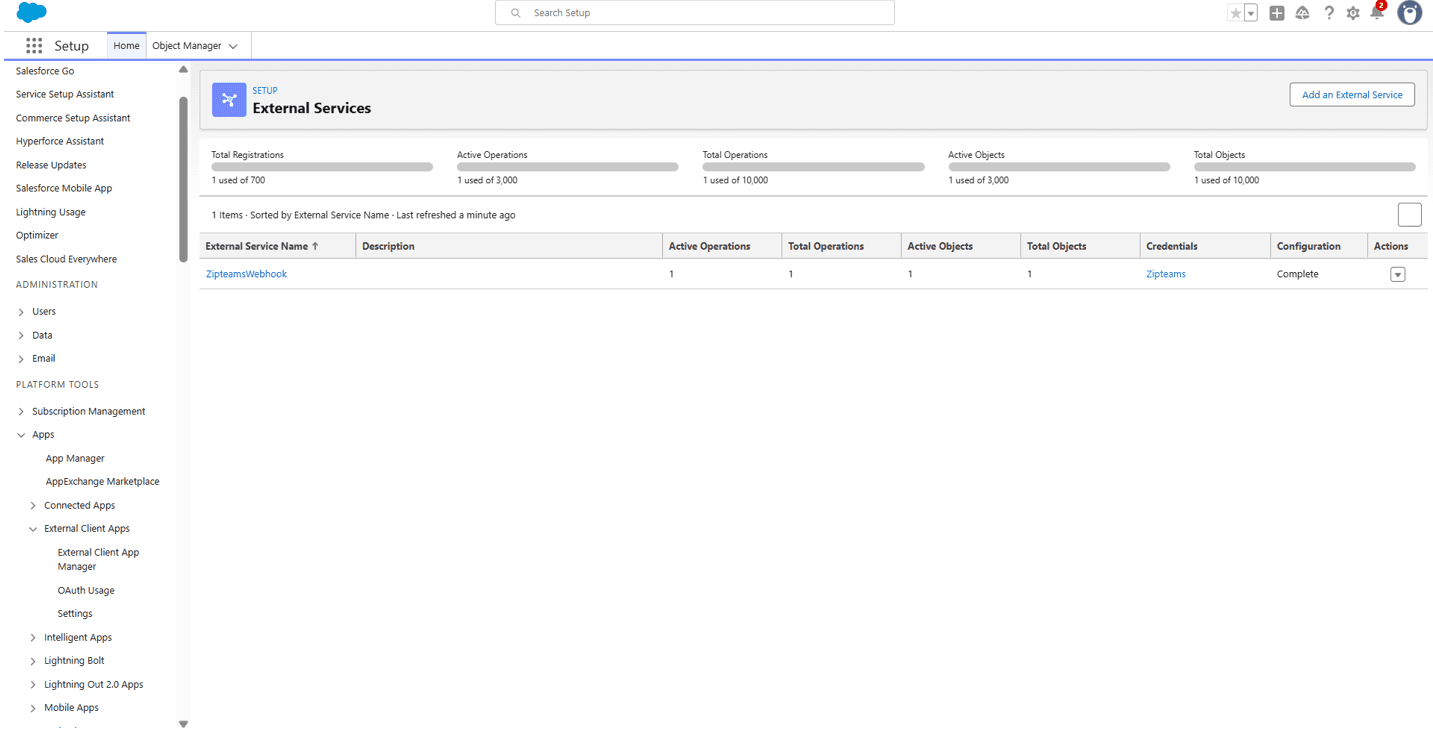
Then select ‘From Api Specification’ and after that click on the ‘Next’ button on the bottom right corner of the page.
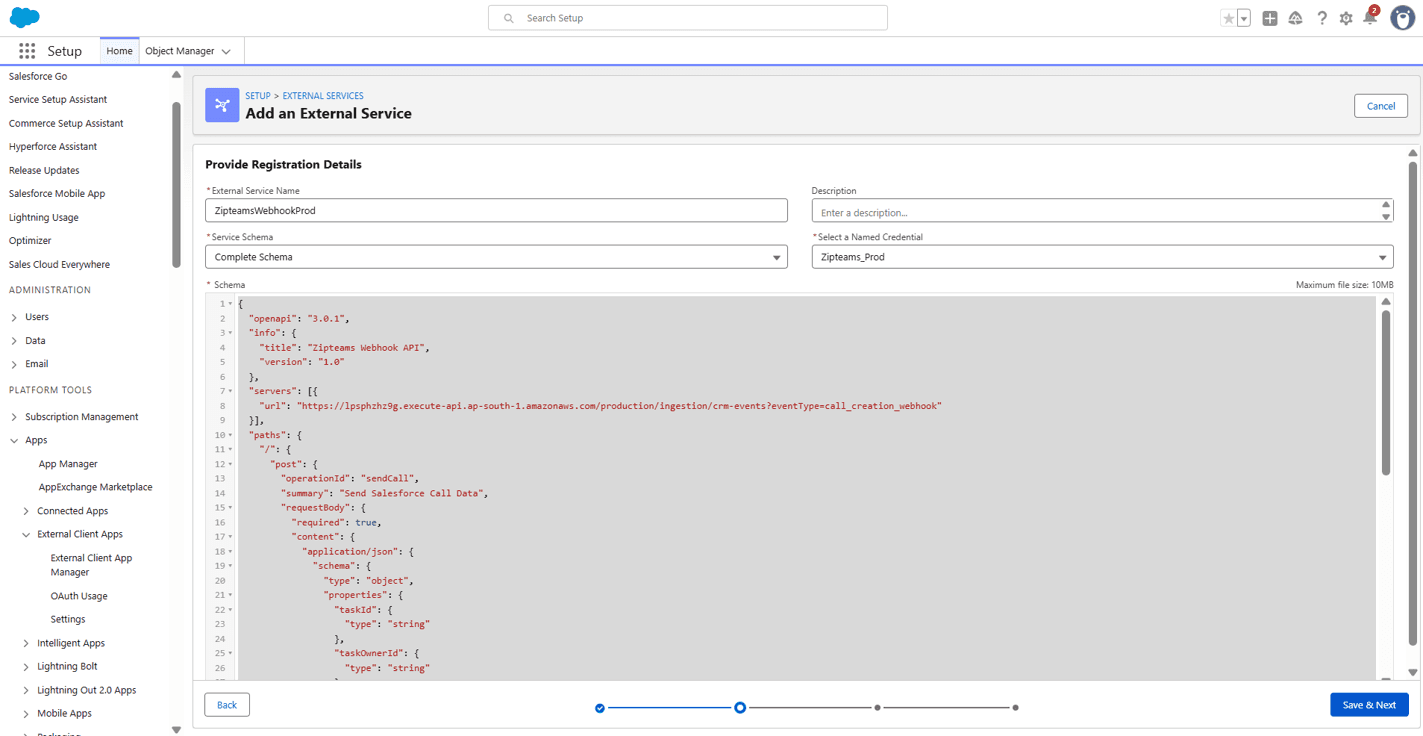
Enter name for your service like ‘ZipteamsWebhook’. From the ‘Service Schema’ dropdown select ‘Complete Schema’ and from the ‘Select a Named Credential’ dropdown select the name of the Named Credential you created above. In the schema textarea copy paste the below json and then click on ‘save & next’ button.
Select the checkbox beside the operation ‘sendCall’ and click on next. Then onto the next page click on Finish.

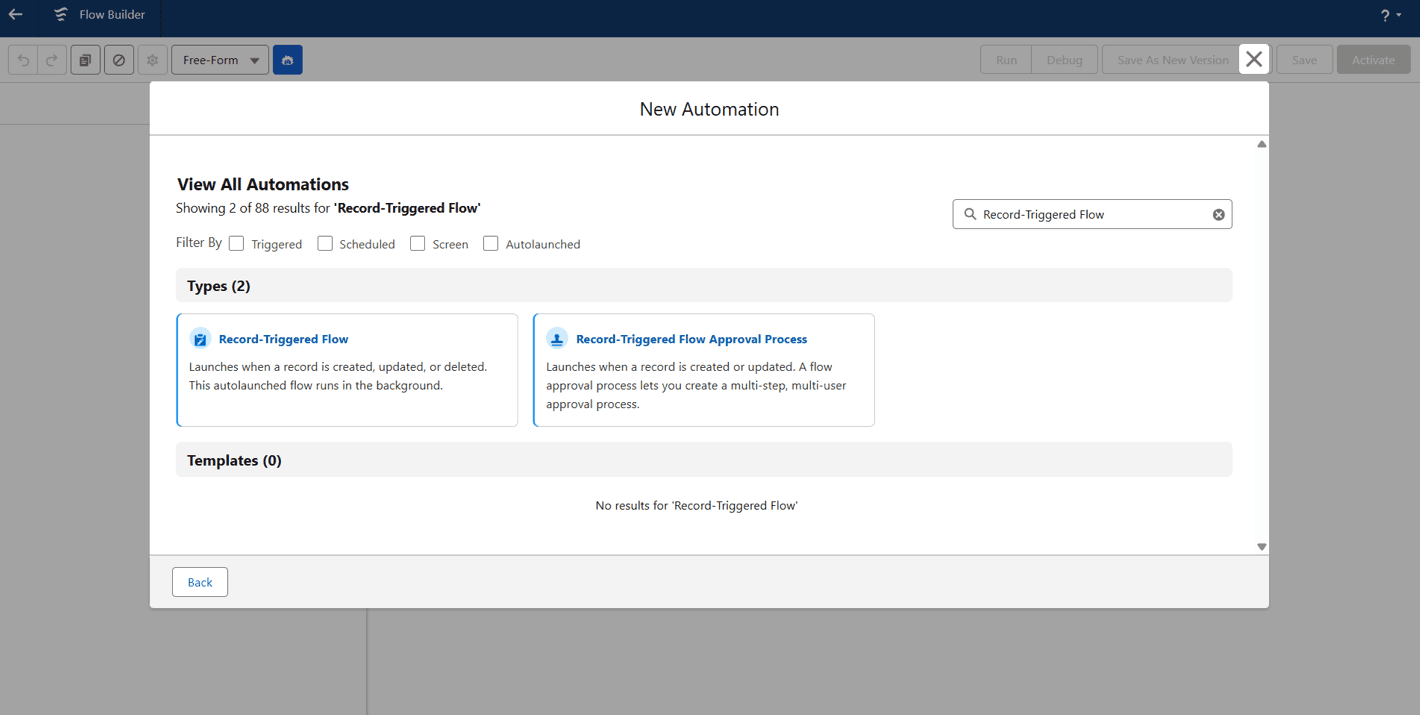
Now go to setup page and search ‘Flows’. Then click on New Flow. A new window will open from that search and select ‘Record-Triggered Flow’.
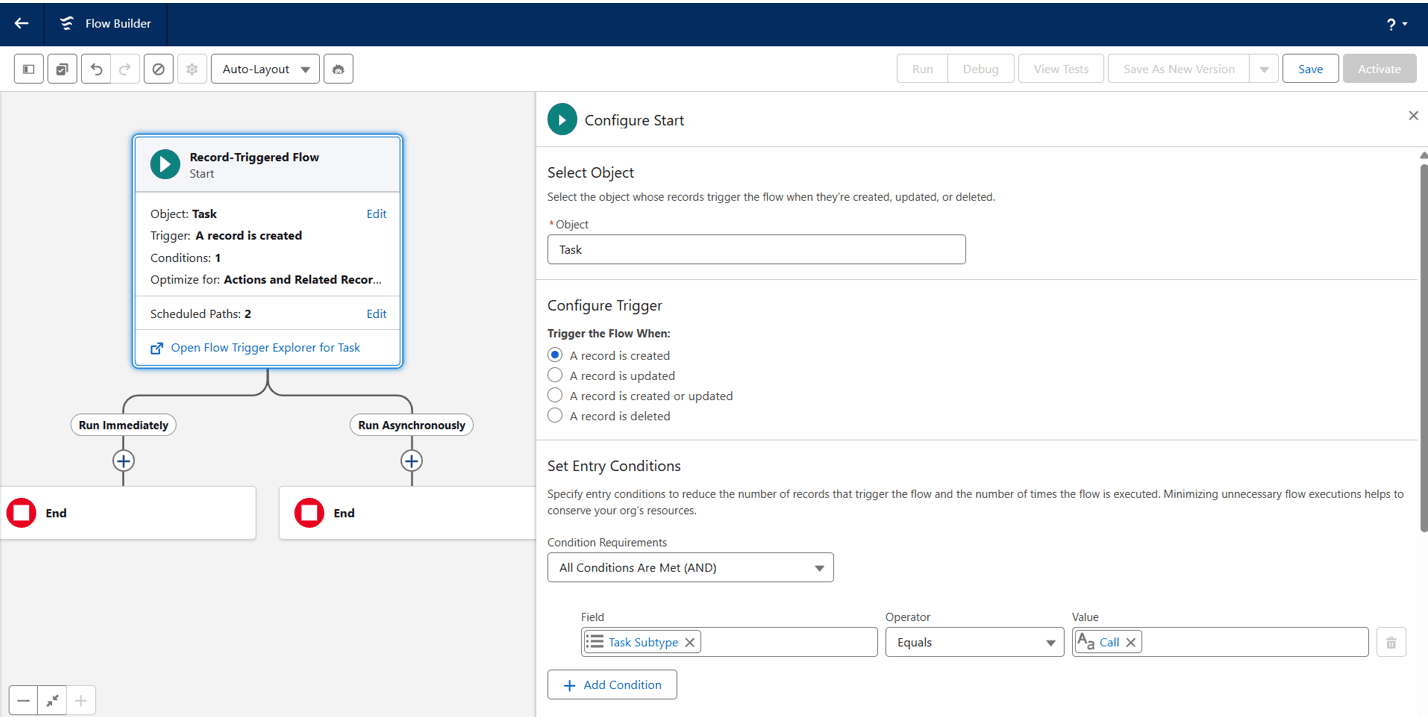
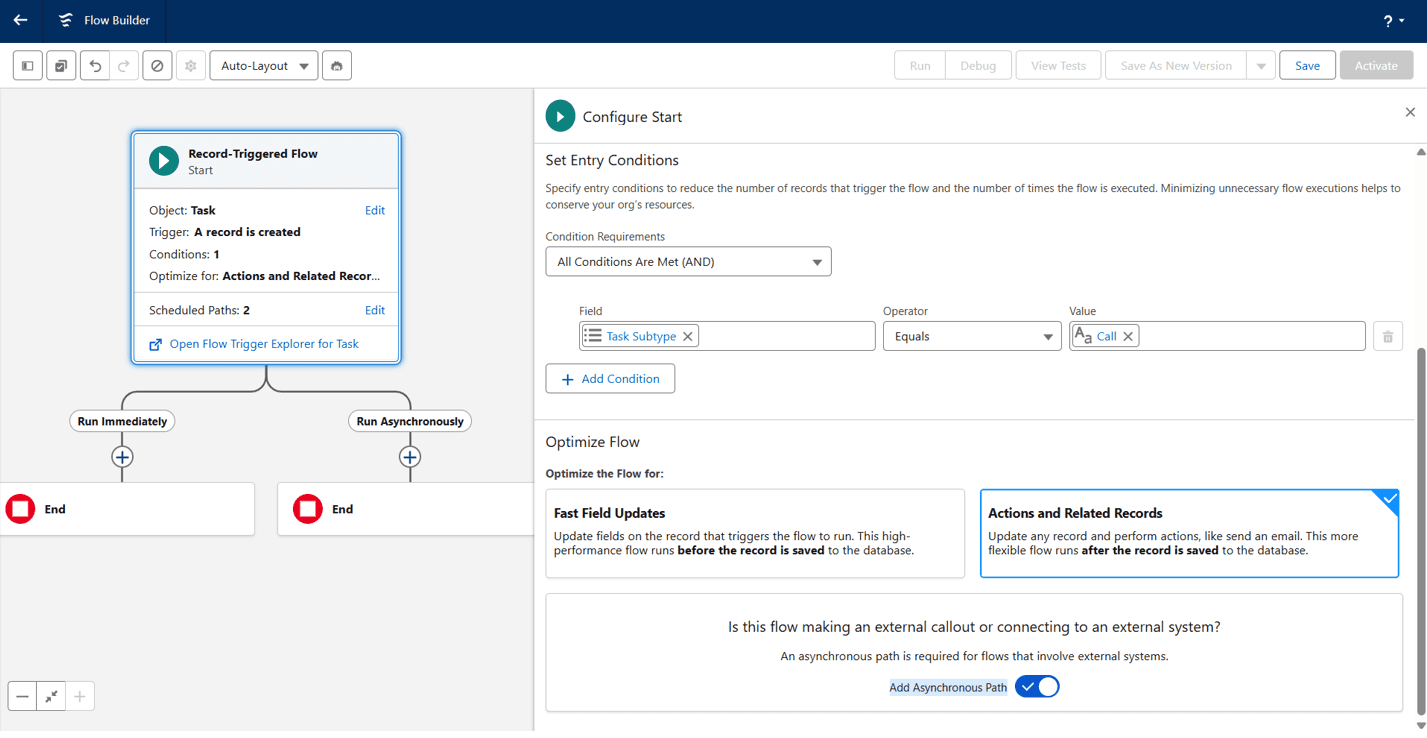
A configure start dialog will appear. Select ‘Task’ from the ‘Object’ dropdown. Select ‘A record is created’ option from ‘Configure Trigger’ section. From the ‘Set Entry Conditions Section’ select ‘All conditions are met (AND)’ option from the ‘Condition Requirements’ dropdown. A new line below that will appear. Inside the ‘Field’ select ‘Task Subtype’, from ‘Operator’ select ‘Equals’ and from ‘Value’ select ‘Call’. Check the ‘Add Asynchronous Path’ at the bottom of the dialog box. And click on save. See the screenshots below for reference.
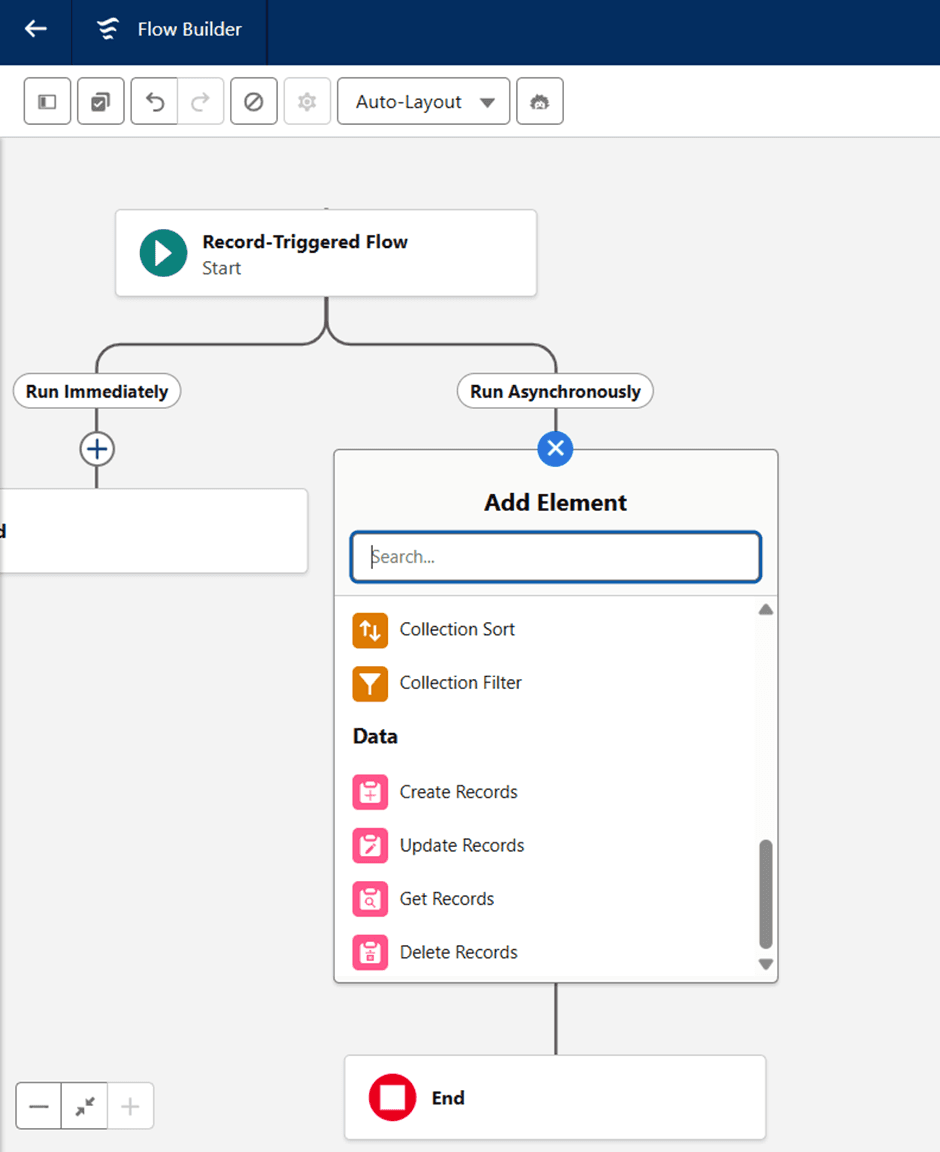
Click on the ‘+’ symbol below ‘Run Asynchronously’ in the flowchart. A dialog box will appear. Scroll down and select ‘Get Records’ element.
A dialog will open on the right. Add label as ‘Get Task Owner’. Select Object as ‘User’. Add conditional field:-
Field:- Id
Operator:- Equals
Value:- {!$Record.OwnerId}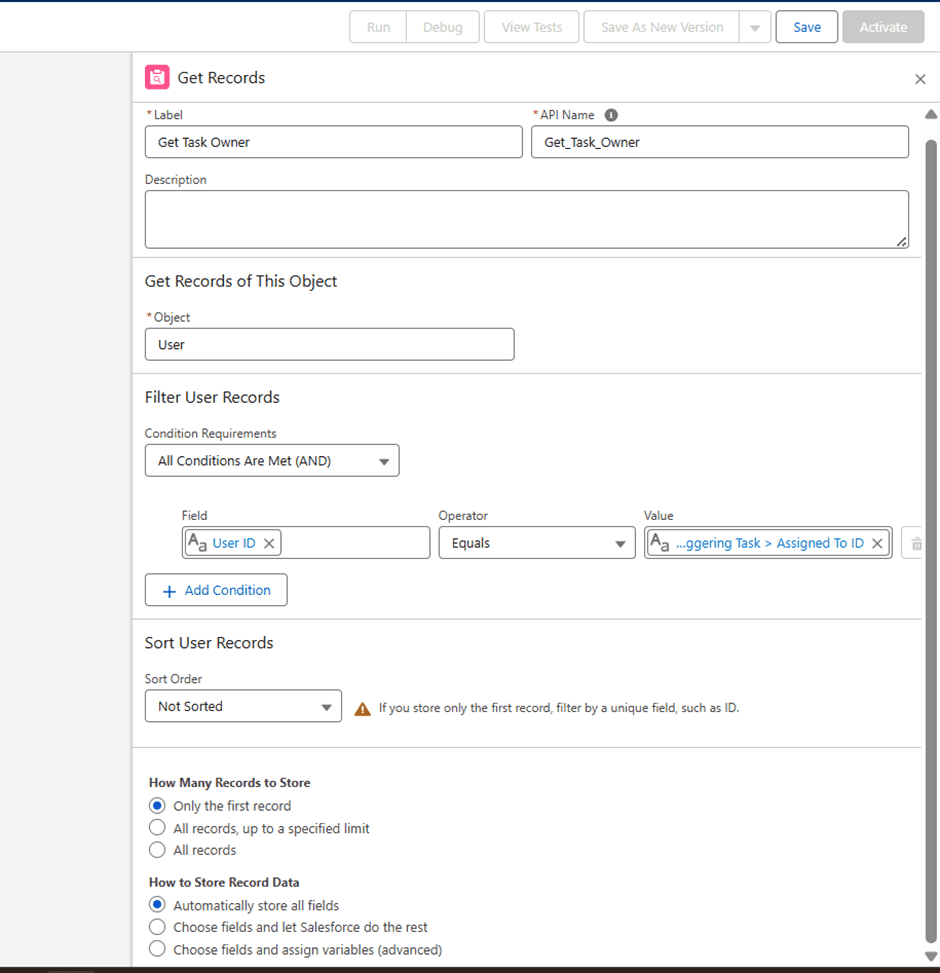
Click on the ‘+’ sign below ‘Get Task Owner’ in the flowchart and select ‘Decision’
Element. Give label name as ‘WhoId’. In the Outcome label below put value ‘has WhoId’. Add a condition:-
Field: {!$Record.WhoId}
Operator: Is Null
Value: {!$GlobalConstant.False}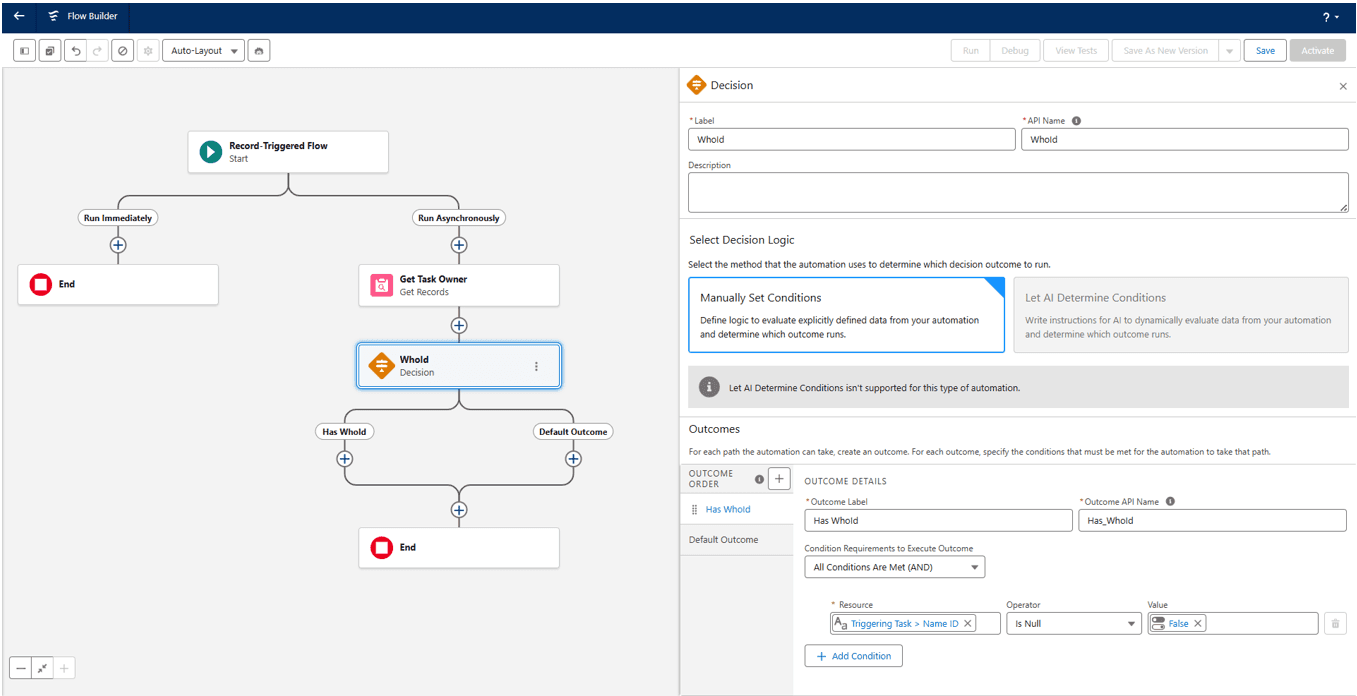
Click on the ‘+’ sign below ‘Has WhoId’. Select ‘Get Records’ element. A dialog box will open on the right. Put label as ‘Get Contact’. Select Object as ‘Contact’ and add a condition below:-
Field: Id
Operator: Equals
Value: {!$Record.WhoId}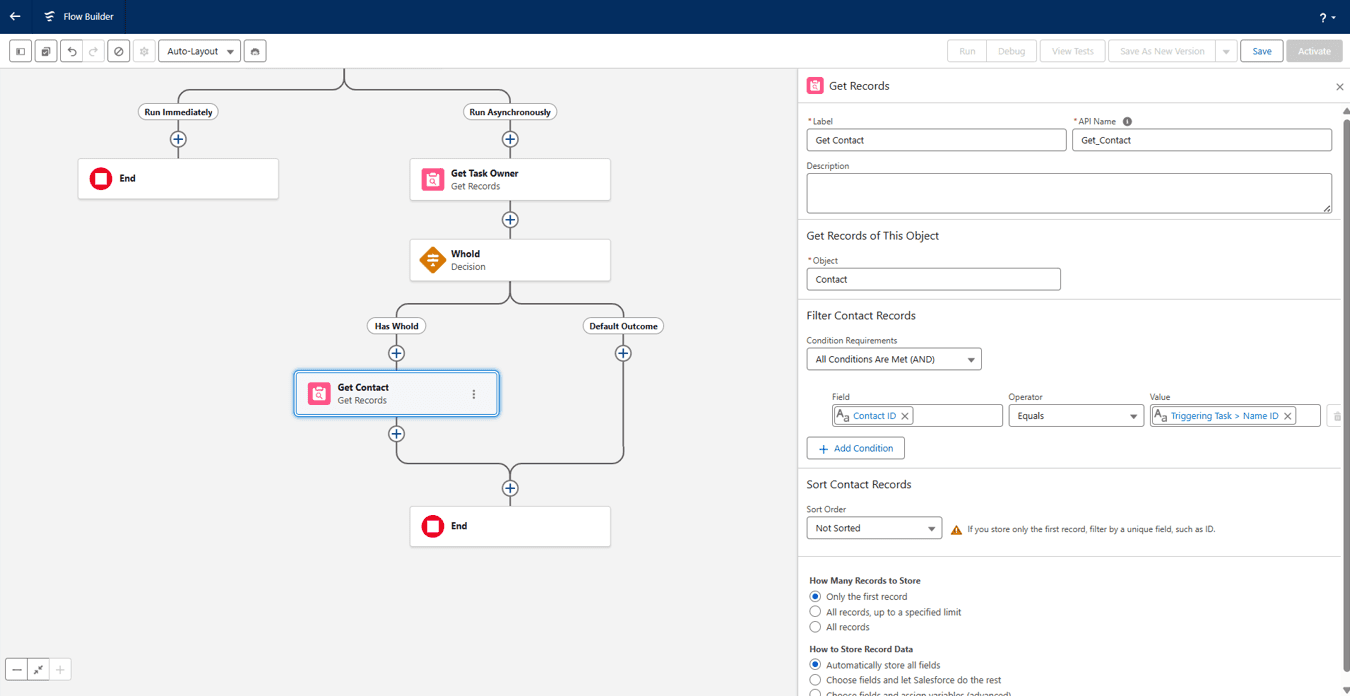
Click on the ‘+’ sign below Get Contact and select ‘Decision’ element. A dialog box will appear on the right. Add label ‘Has Contact’. Put Outcome label as ‘Contact Found’. Add a condition:-
Field: {!Get_Contact.Id}
Operator: Is Null
Value: {!$GlobalConstant.False}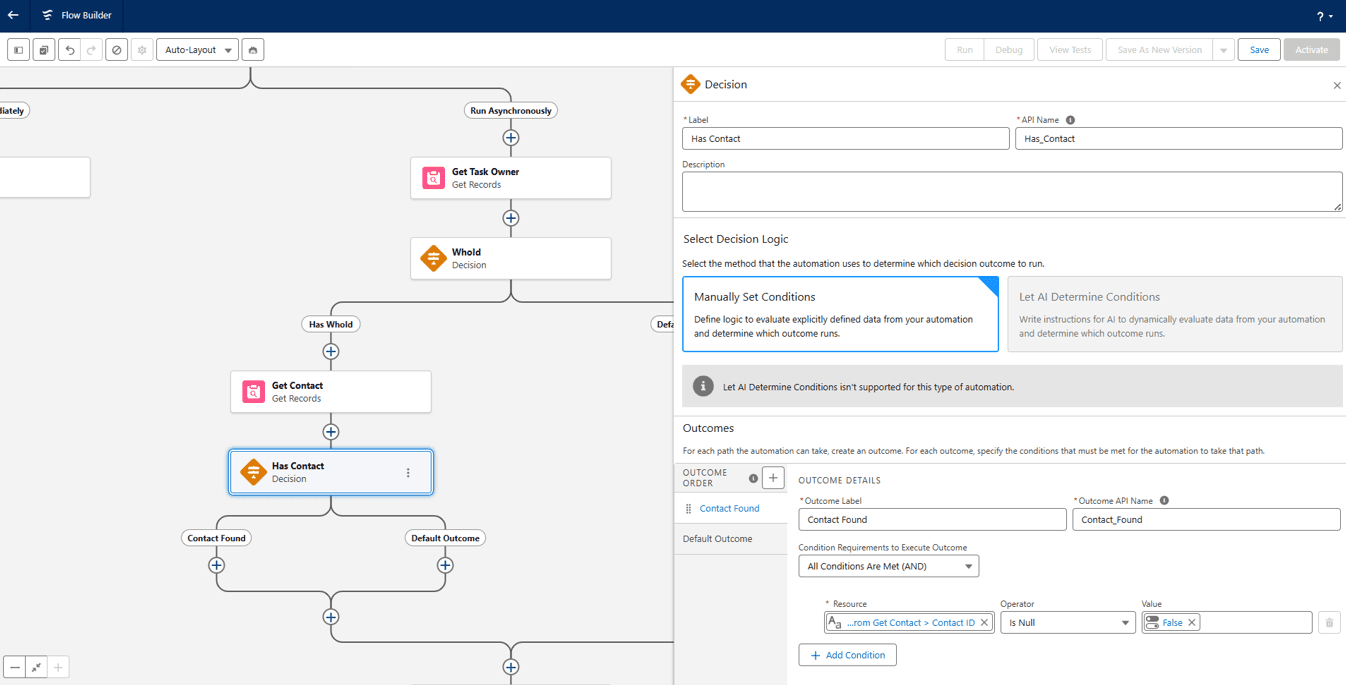
On click on ‘+’ sign below ‘Contact Found’ and select ‘Assignment’ element. A dialog box opens on the right. Add label as ‘Task Who Type’.
Now in the search variables box click on ‘+ New Resource’. Select ‘Resource Type’ as ‘Variable’ and give ‘Api Name’ as ‘TaskWhoType’. Select Data Type as ‘Text’ and click on Done.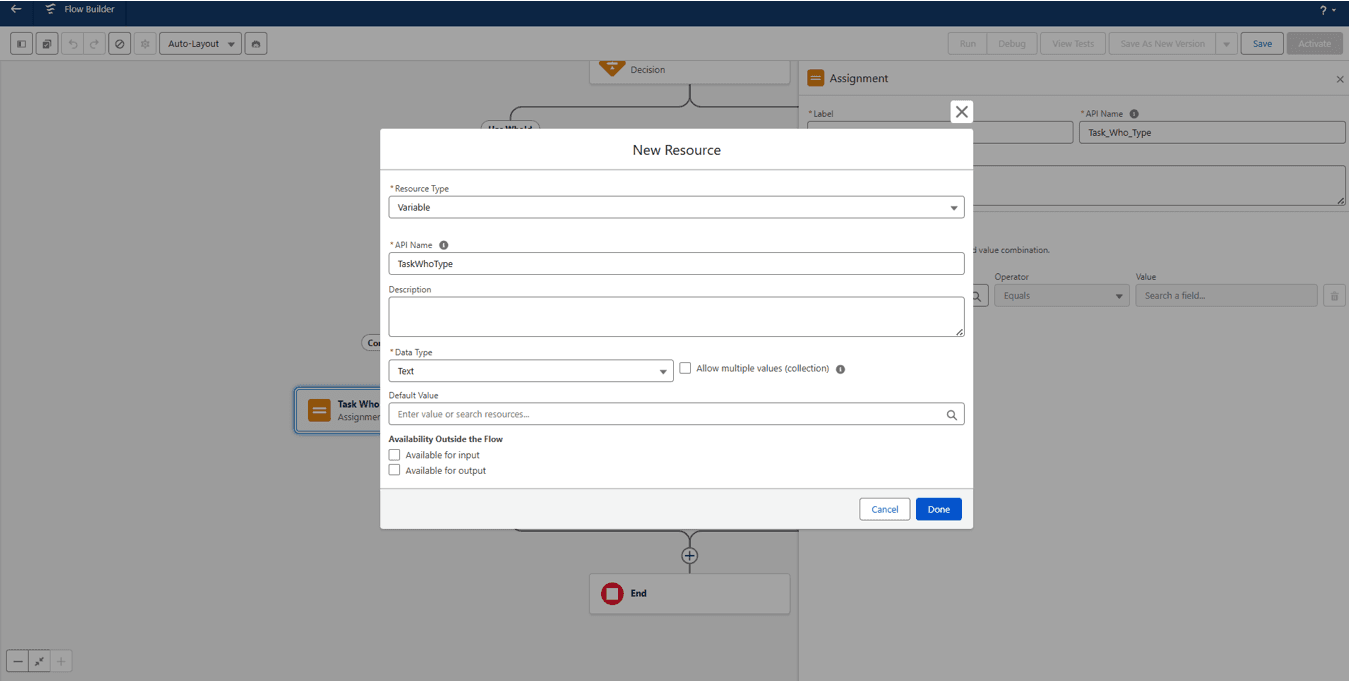
Now back to the Set Variable value enter these values:
Variable: {!TaskWhoType}
Operator: Equals
Value: Contact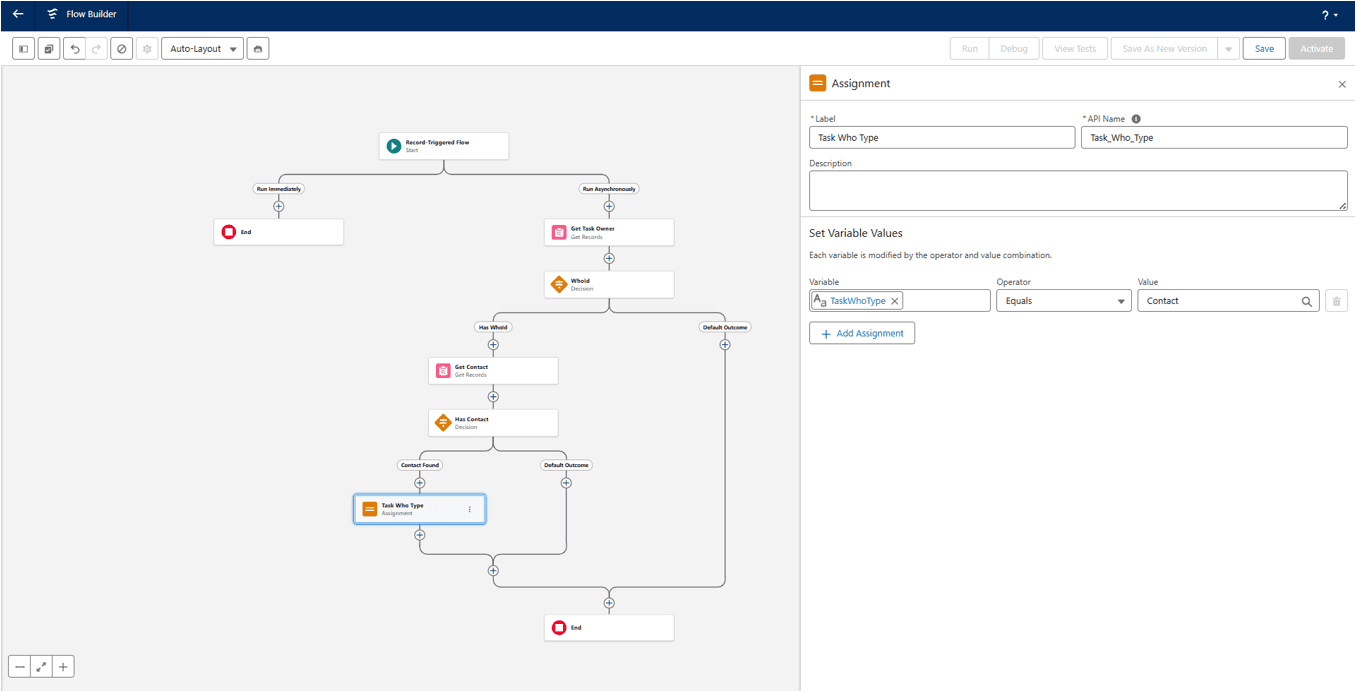
Similarly add another variable with Api Name ‘TaskWhatType’ with same data type and everything as you created ‘TaskWhoType’.
Now click on the ‘+’ sign below ‘Default Outcome’ under ‘Get Contact’. Select ‘Get Records’ element. Add label as ‘Get Lead’. Select object as ‘Lead’. Add a condition:
Field: Id
Operator: Equals
Value: {!$Record.WhoId}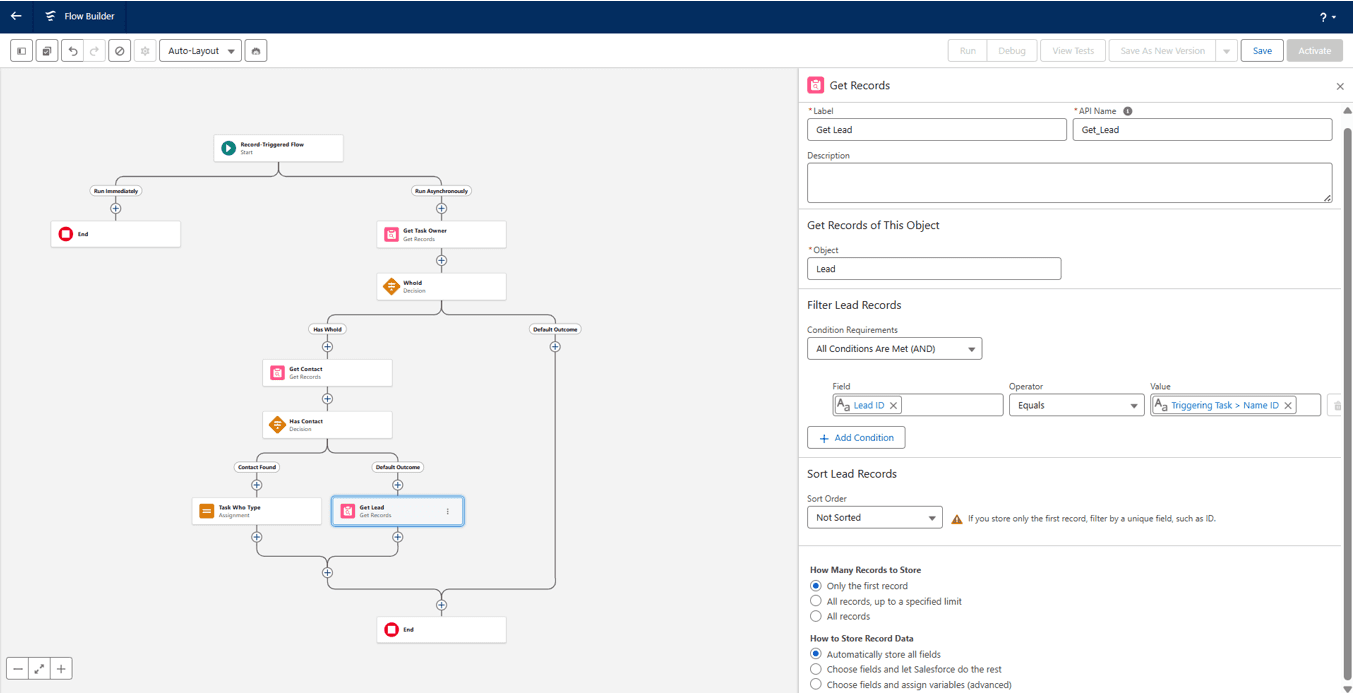
Now click on the ‘+’ sign below ‘Get Lead’ and add ‘Assignment’ element. Add label as ‘Task Who Id’. Add variable:
Variable: {!Get_Lead.Id}
Operator: Equals
Value: {!$Record.WhoId}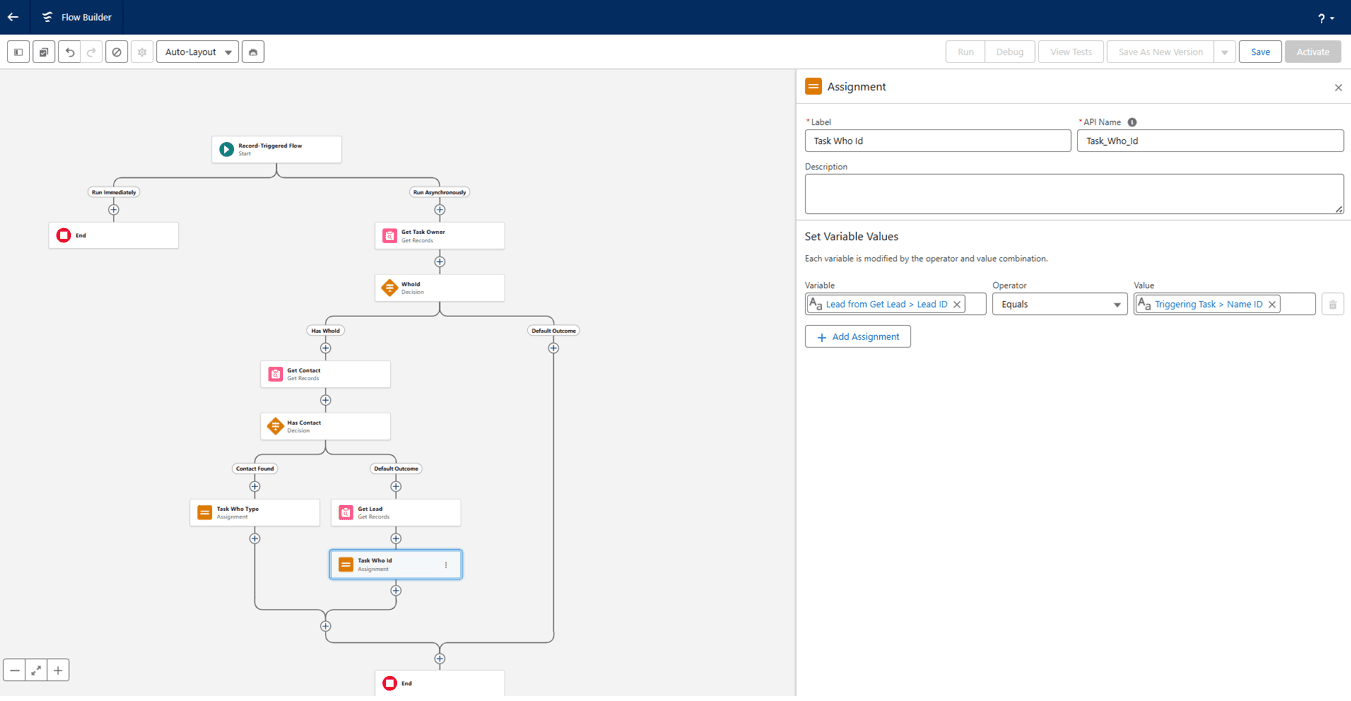
Now at the top left of the page there is a window button. It is the Toolbox Manager. Click on it and click on New Resource. A dialog box will open.
Select Resource Type as ‘Formula’. Add api name as ‘WhatPrefix’. Select Data Type as ‘Text’. Leave Formula blank and in the below Text Area at the last add this: ‘LEFT($Record.WhatId, 3)’. Click on Done.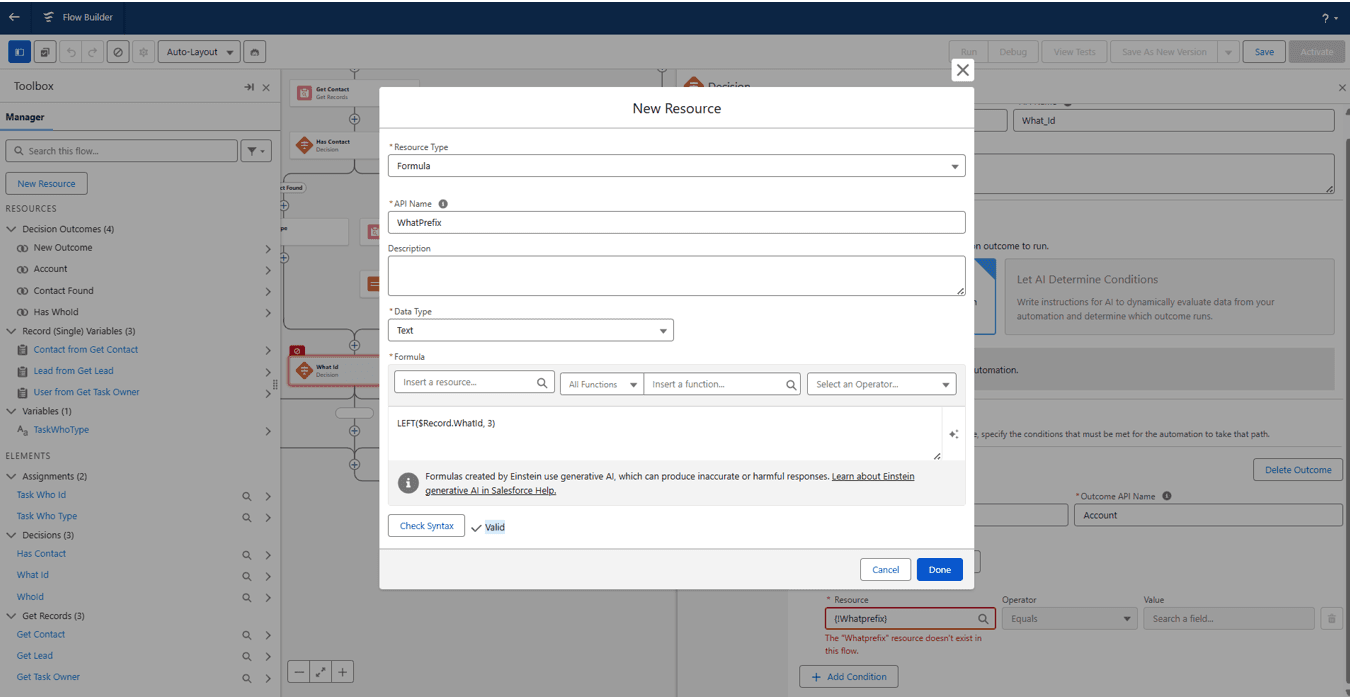
Now click on the common ‘+’ sign below both ‘Task Who Id’ Assignment elements. Add a ‘Decision’ element and label it as ‘What Id’. Now there is a plus sign below on the right side dialog box beside ‘Outcome Order’. Click on it.
Now we need to add 2 types of outcome orders.
1. Outcome label: Account
Resource: {!WhatPrefix}
Operator: Equals
Value: 001
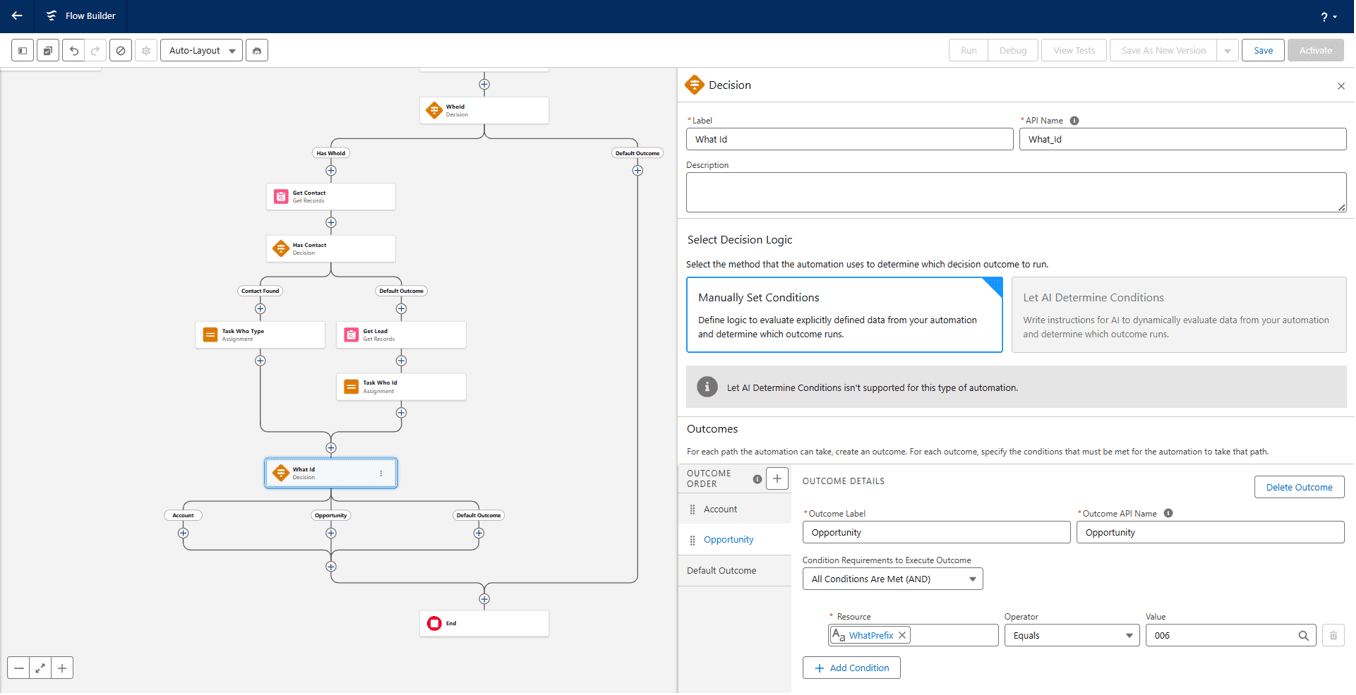
2. Outcome label: Opportunity
Resource: {!WhatPrefix}
Operator: Equals
Value: 006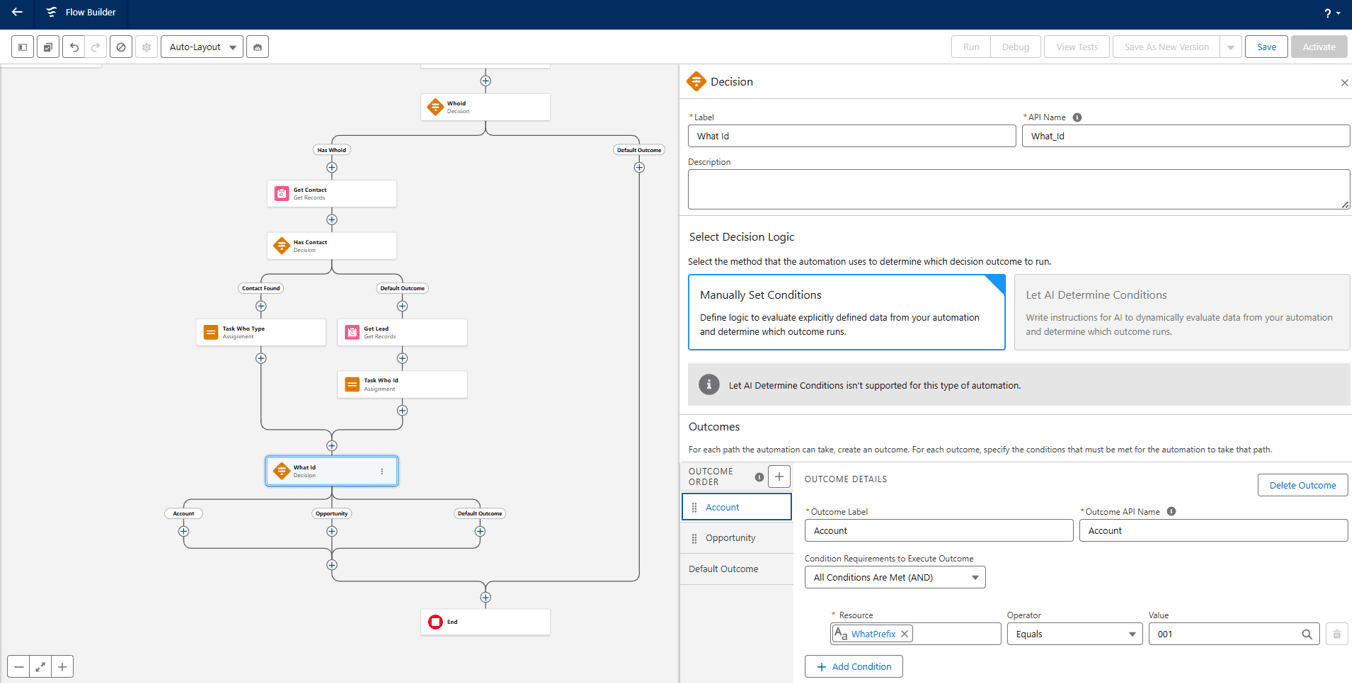
Now click on ‘+’ sign below Account element and add a ‘Get Records’ Element with label ‘Get Account’. Select object as Account. Add condition:
Field: Id
Operator: Equals
Value: {!$Record.WhatId}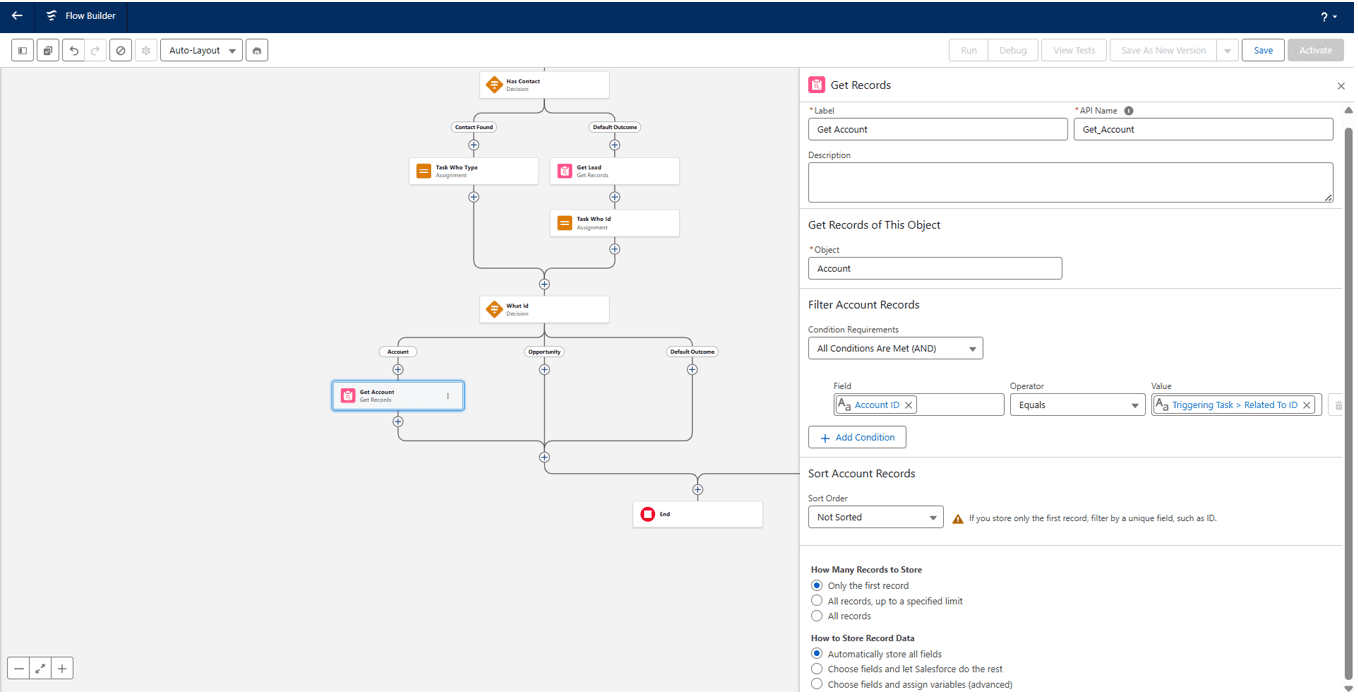
Now click on the ‘+’ sign below ‘Get Account’ element and add ‘Assigment’ element with label Task What Type. Give a distinct api name. Add a variable:
Variable: {!TaskWhatType}
Operator: Equals
Value: Account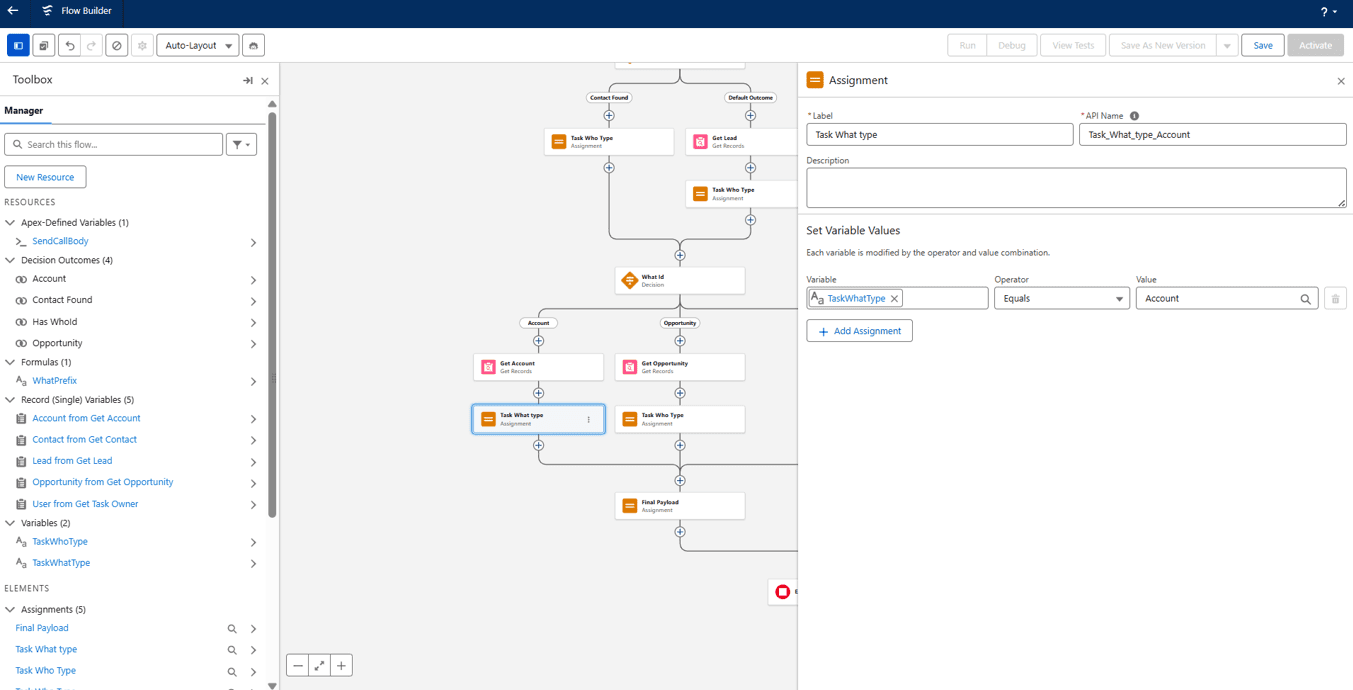
Now click on ‘+’ sign below Opportunity element and add a ‘Get Records’ Element with label ‘Get Opportunity’. Select object as Opportunity. Add condition:
Field: Id
Operator: Equals
Value: {!$Record.WhatId}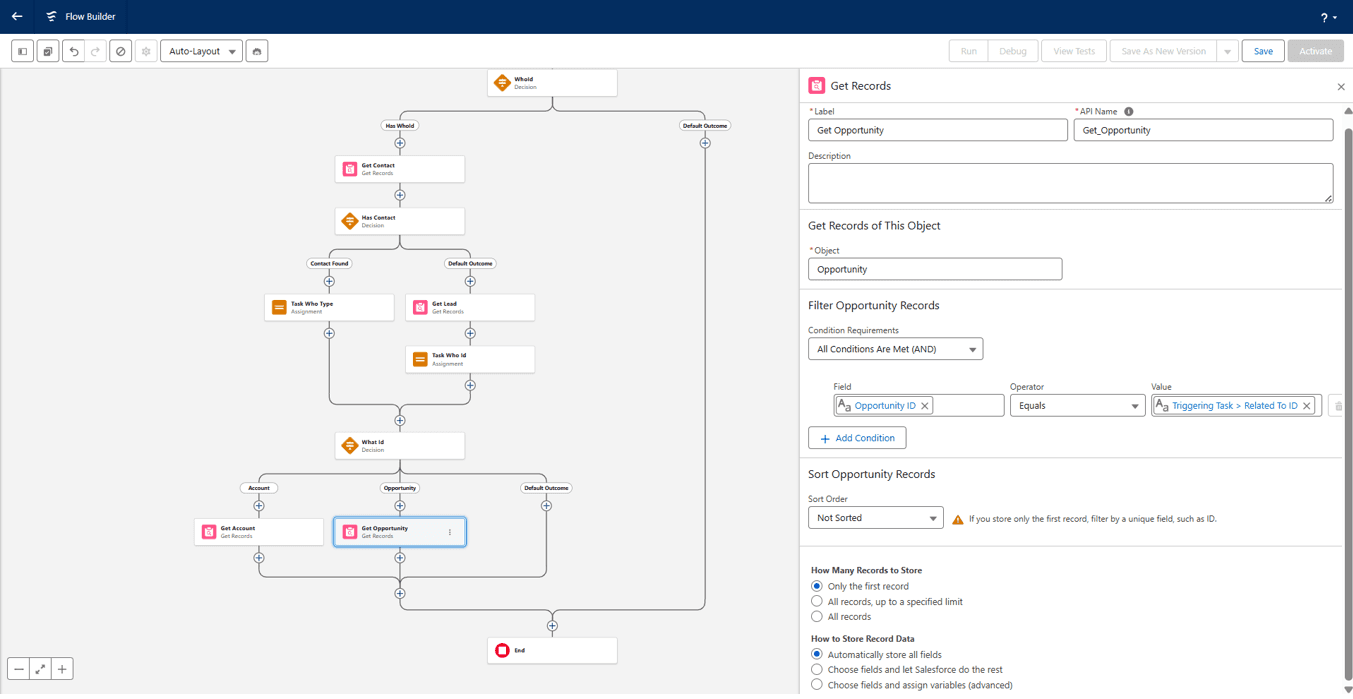
Now click on the ‘+’ sign below ‘Get Opportunity element and add ‘Assigment’ element with label Task What Type. Give a distinct api name. Add a variable:
Variable: {!TaskWhatType}
Operator: Equals
Value: Opportunity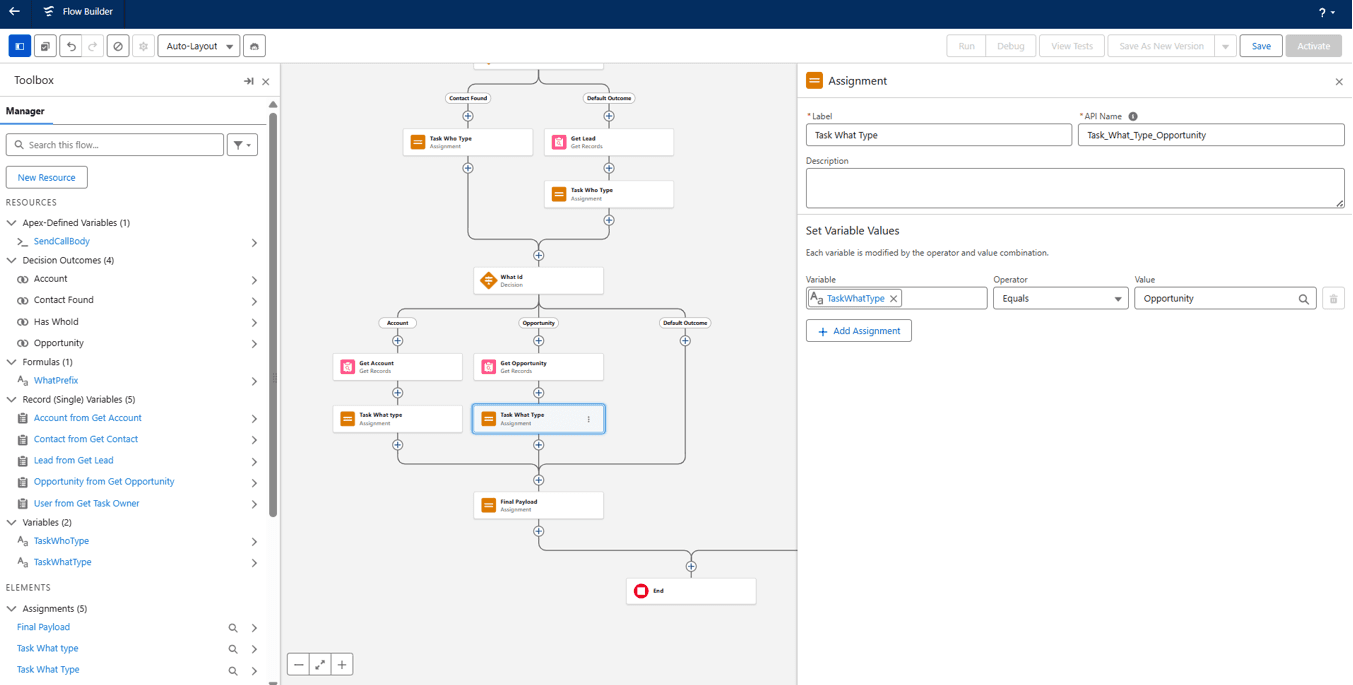
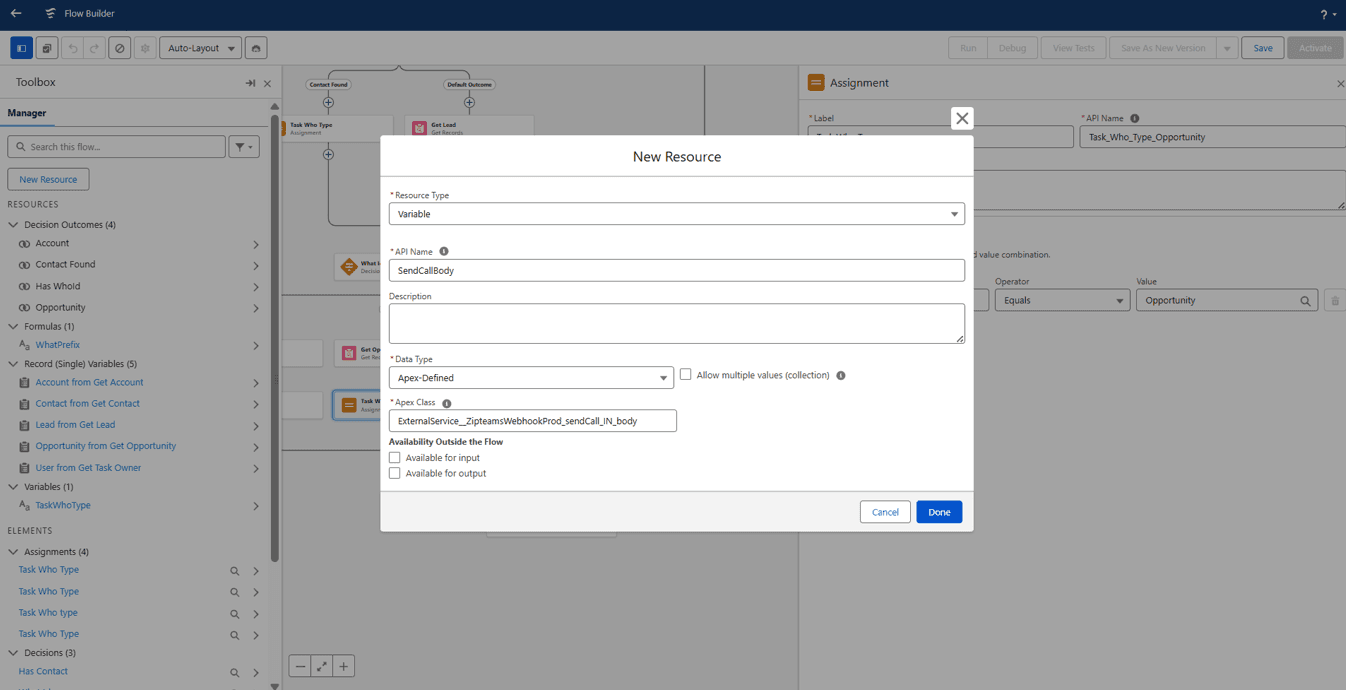
Now click on the Manager Toolbox again and click on New Resource. Dialog box opens. Select Resource Type as ‘Variable’. Add api name as ‘SendCallBody’. From the data type select ‘Apex-Defined’. In the ‘Apex Class’ search with ‘ExternalService_’…A similar name to the external service you created will appear. Select it and click on Done.
Now click on the common ‘+’ at the end of both the Task Who Type Assigment elements we created for Account and opportunity. Add a new Assignment Element. Label it as ‘Final Payload’. Now we will add 8 variables here.
1->
Variable: {!SendCallBody.taskId}
Operator: Equals
Value: {!$Record.Id}2->
Variable: {!SendCallBody.taskOwnerId}
Operator: Equals
Value: {!$Record.OwnerId}
3-> This is the field where you are storing your recording url. So enter the value accordingly. Below value field is just an example.
Variable: {!SendCallBody.taskRecordingUrl}
Operator: Equals
Value: {!$Record.Recording_Url__c}
4-> This is the field where you are storing your call start time. So enter the value accordingly. Below value field is just an example.
Variable: {!SendCallBody.taskStartTime}
Operator: Equals
Value: {!$Record.Start_Time__c}
5->
Variable: {!SendCallBody.taskWhatId}
Operator: Equals
Value: {!$Record.WhatId}
6->
Variable: {!SendCallBody.taskWhatType}
Operator: Equals
Value: {!TaskWhatType}
7->
Variable: {!SendCallBody.taskWhoId}
Operator: Equals
Value: {!$Record.WhoId}
8->
Variable: : {!SendCallBody.taskWhoType}
Operator: Equals
Value: {!TaskWhoType}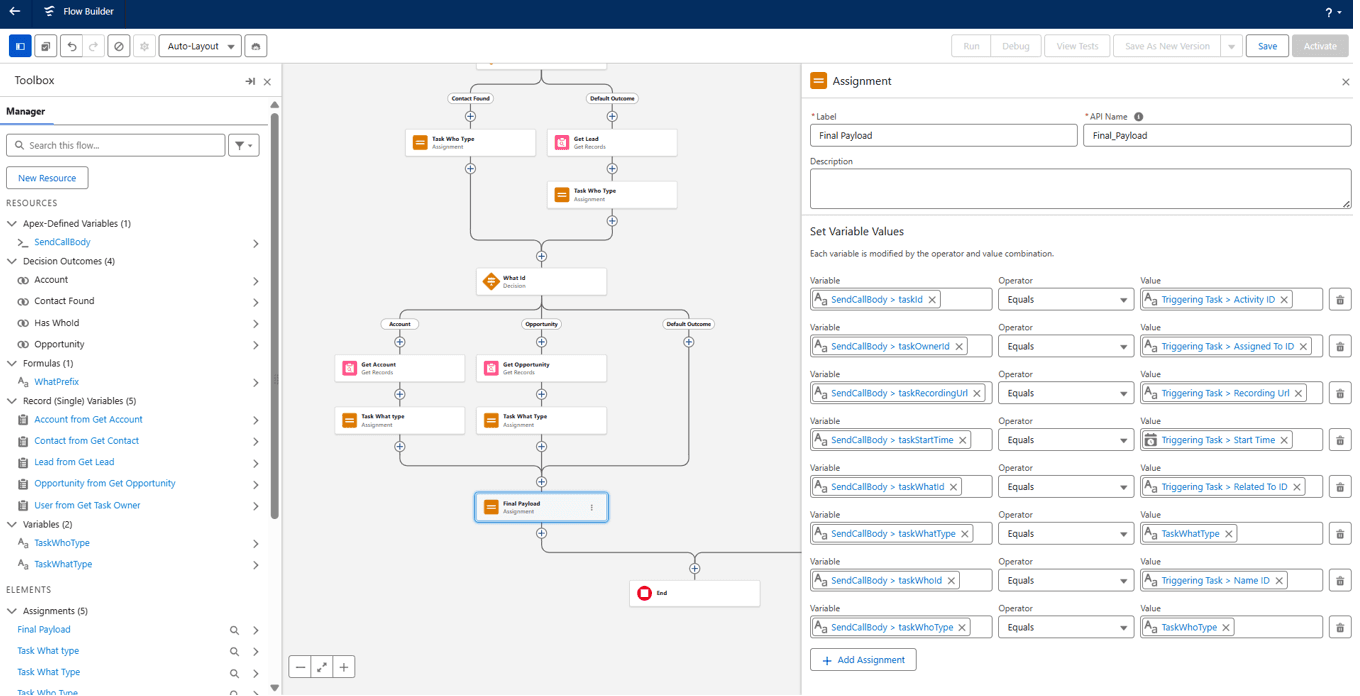
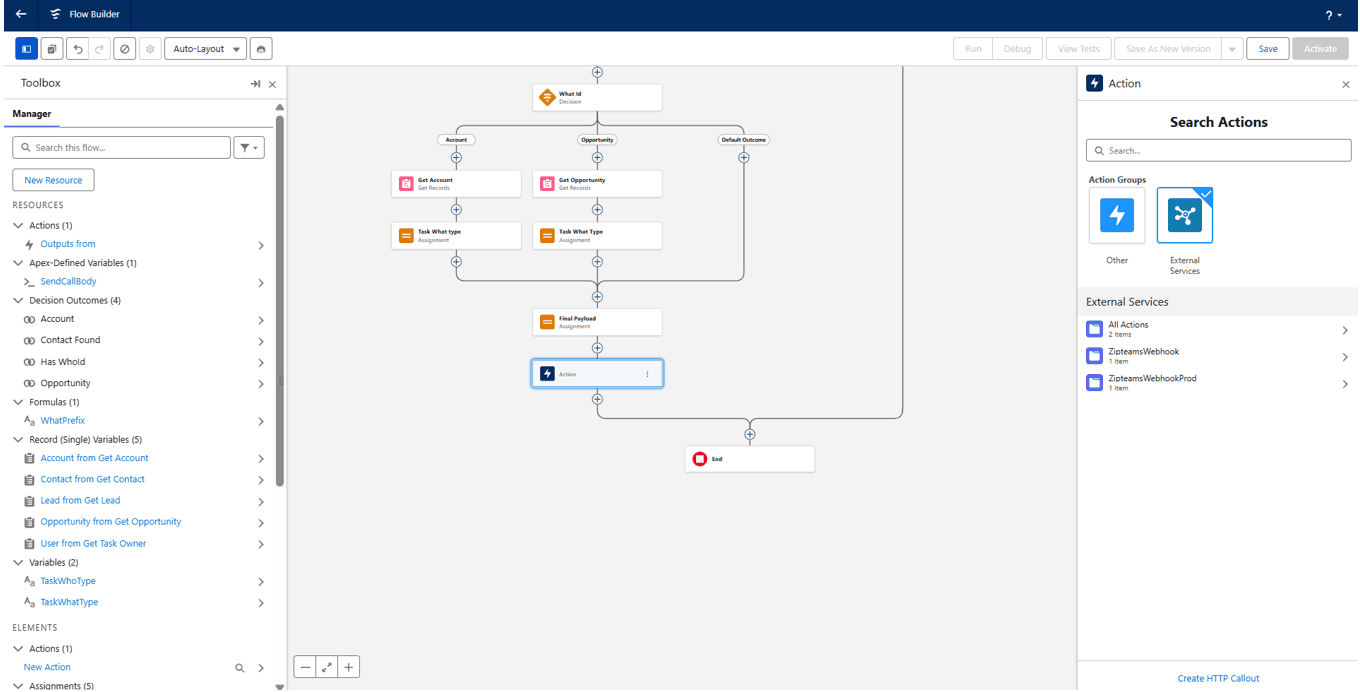
Now click on ‘+’ sign below ‘Final Payload’ element and add ‘Action’ element. A dialog box appears on the right side. Select ‘External Services’ from there and select the external service you created above from there.
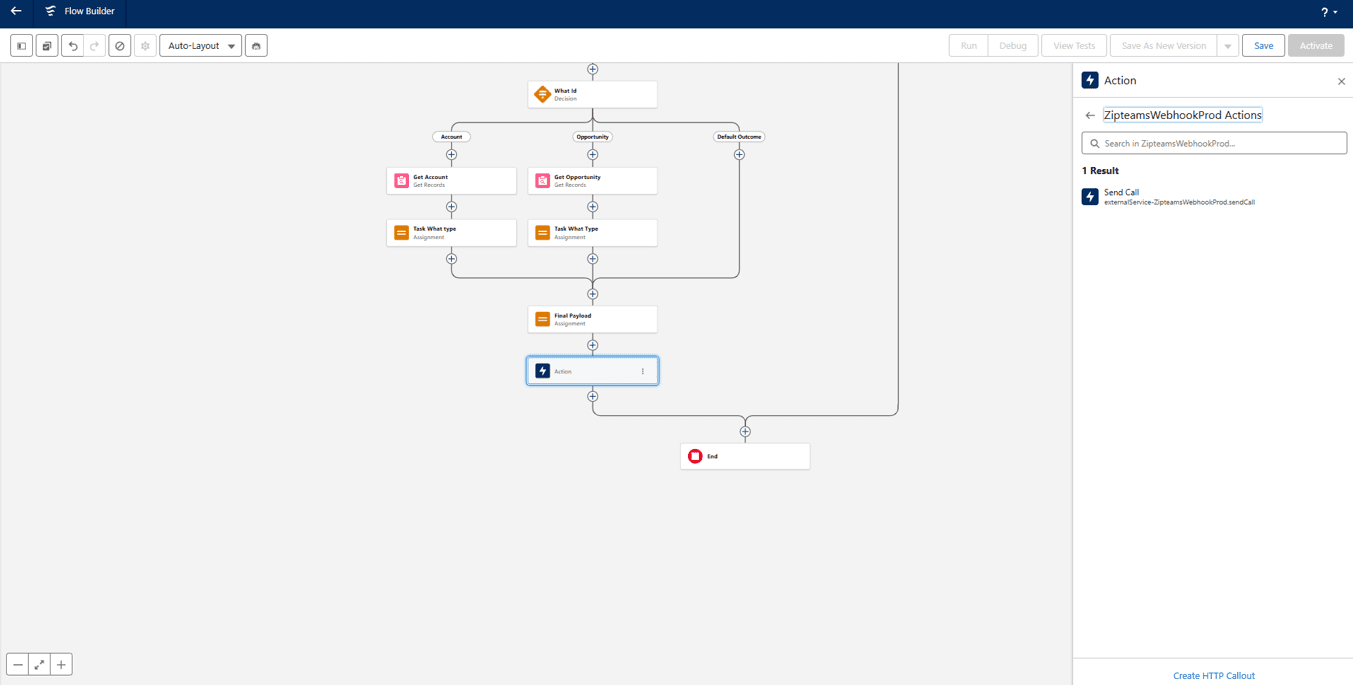
Select the ‘Send Call’ Result.
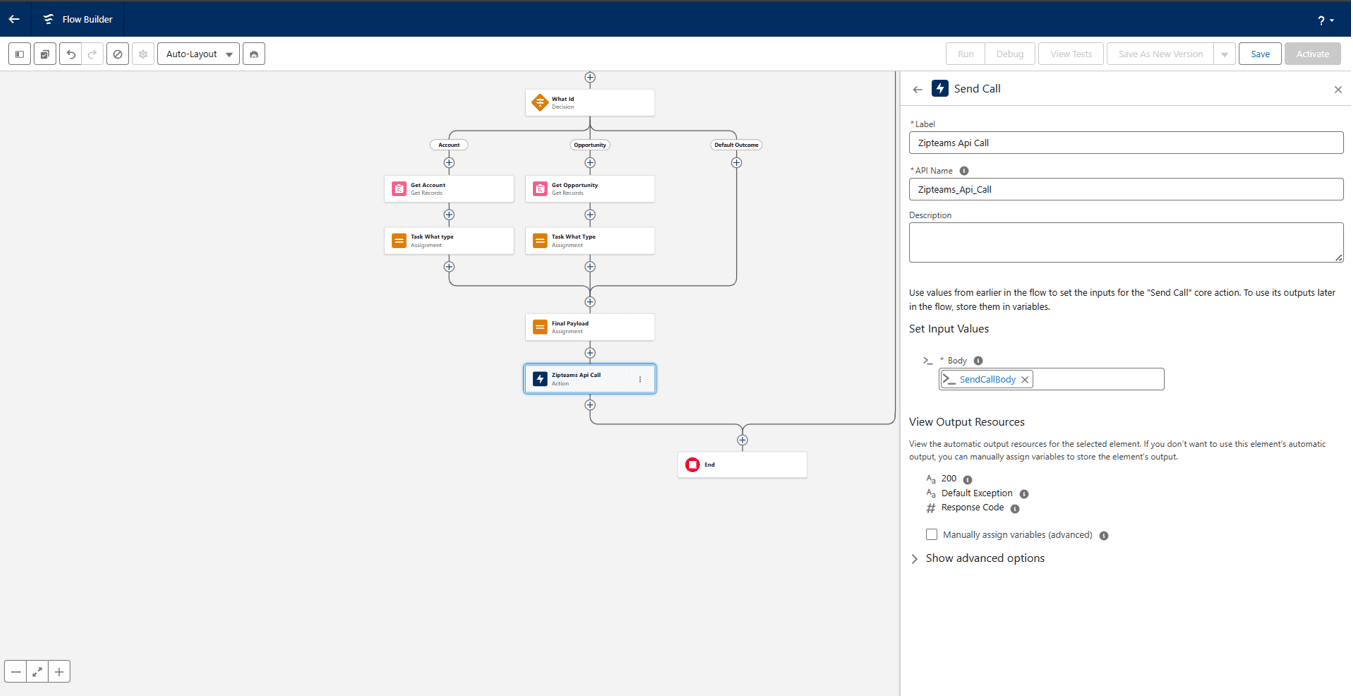
Add label as ‘Zipteams Api Call’. In the body select ‘SendCallBody’. Click on Save on the top right.
Name your flow as ‘Zipteams Flow’. Click on Save. The Setup of Webhook is complete now. It will trigger everytime a new Call Task is created.
Section 3 - Adding Zipteams as an iframe
Go to Home > Search for Visualforce pages
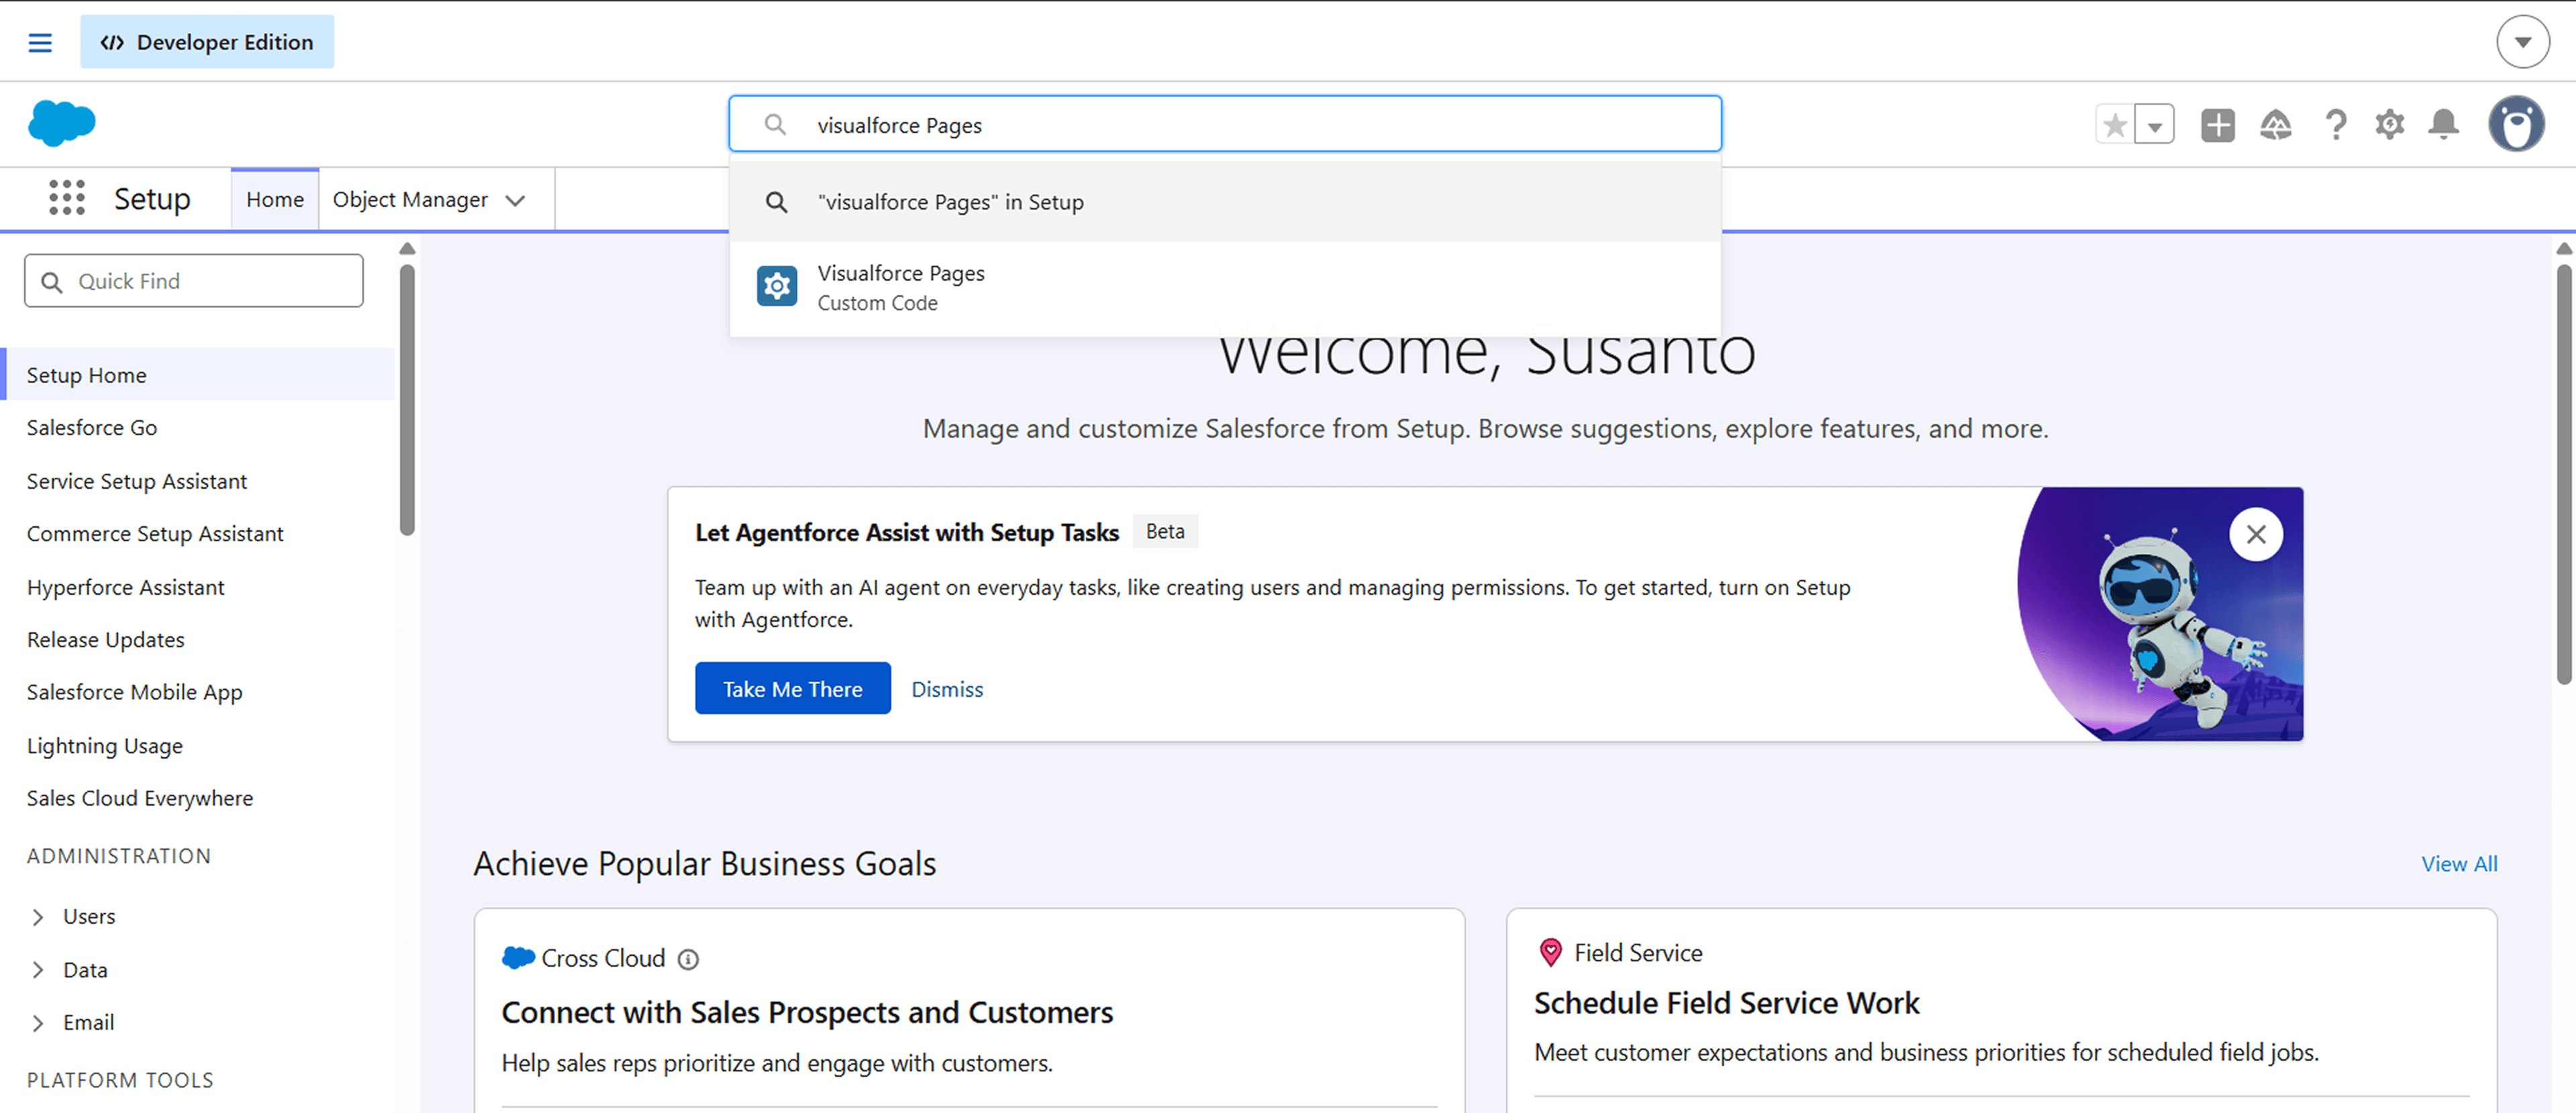
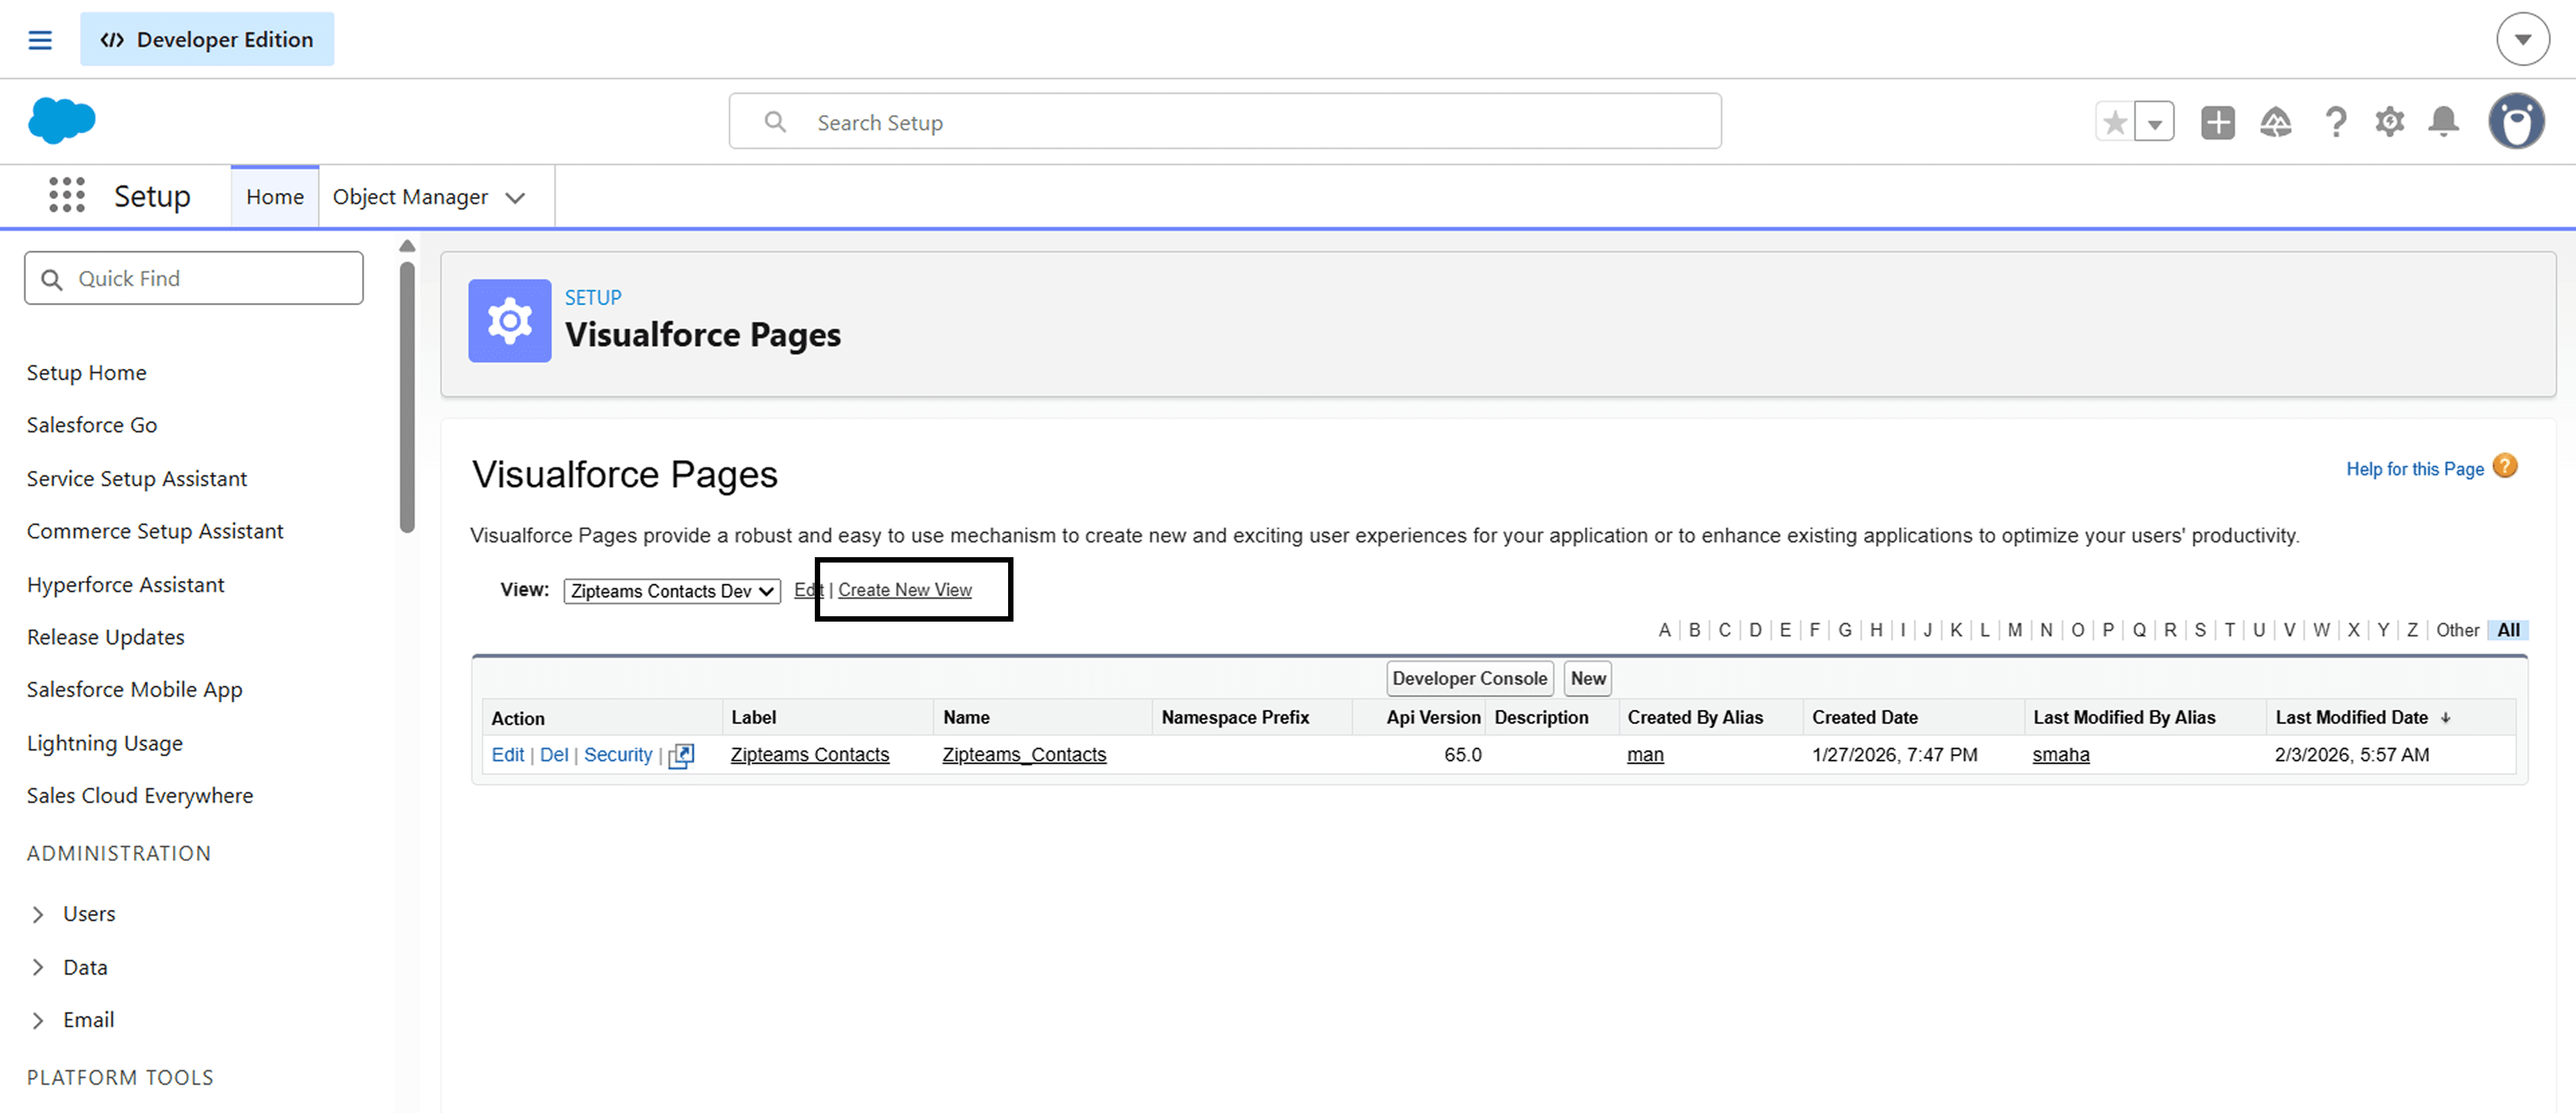
Go to the Visualforce Page in Salesforce
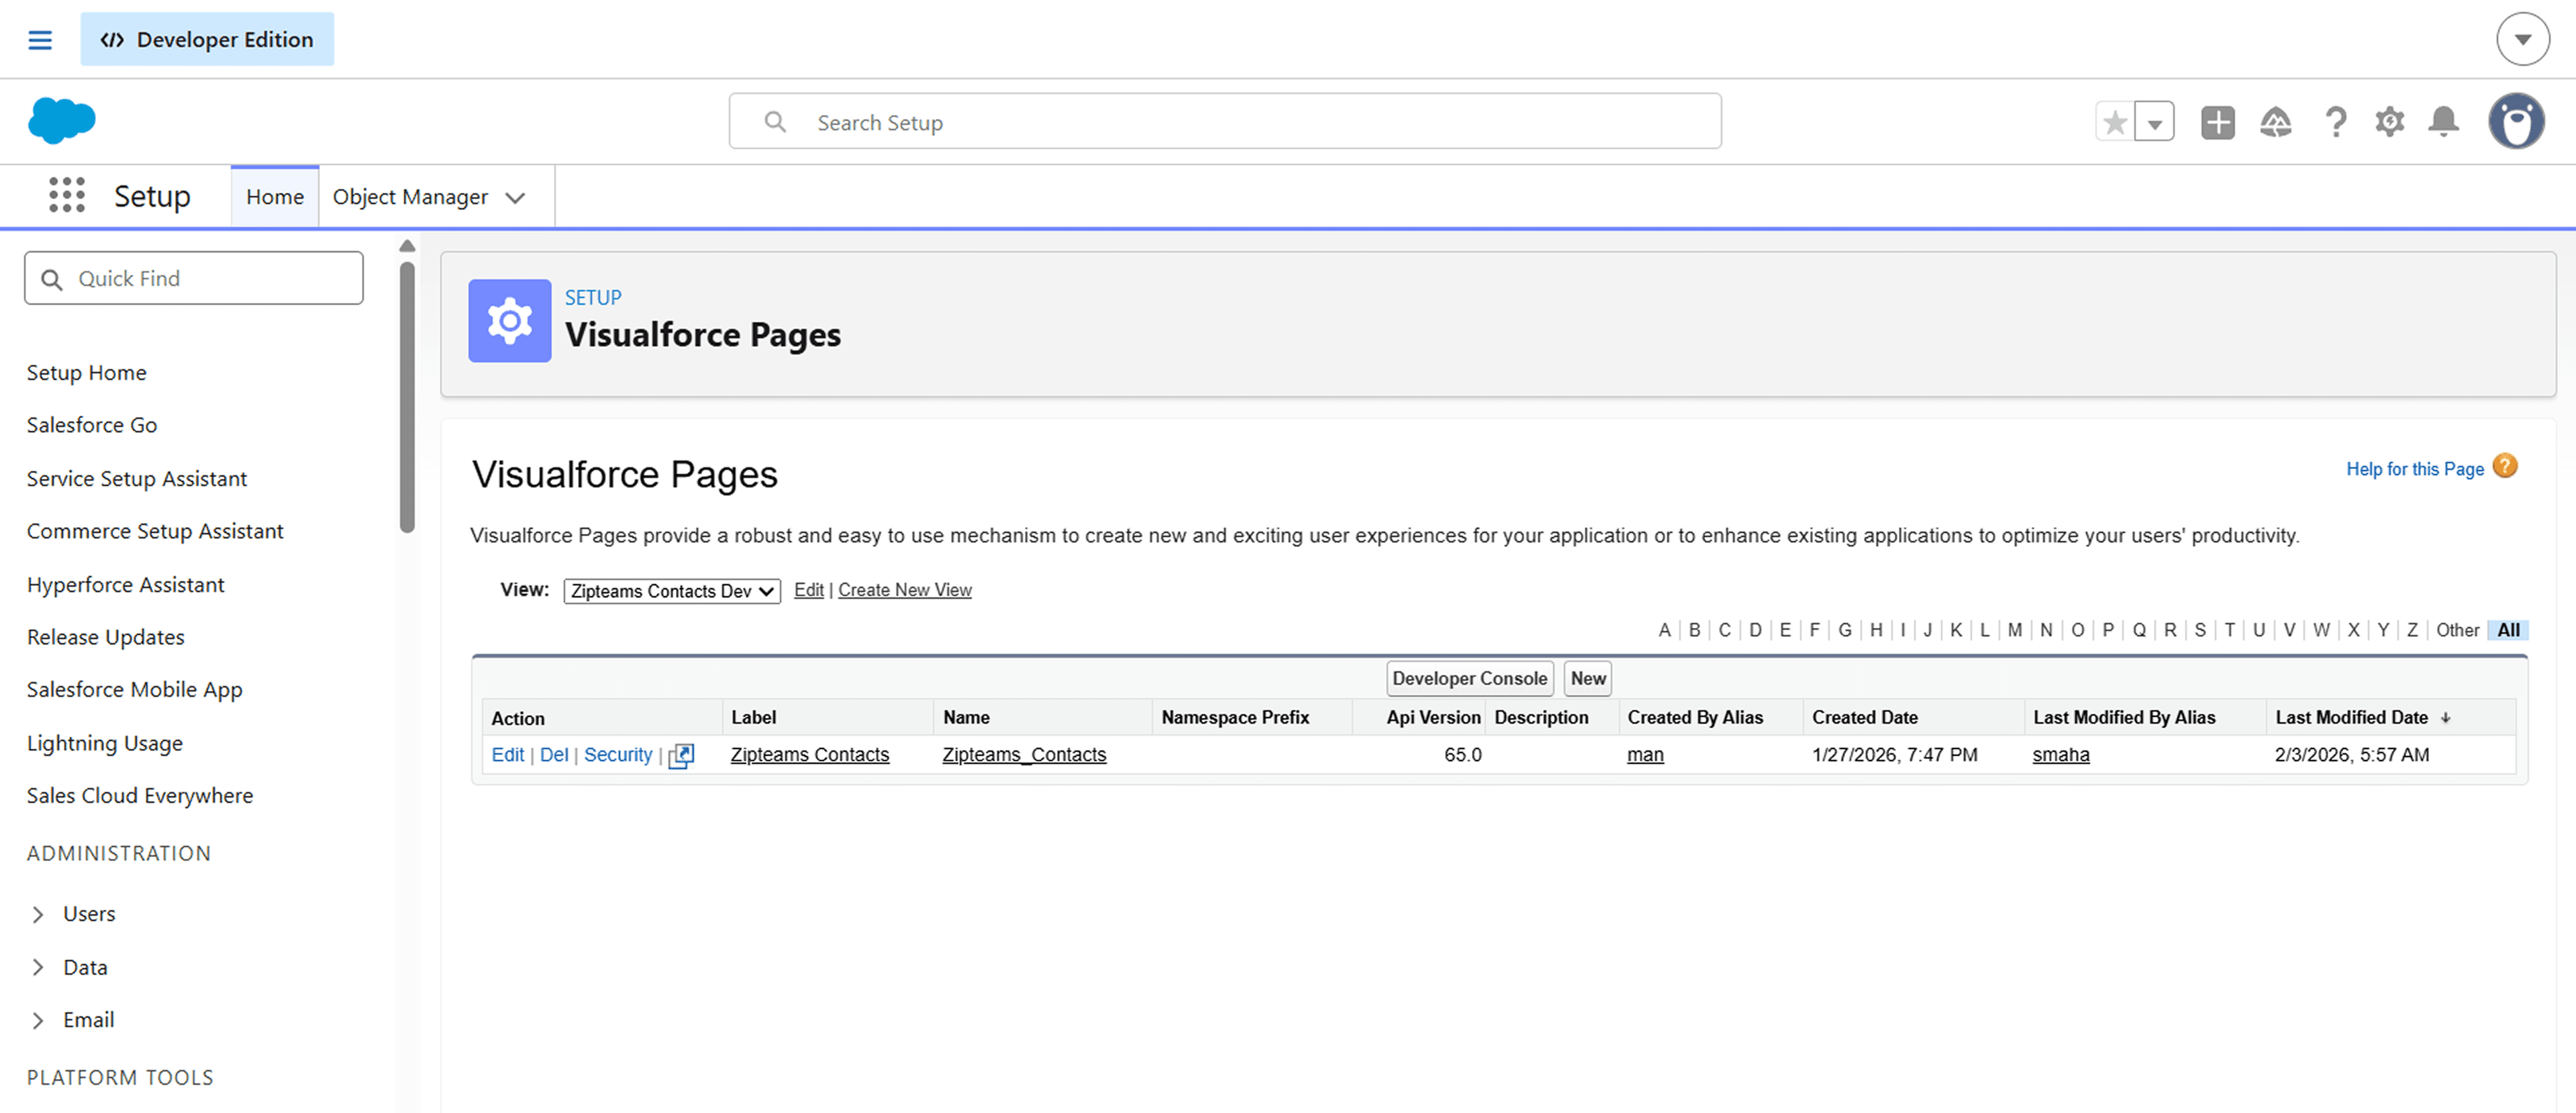
Click on "Create New View"
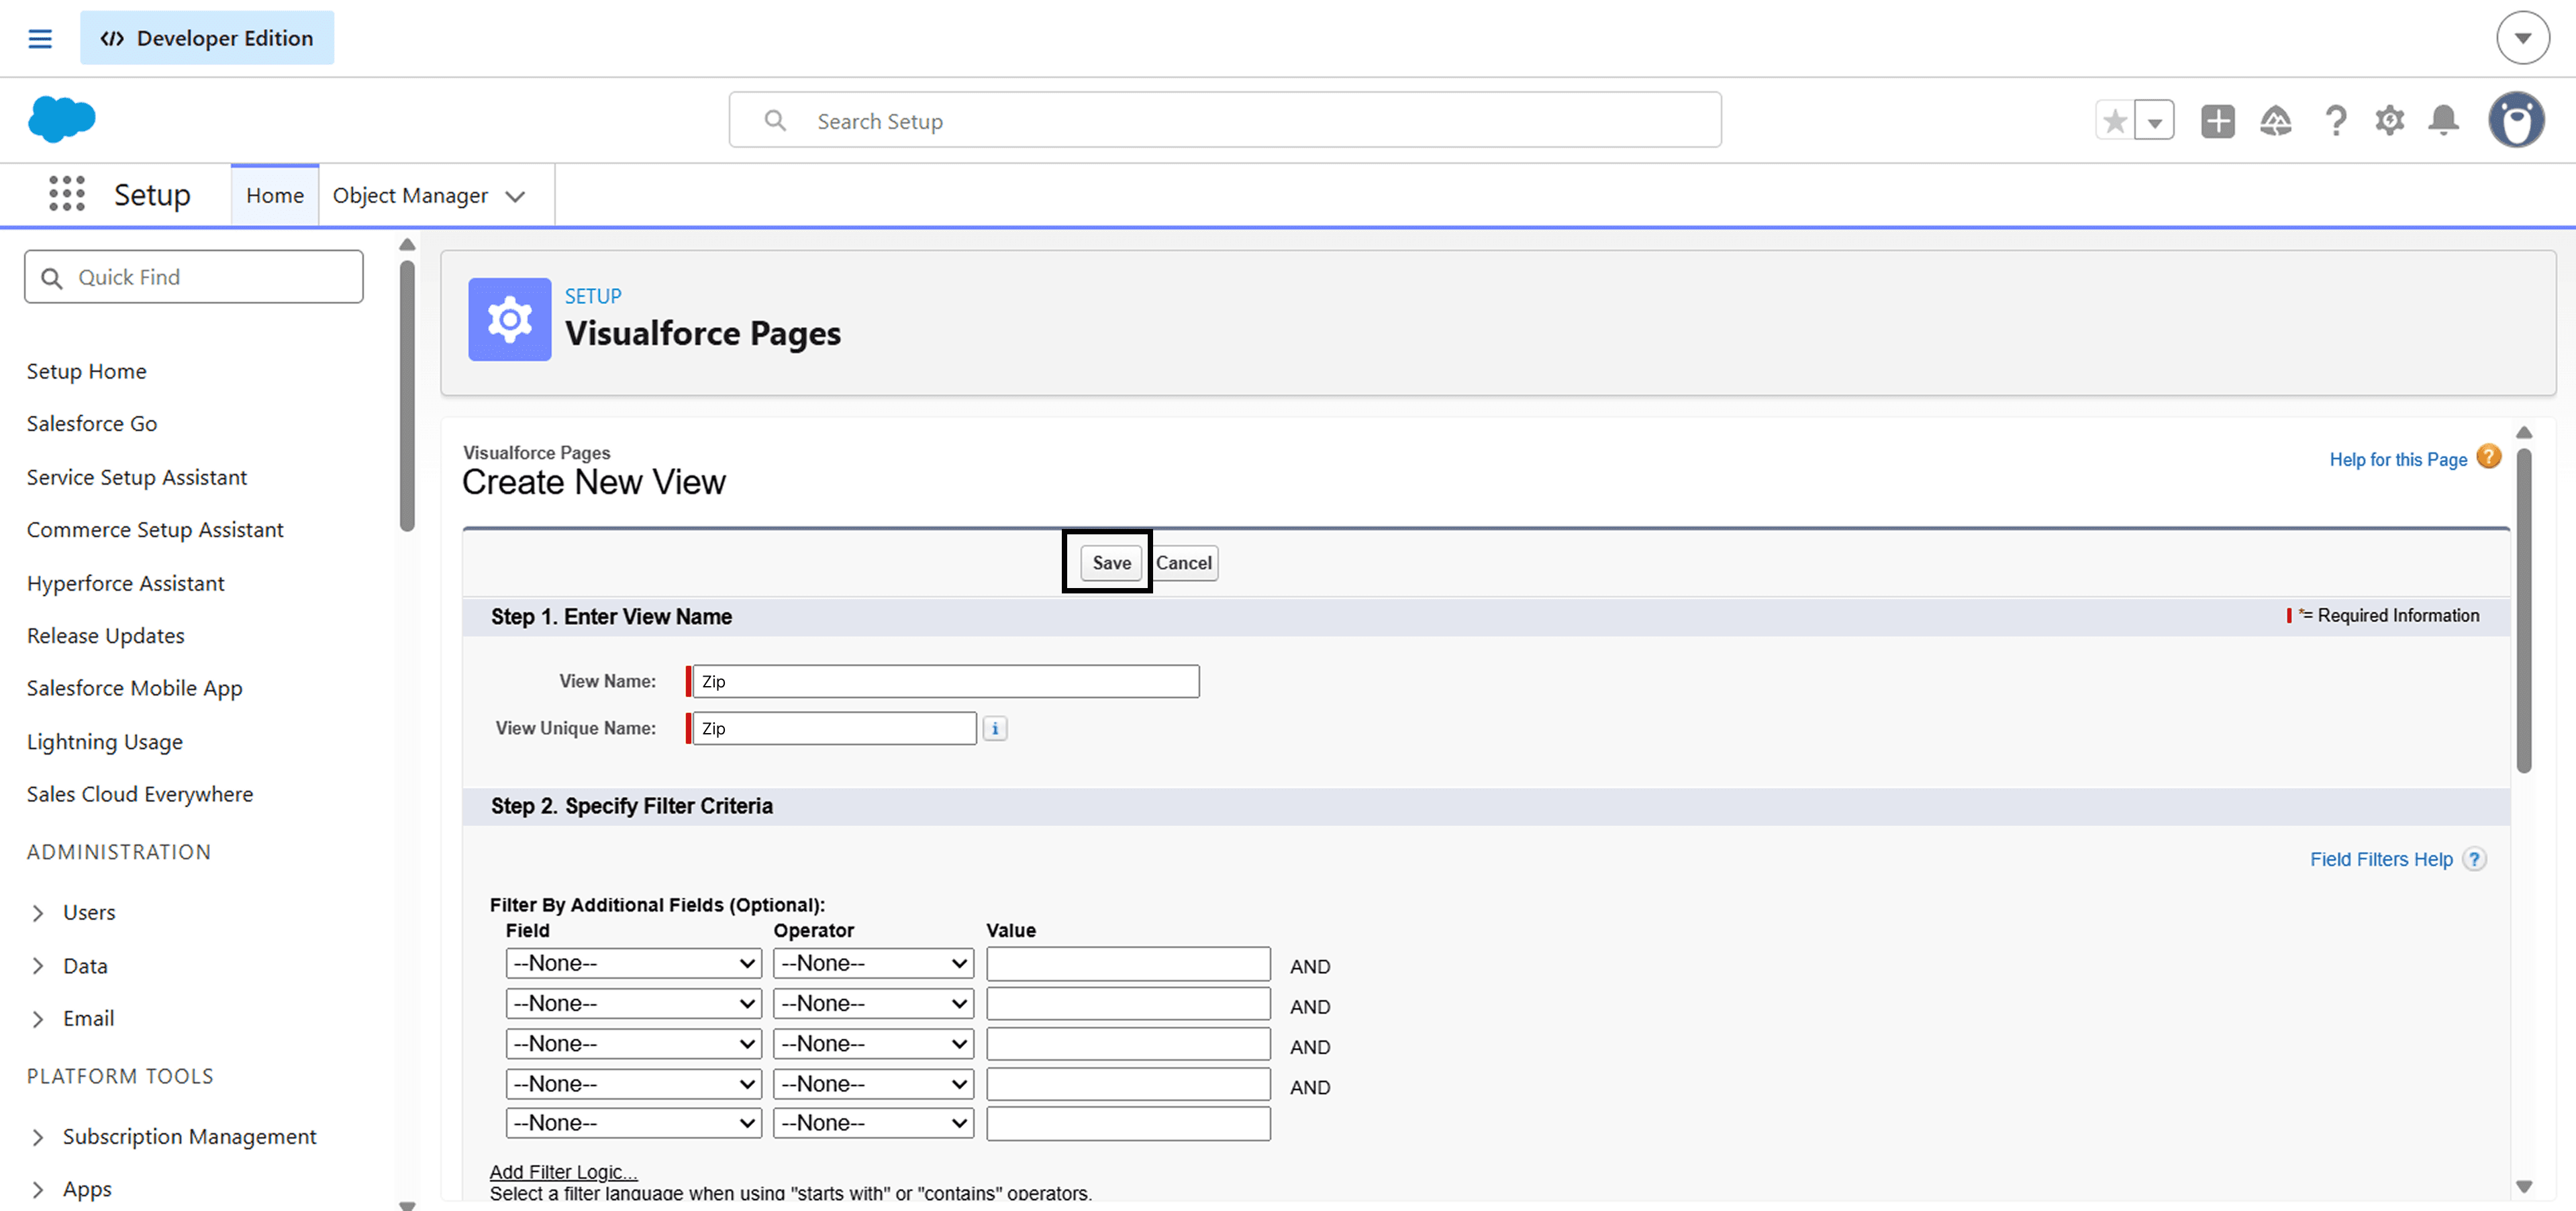
The page will open up. Now enter the following details.
View Name: Zip
View Unique Name: Zip
Now, Click on the "Save" button
Now again arrive at the Visualforce page and click on the button "New" as given in the image below.
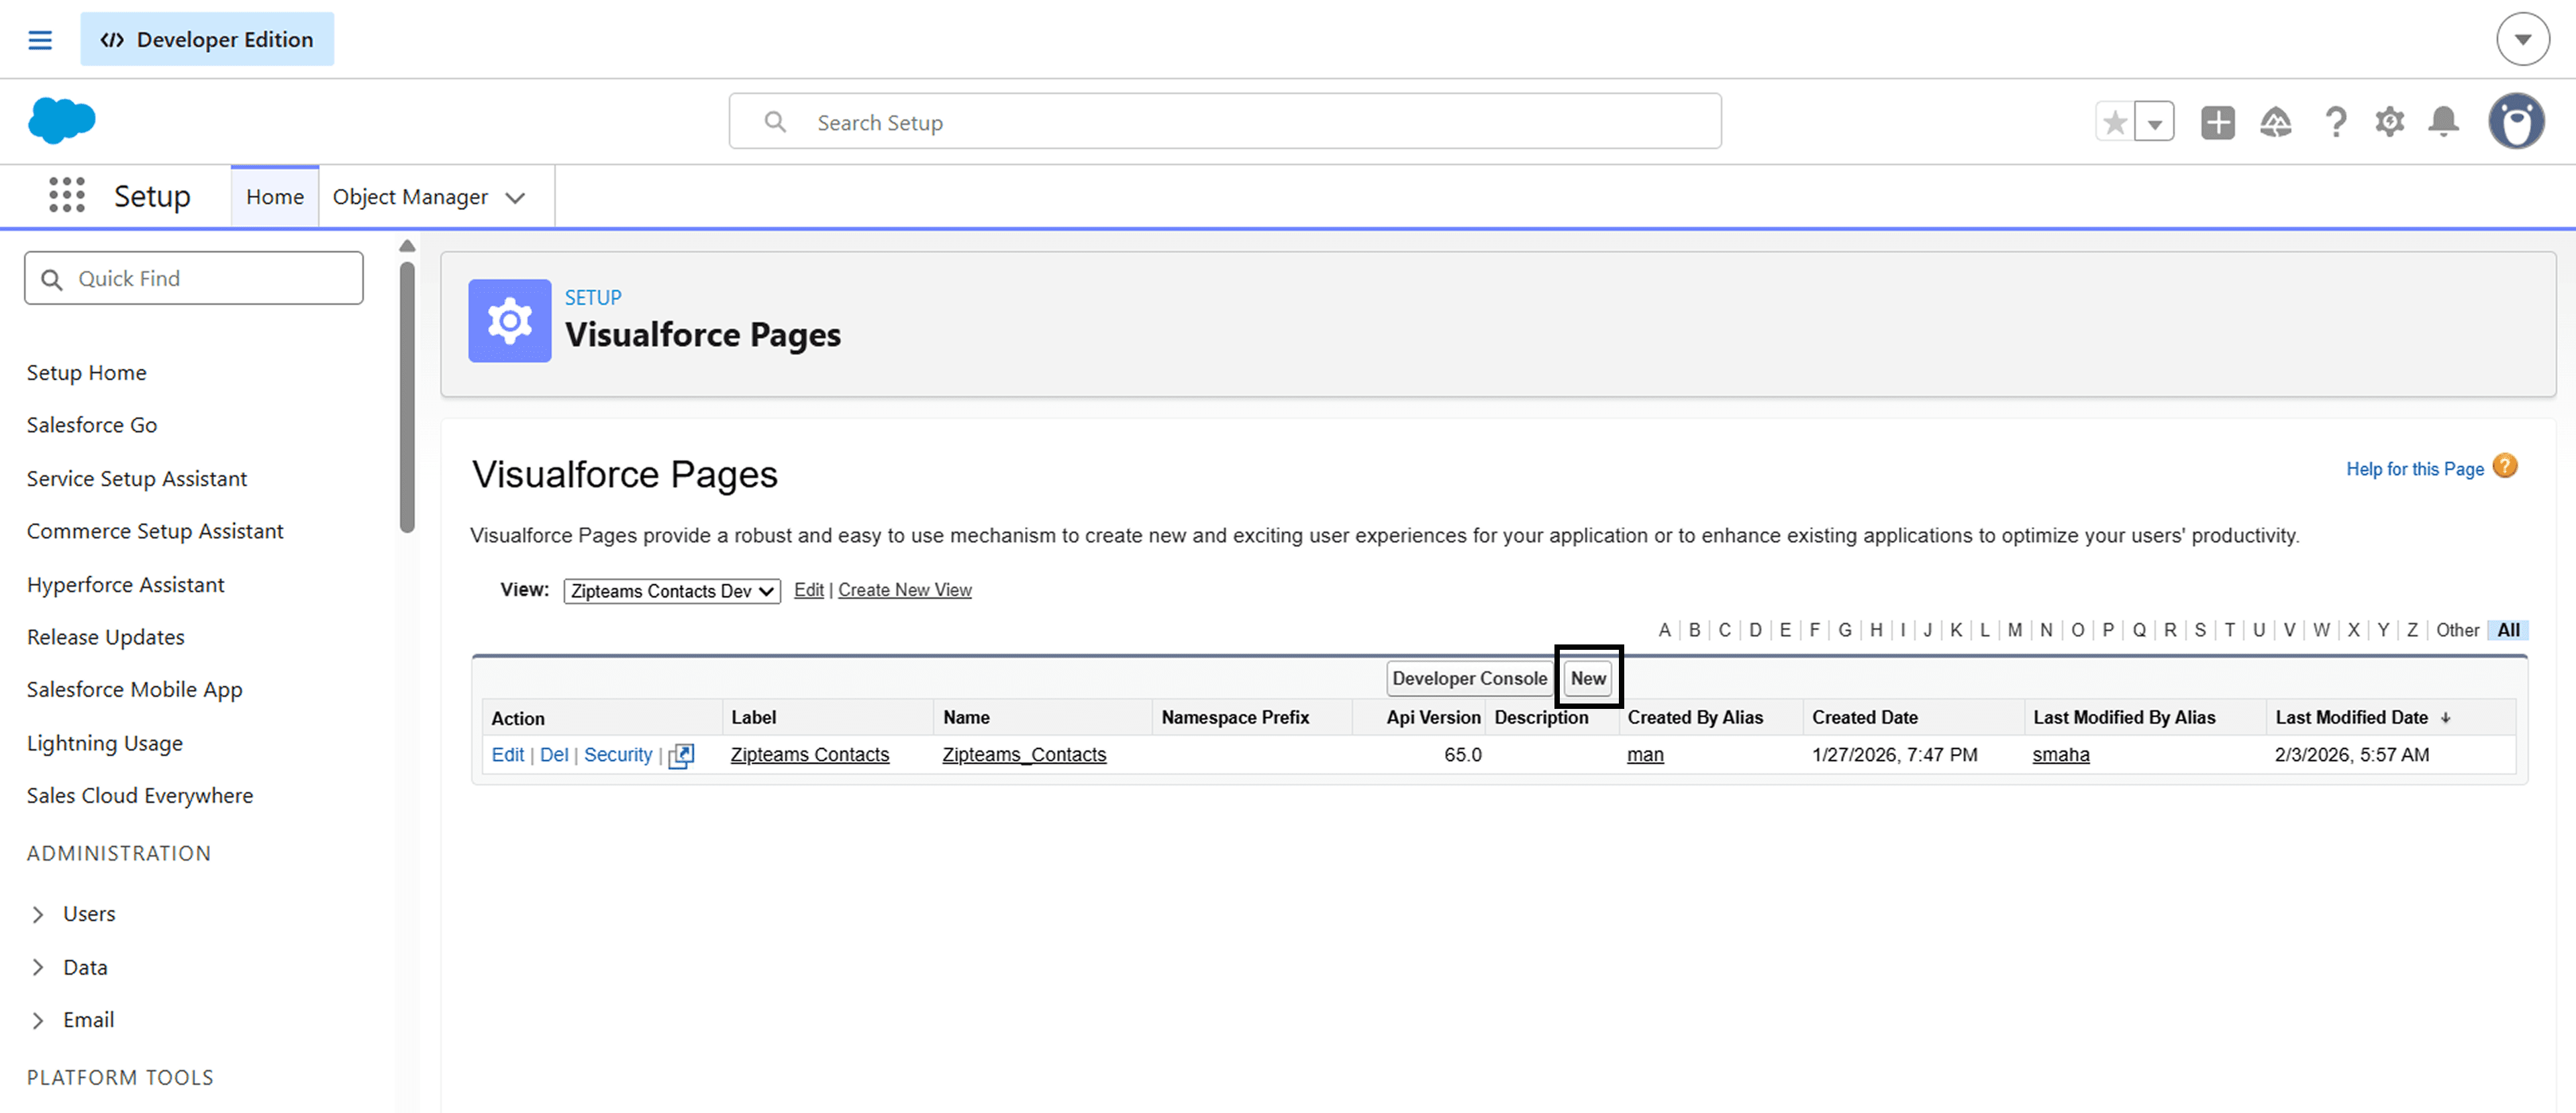
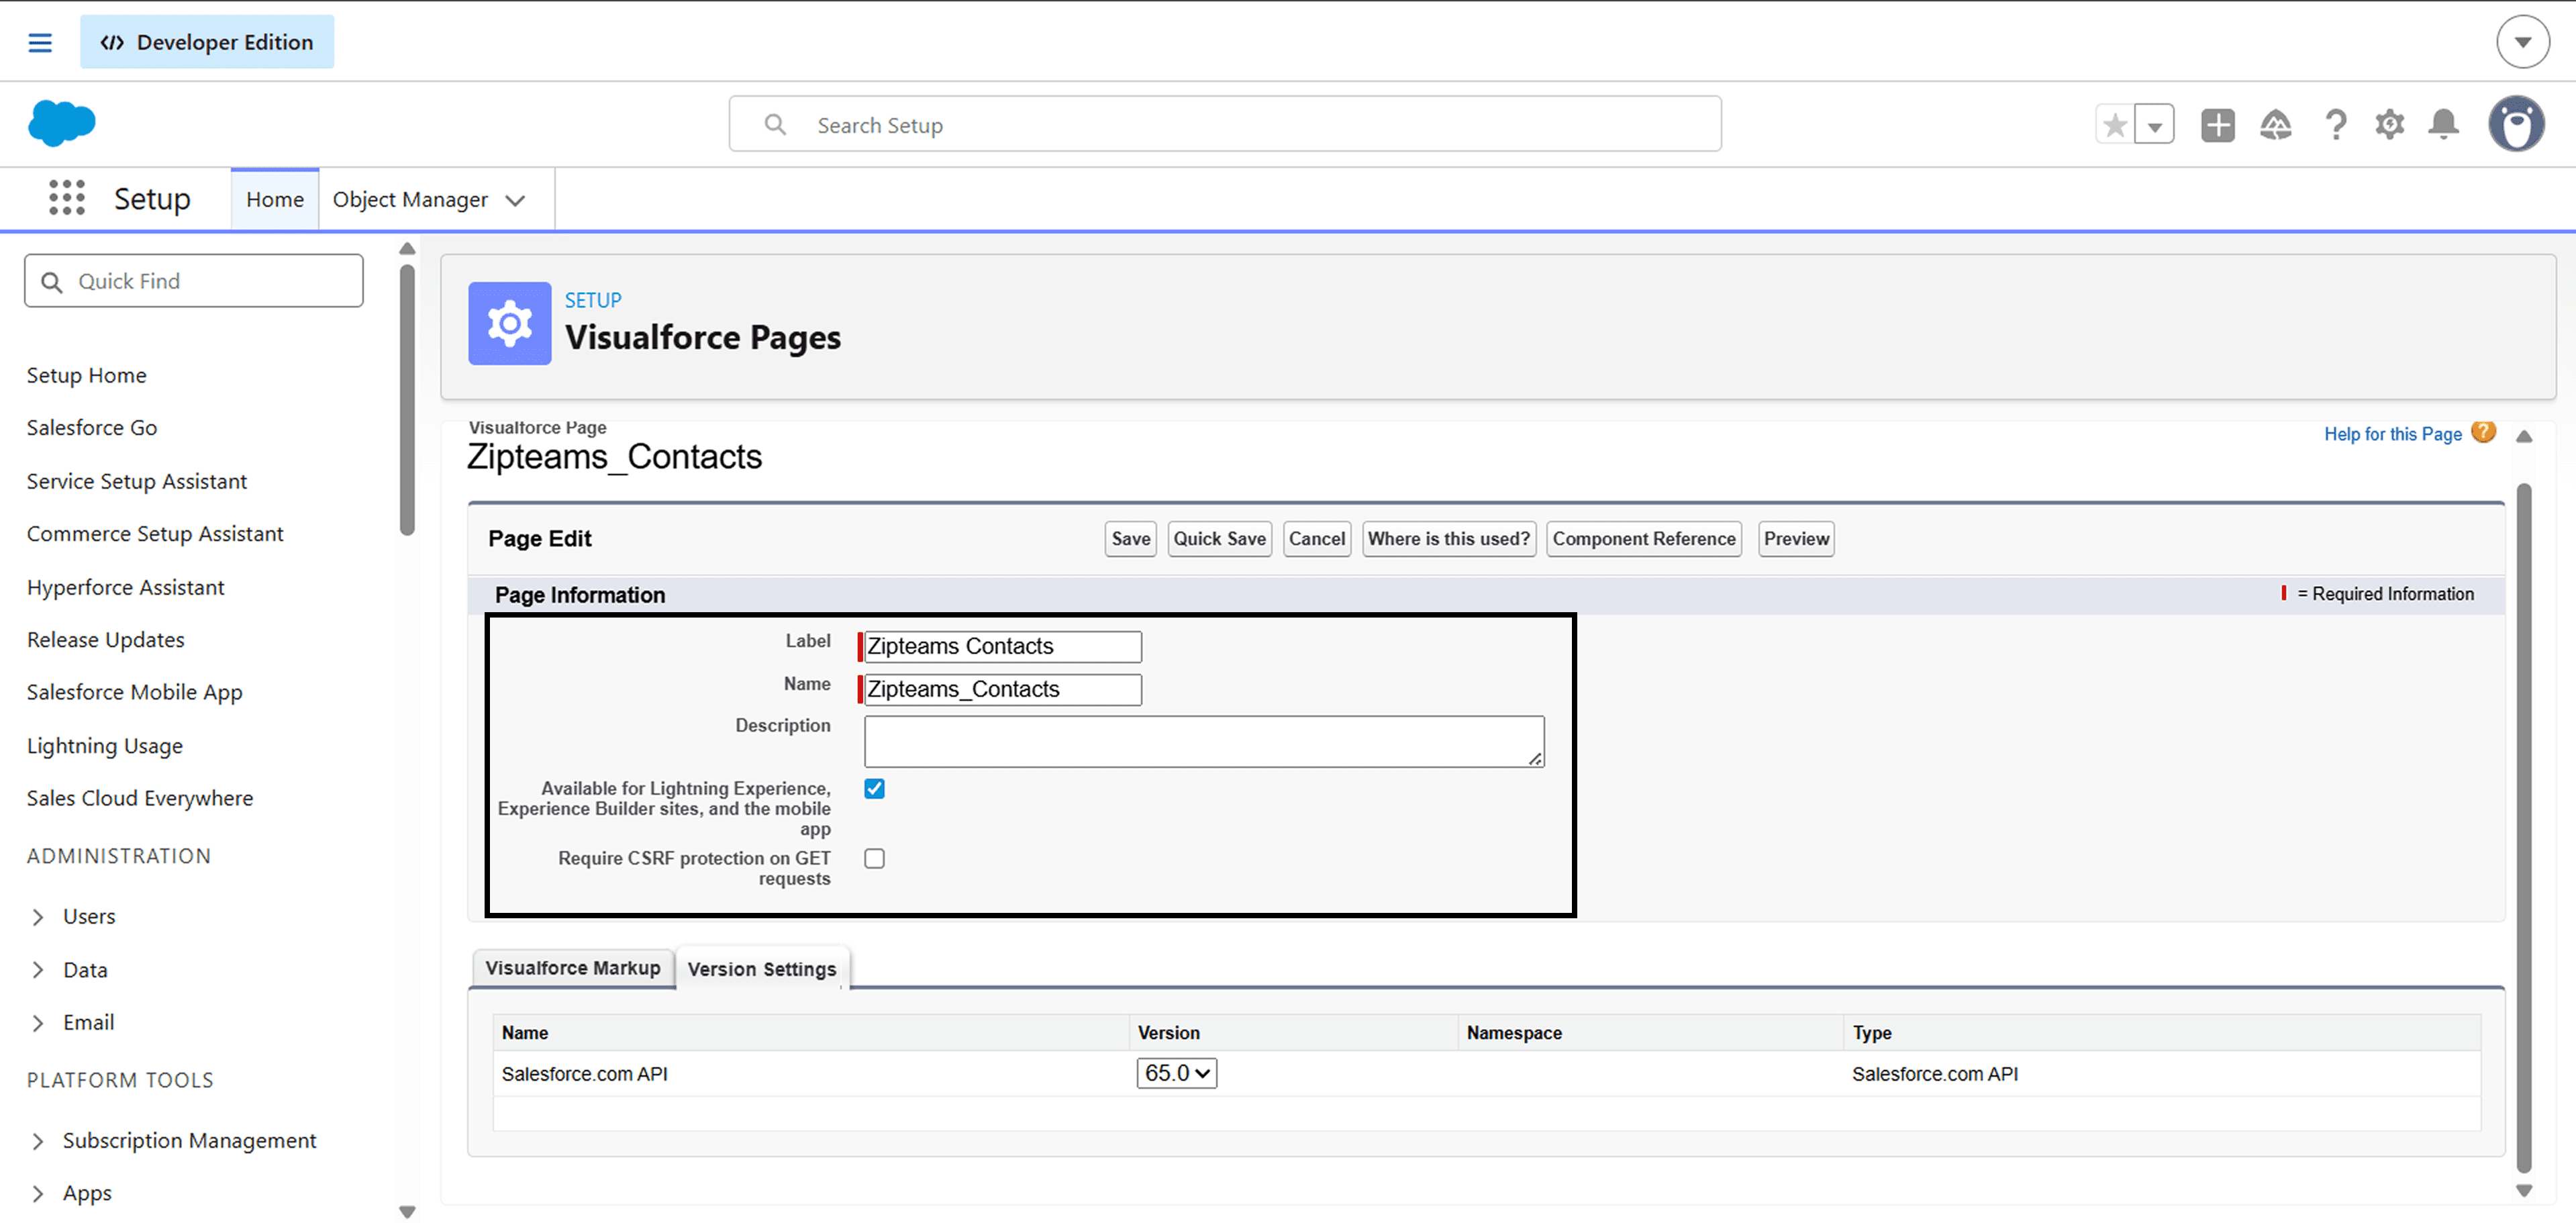
A page will open up. Now, enter the following details in the page information section.
Label: Zipteams ContactsName: Zipteams_Contacts
Also, Tick the option as given in the image below.
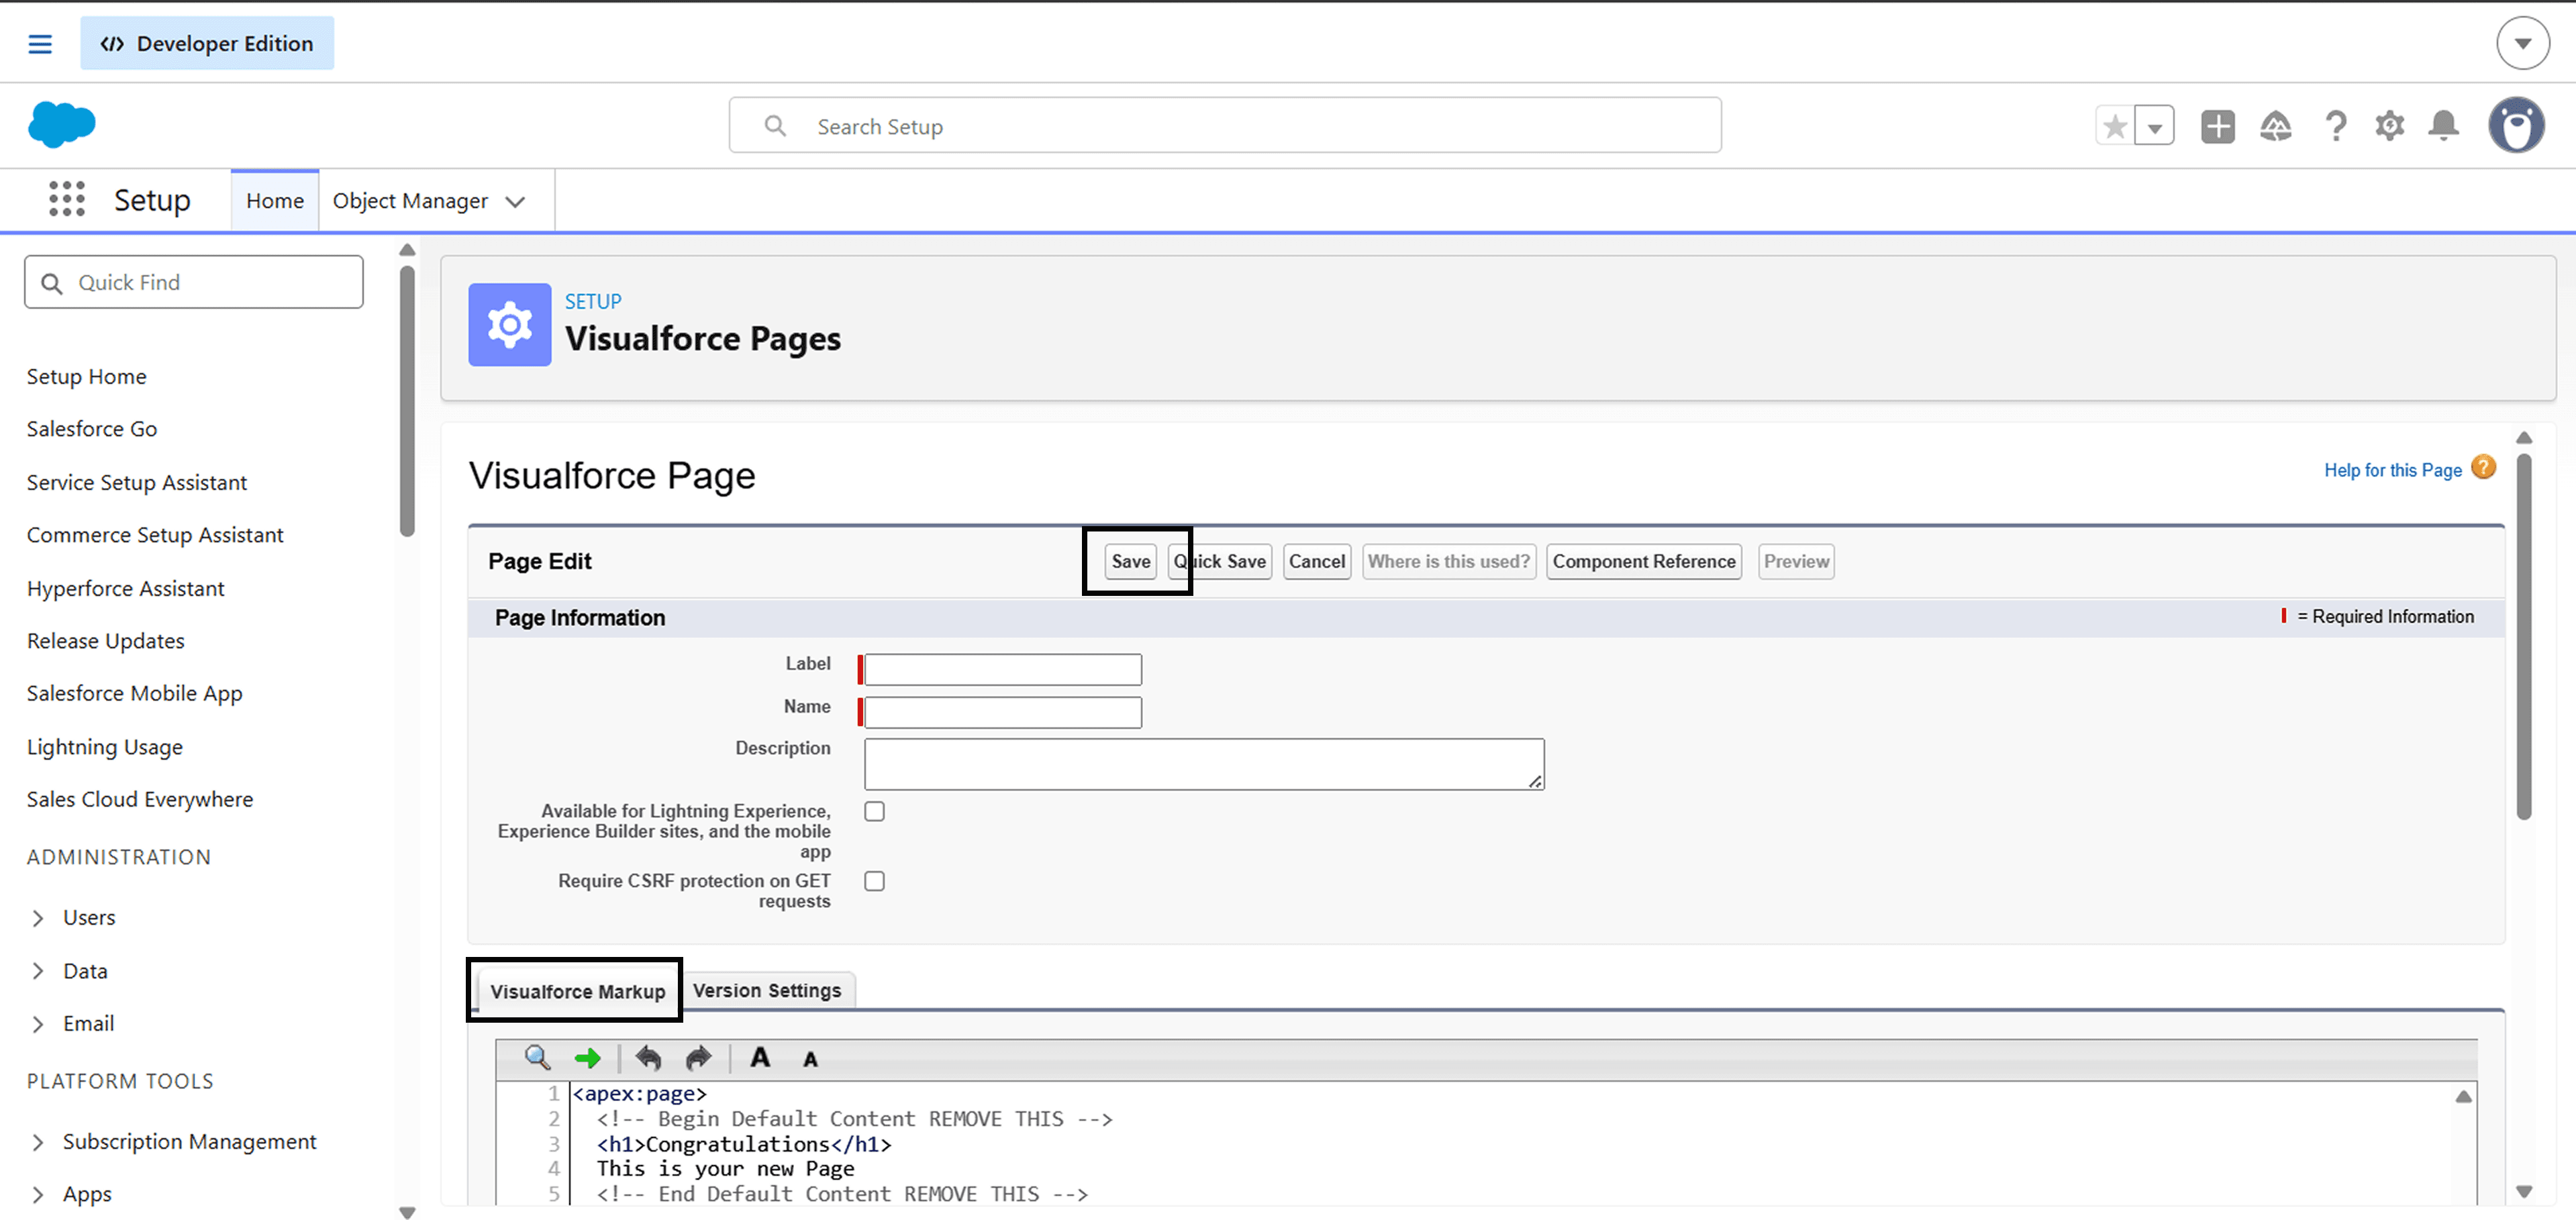
Click on the Visualforce Markup tab and paste the code below.
After pasting this, Click on the "Save" button
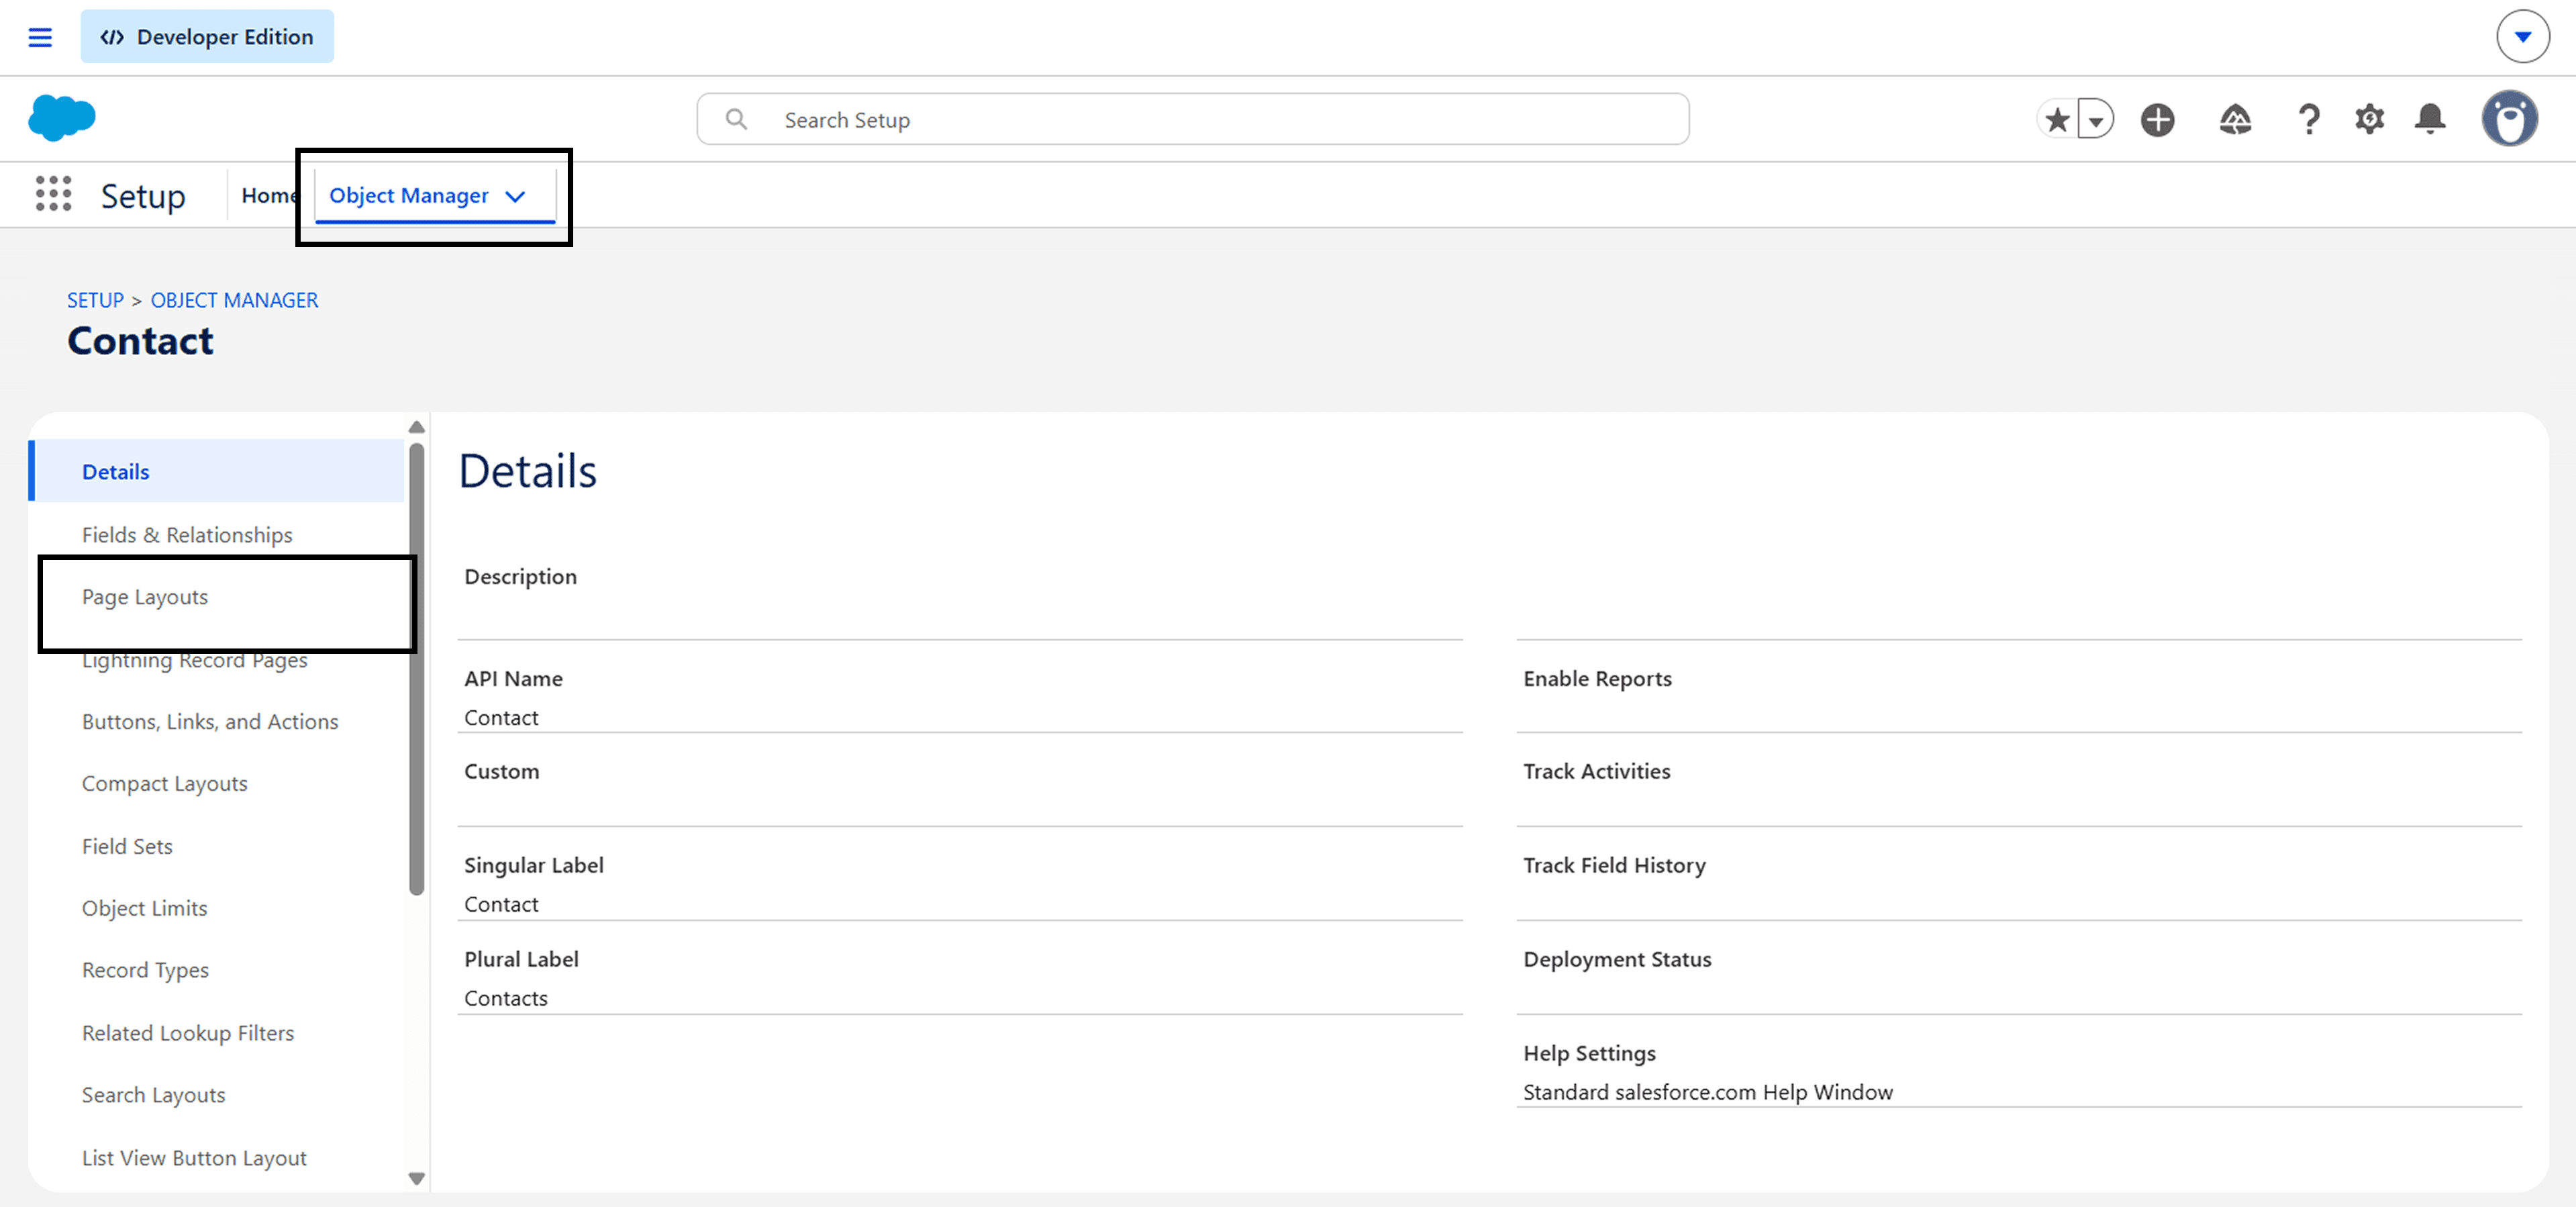
Go to Object Manager in Salesforce and go to "Page Layout" Section from the sidebar
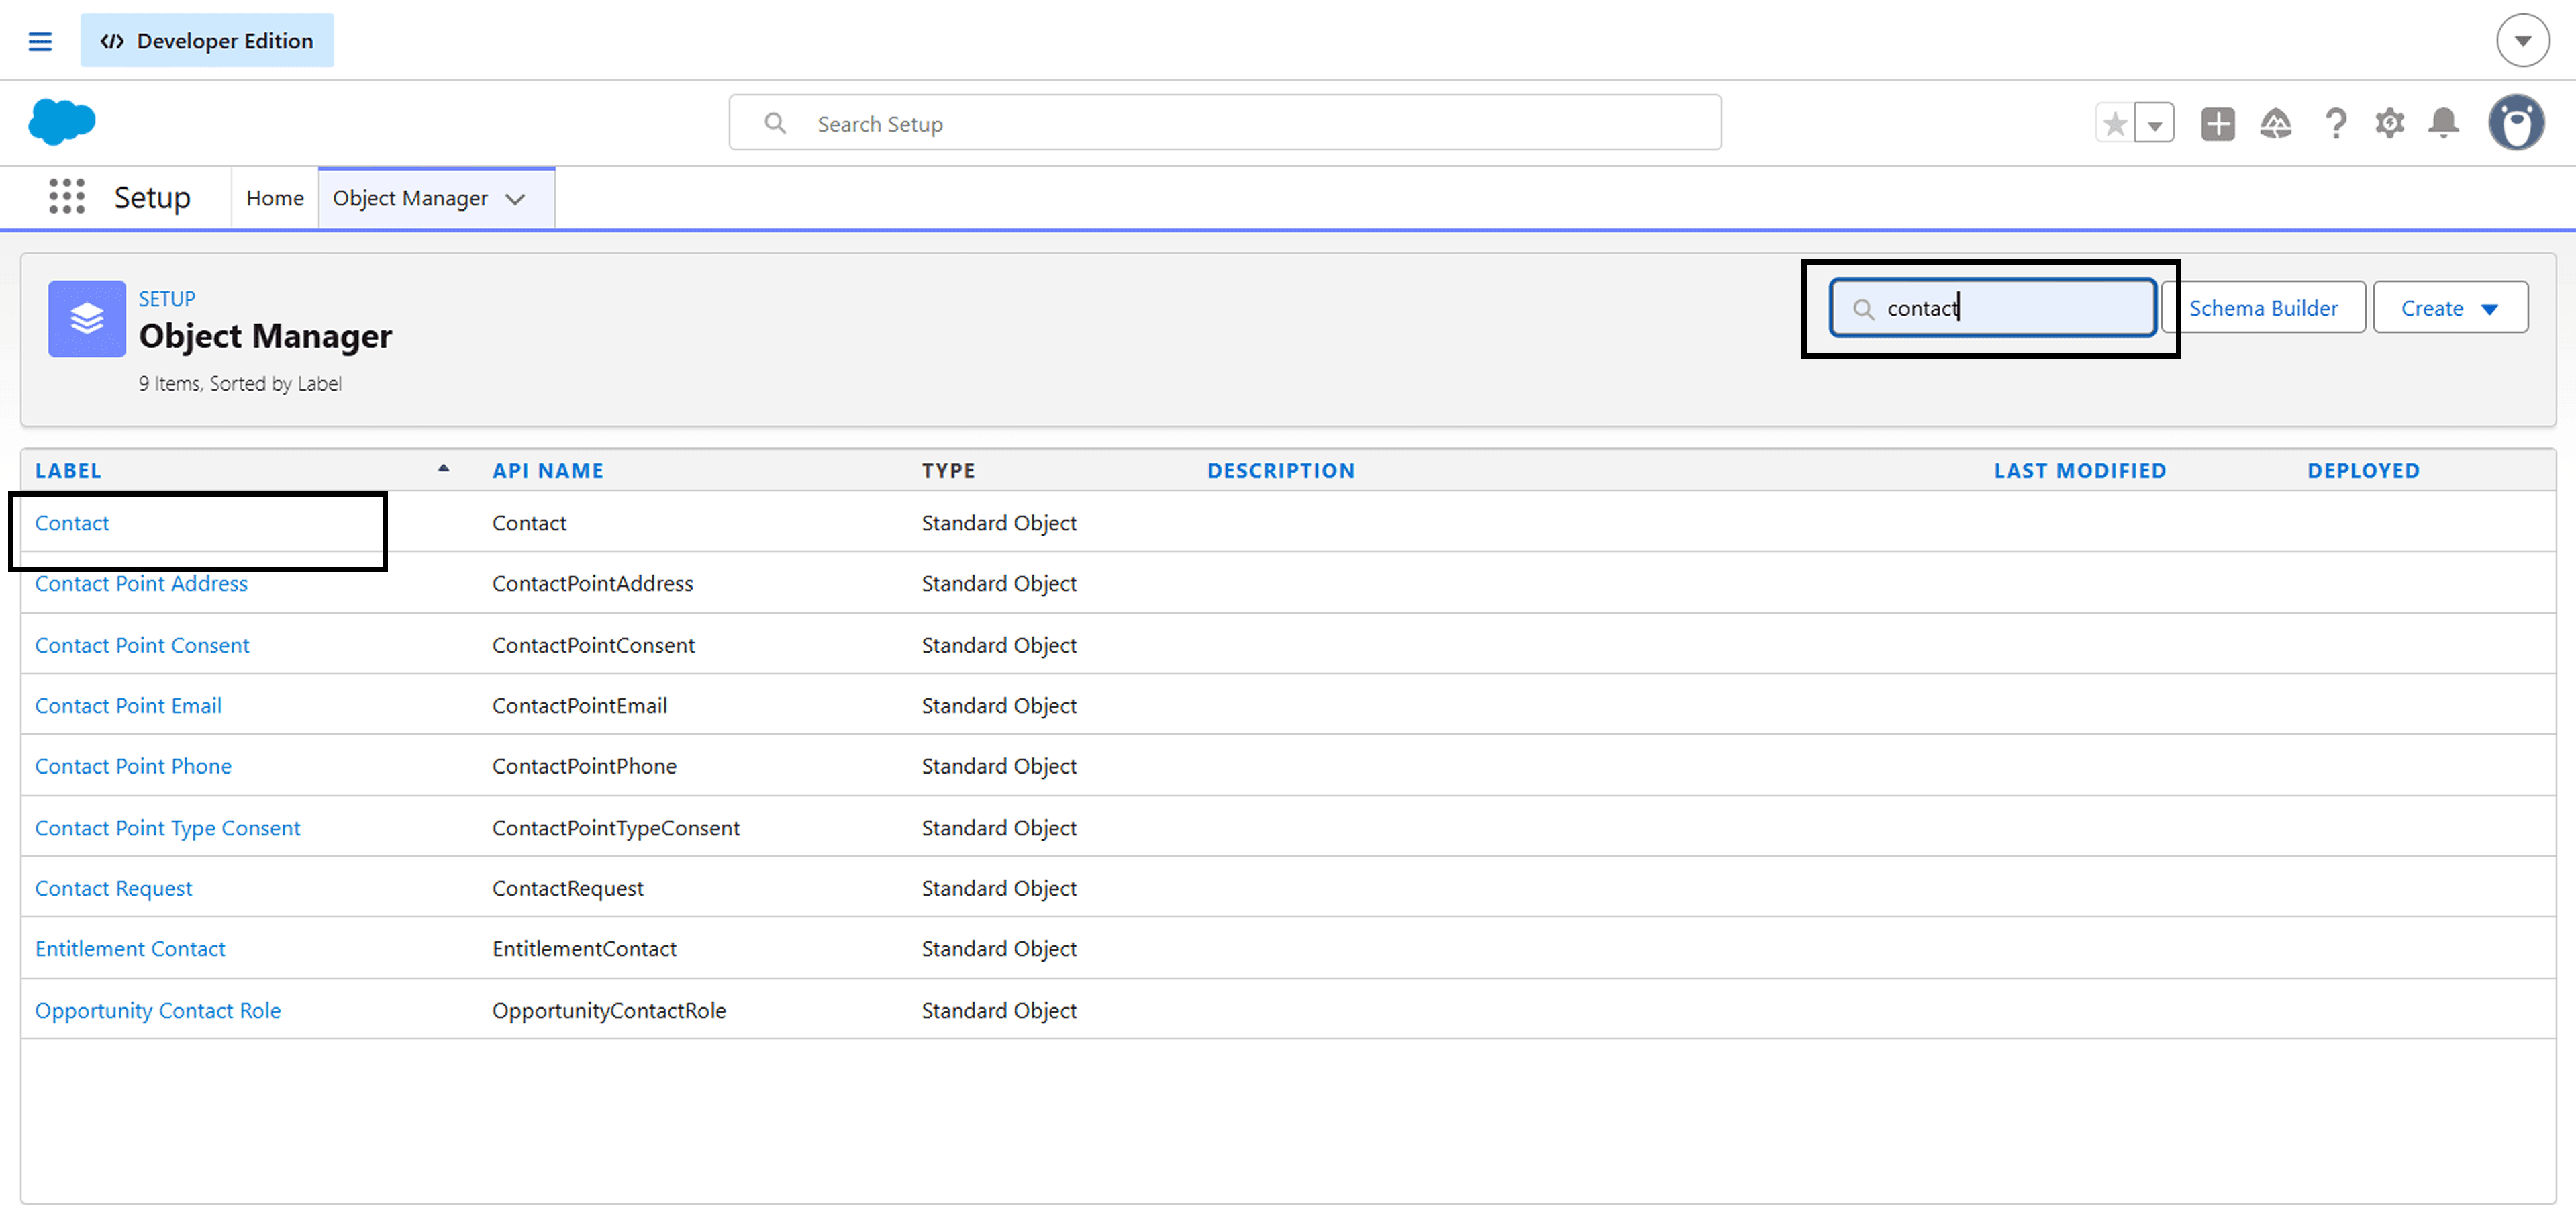
Search for "contact" in the searchbar and click on Contact Row
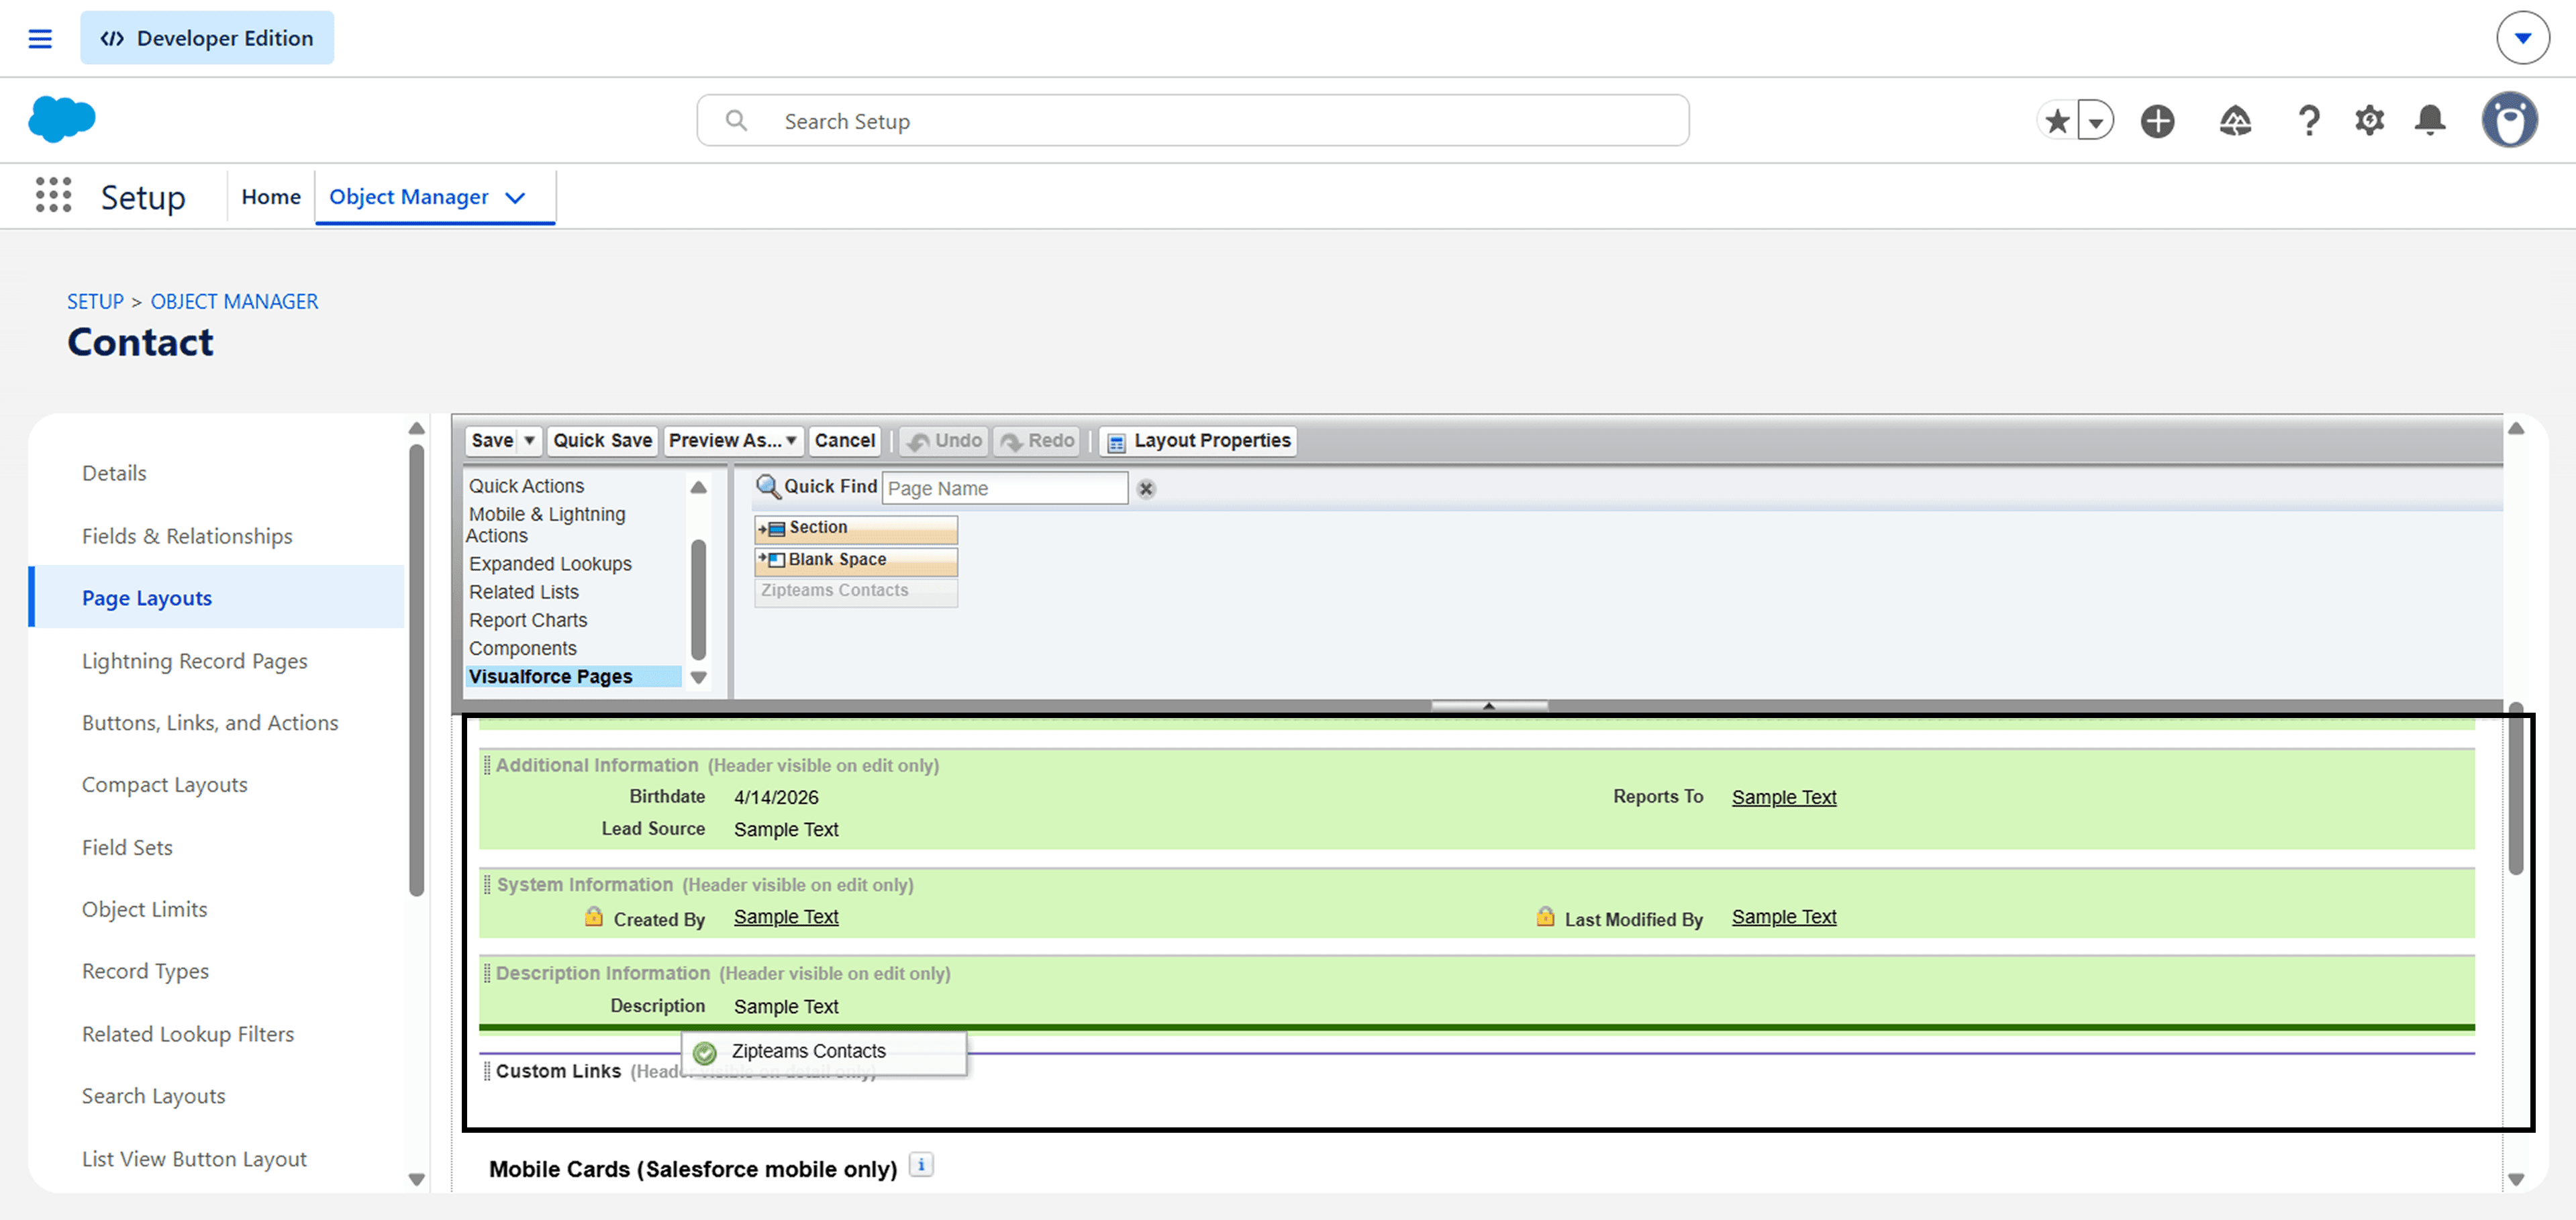
Now, the Contact page will open up. There will be a box called as "Zipteams Contacts" in the visualforce page.
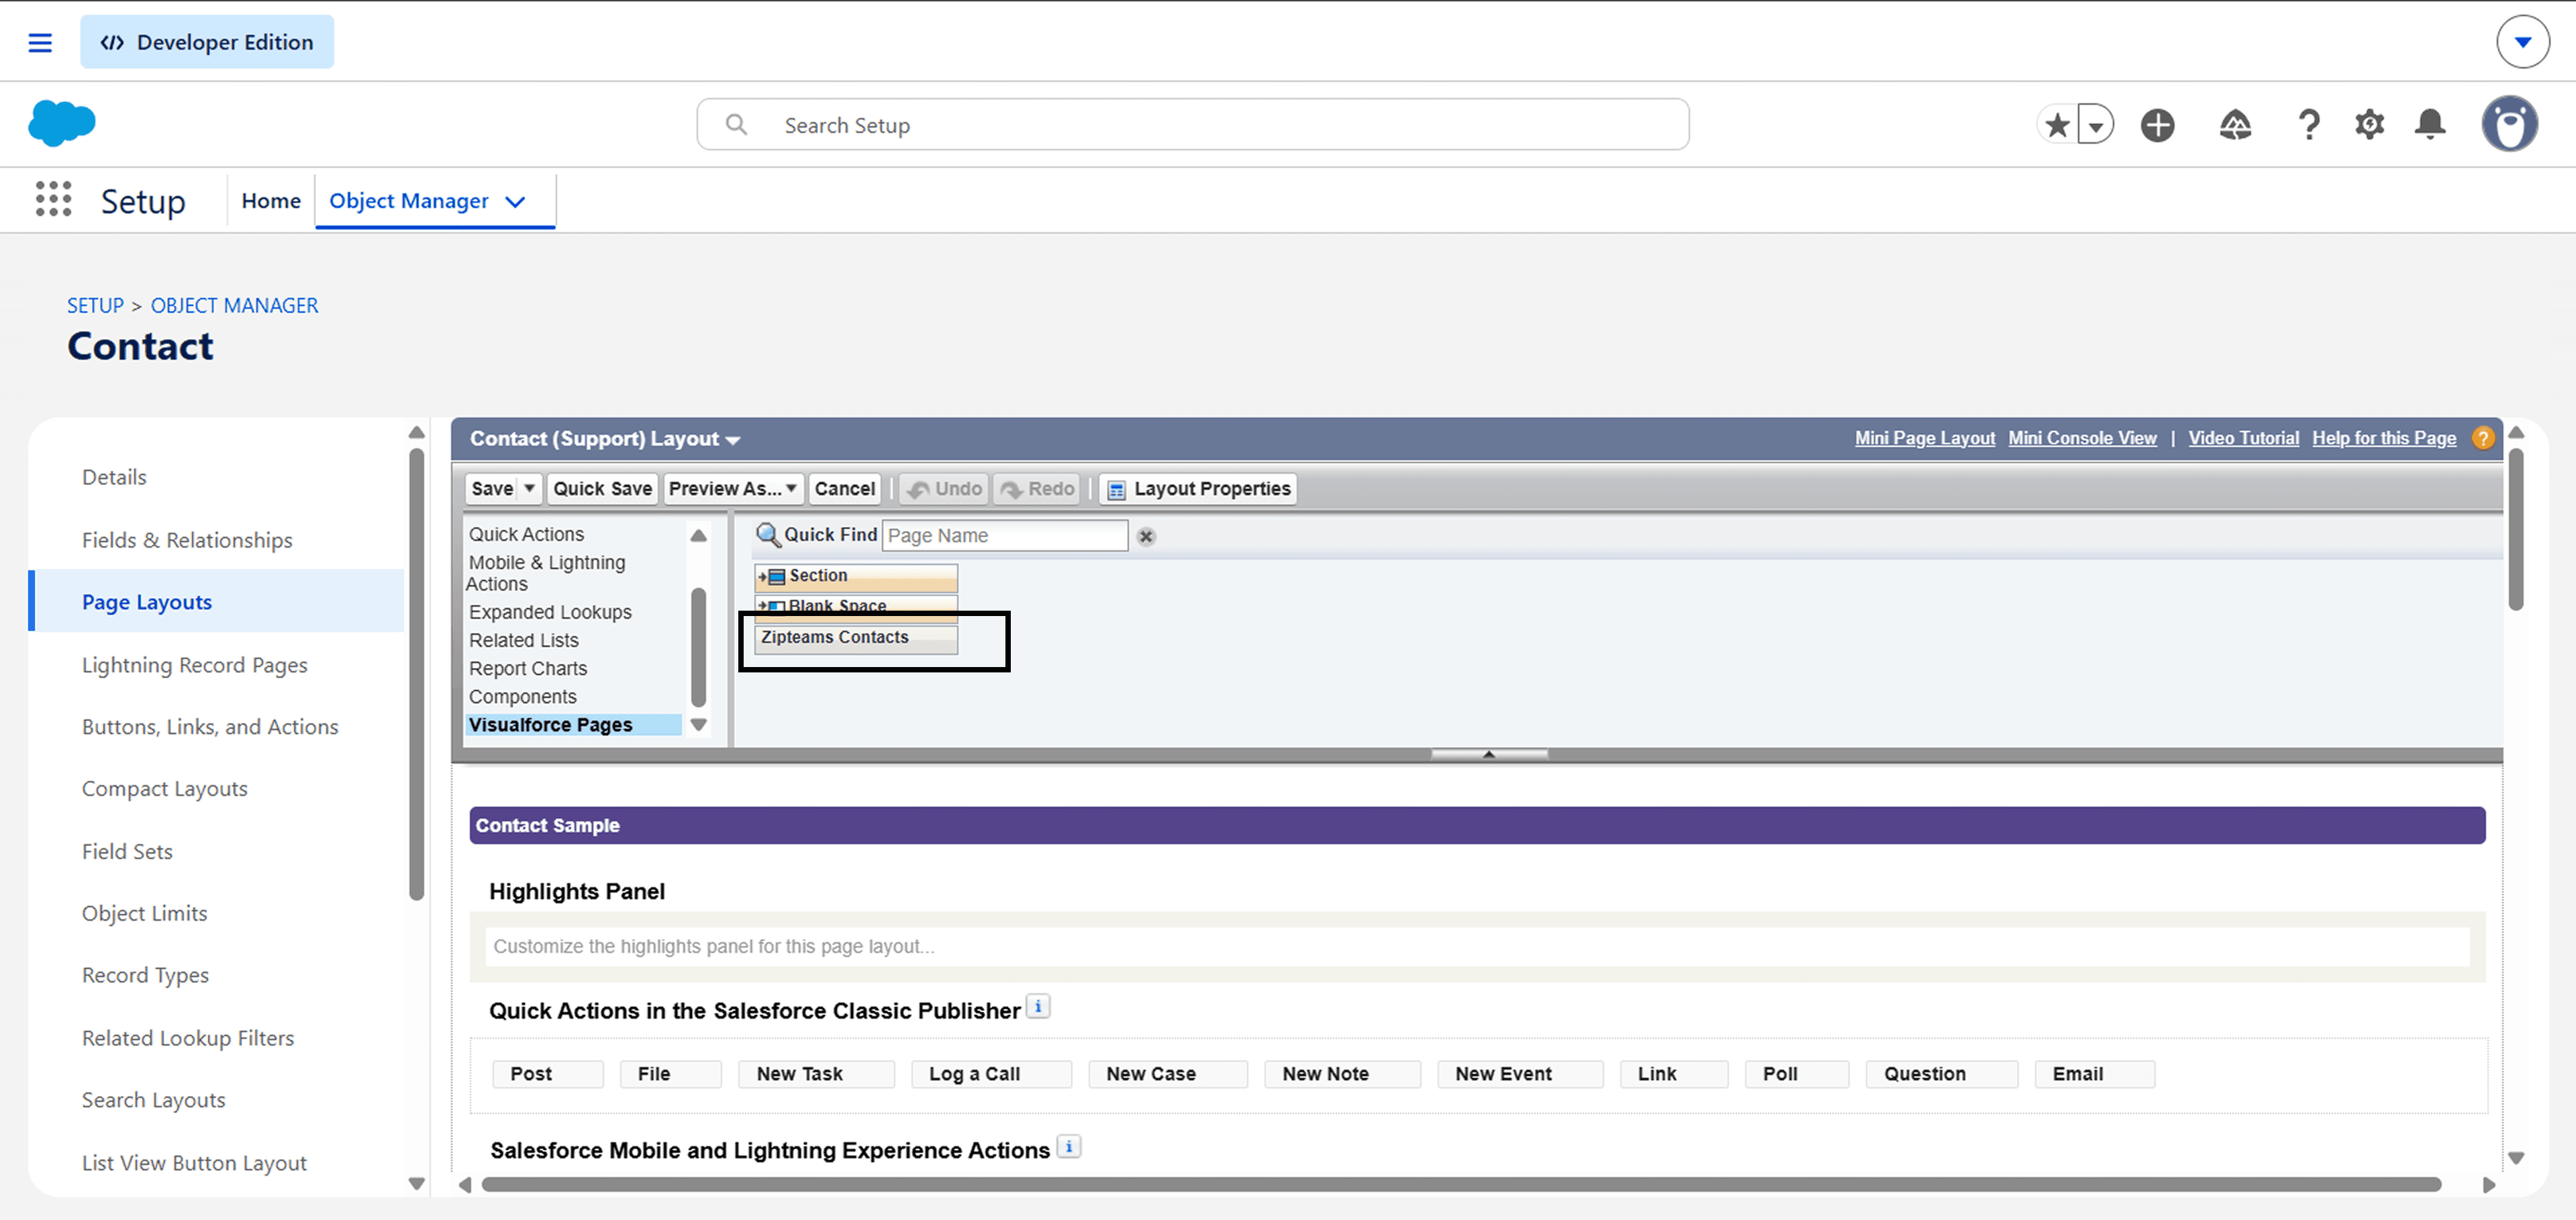
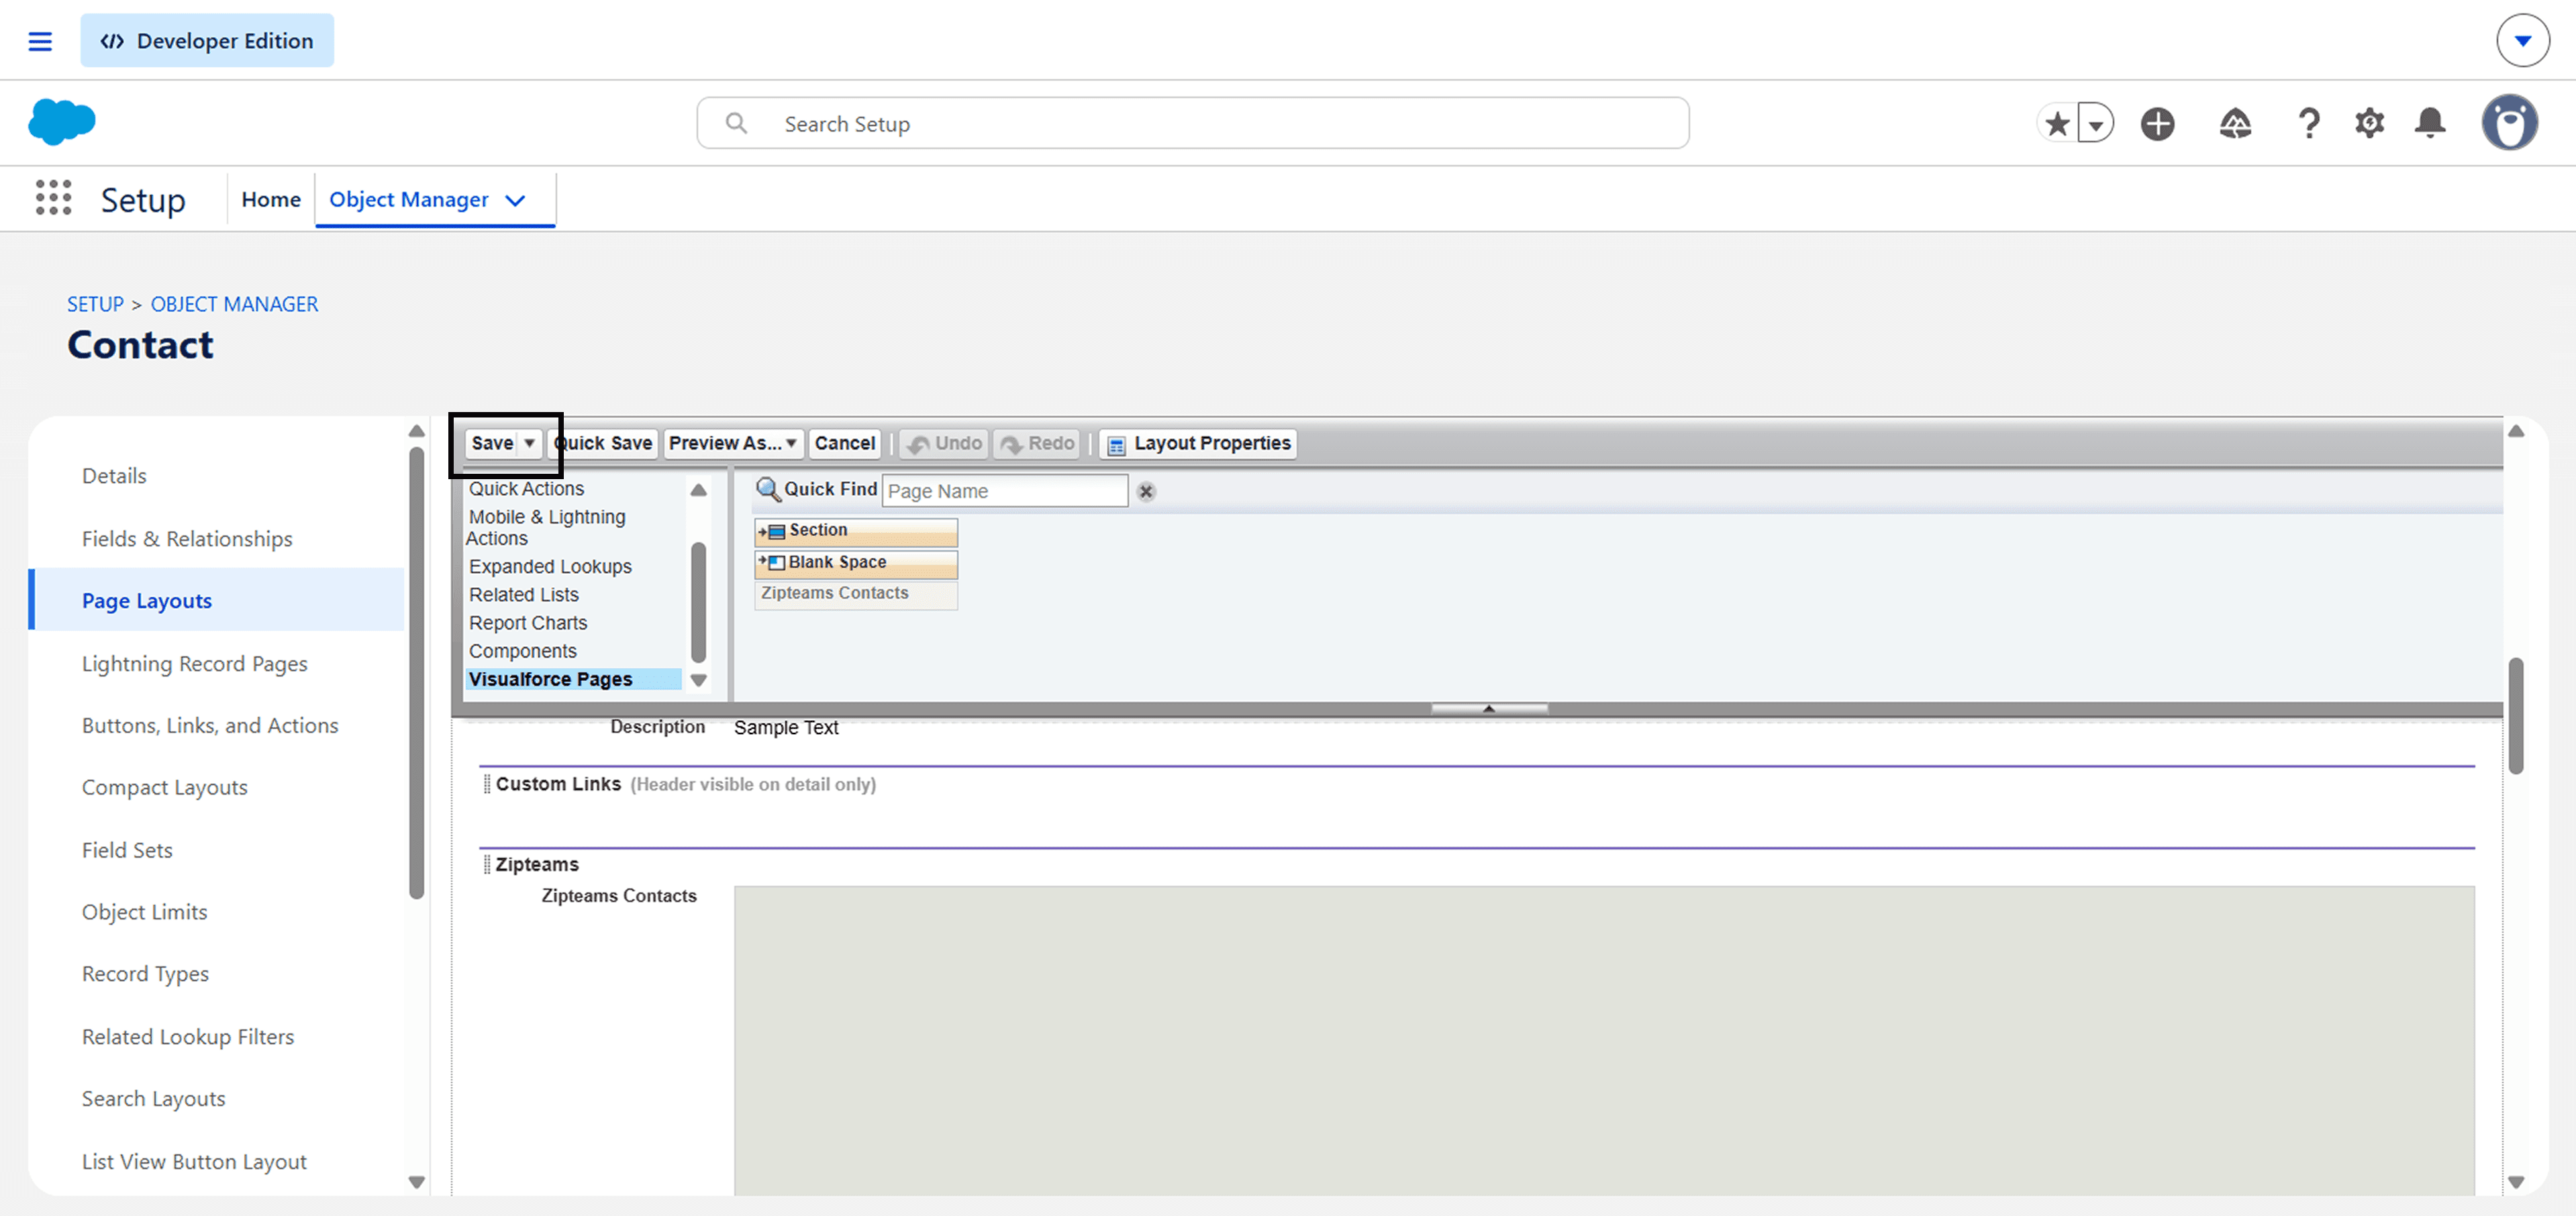
Now, Click and drag the Zipteams box to below Description Information as shown in the image below
Now click on "Save" button
Go to "Contacts" Tab in your Salesforce account and click in a particular lead.
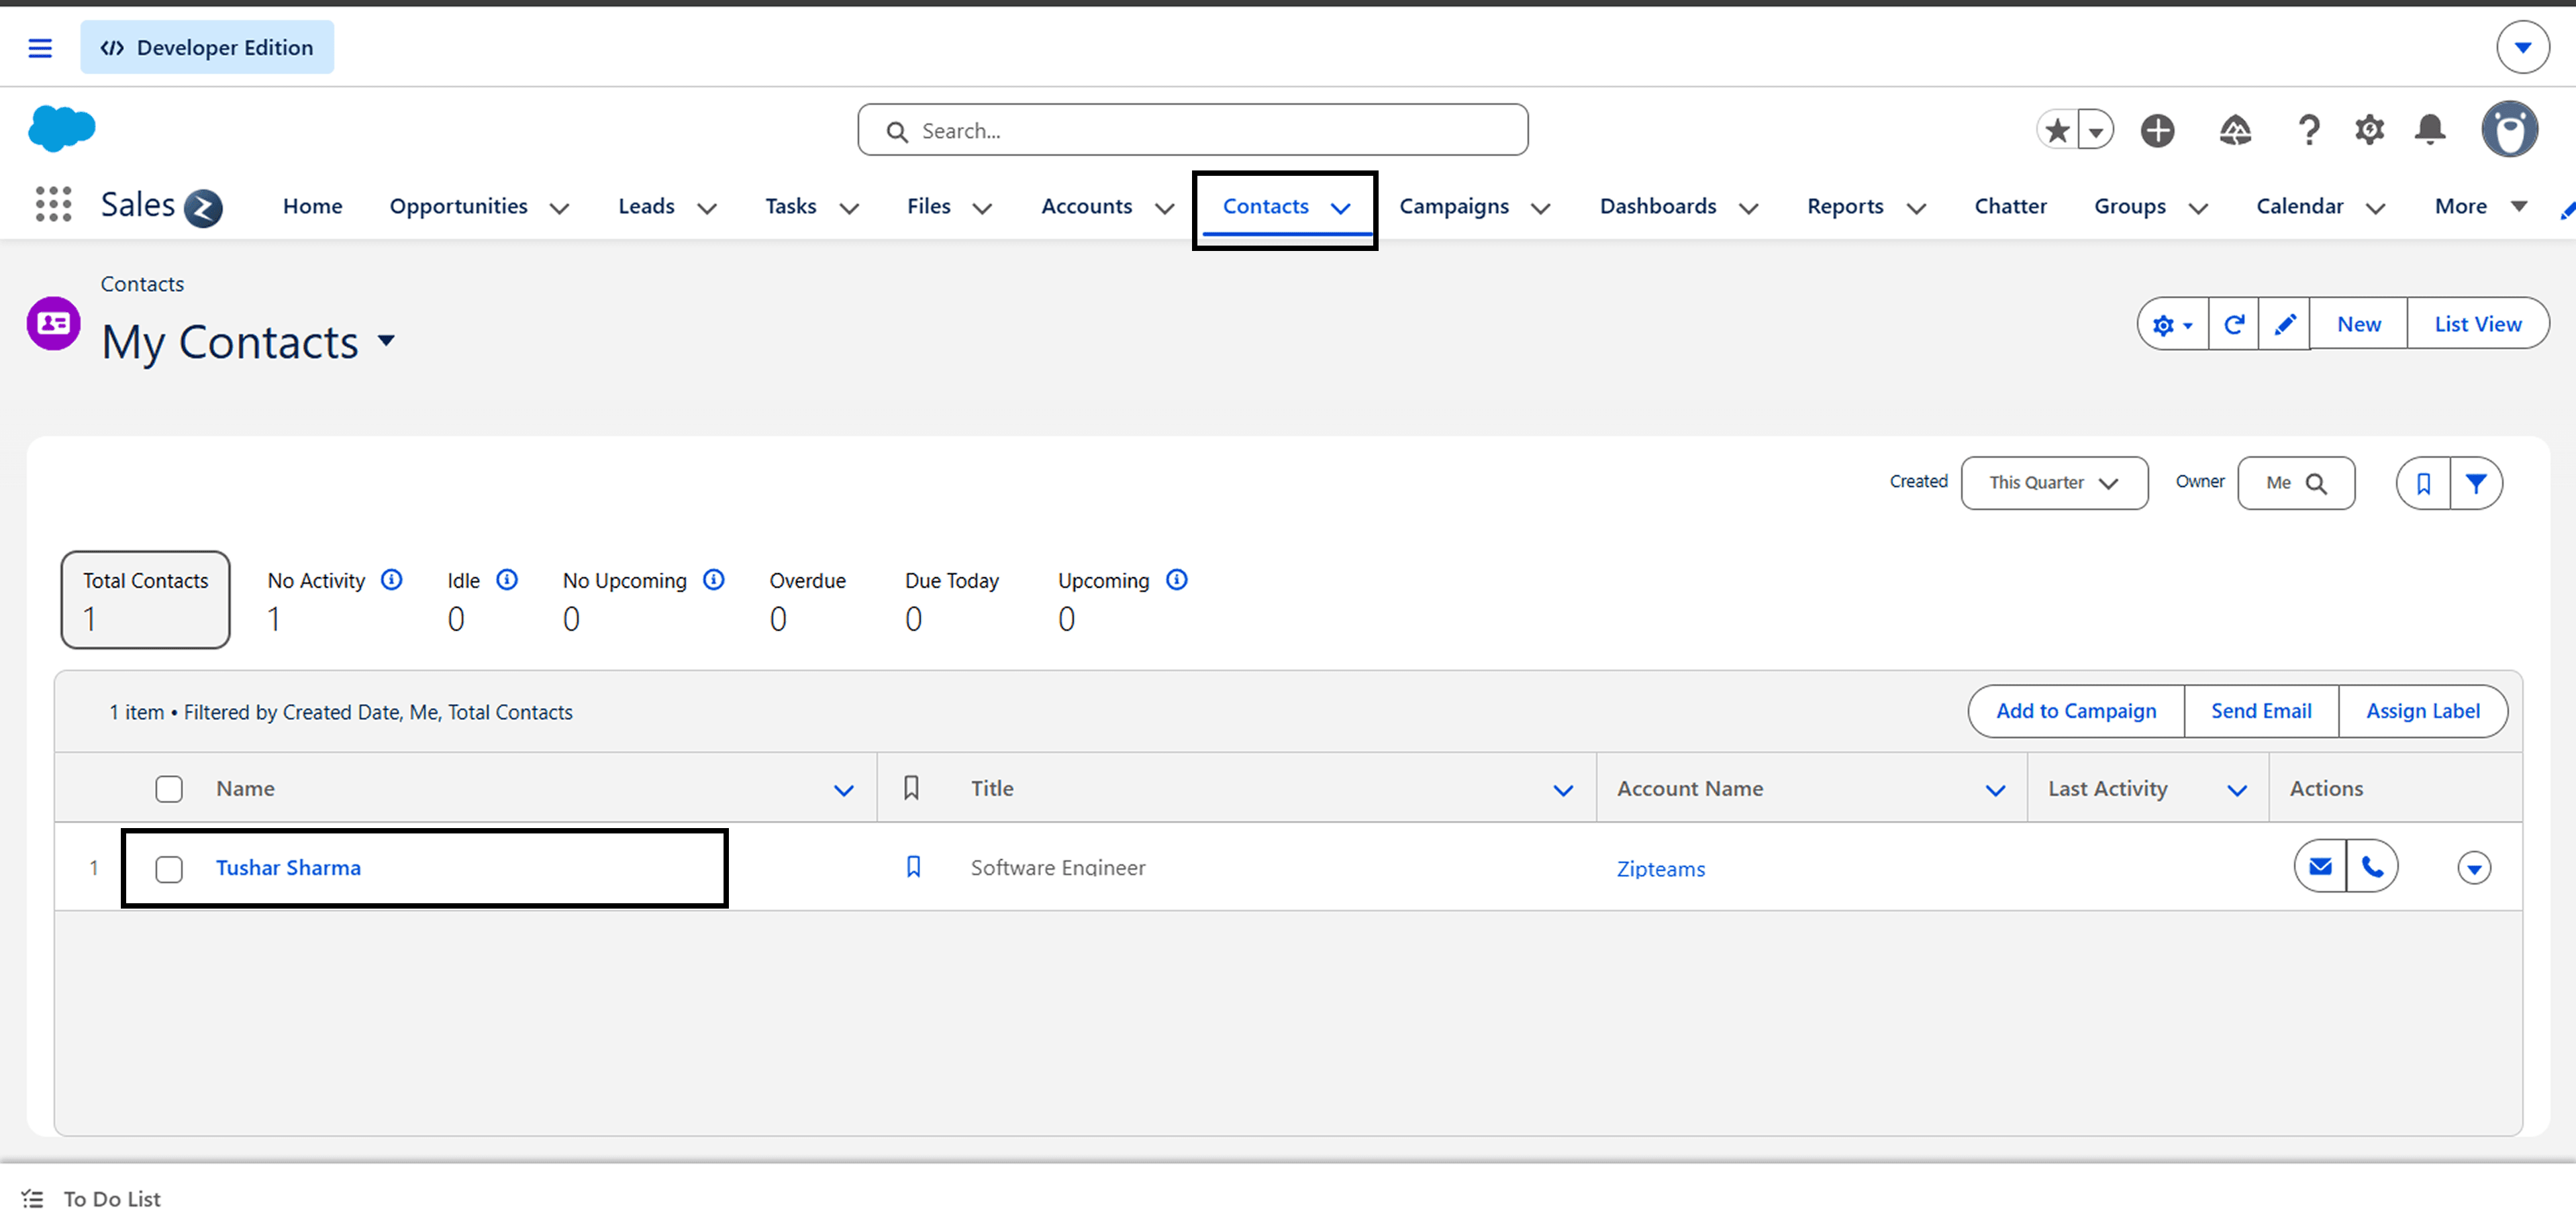
Now, the contact page of the lead opens up. Click on the "Details" tab of the lead.
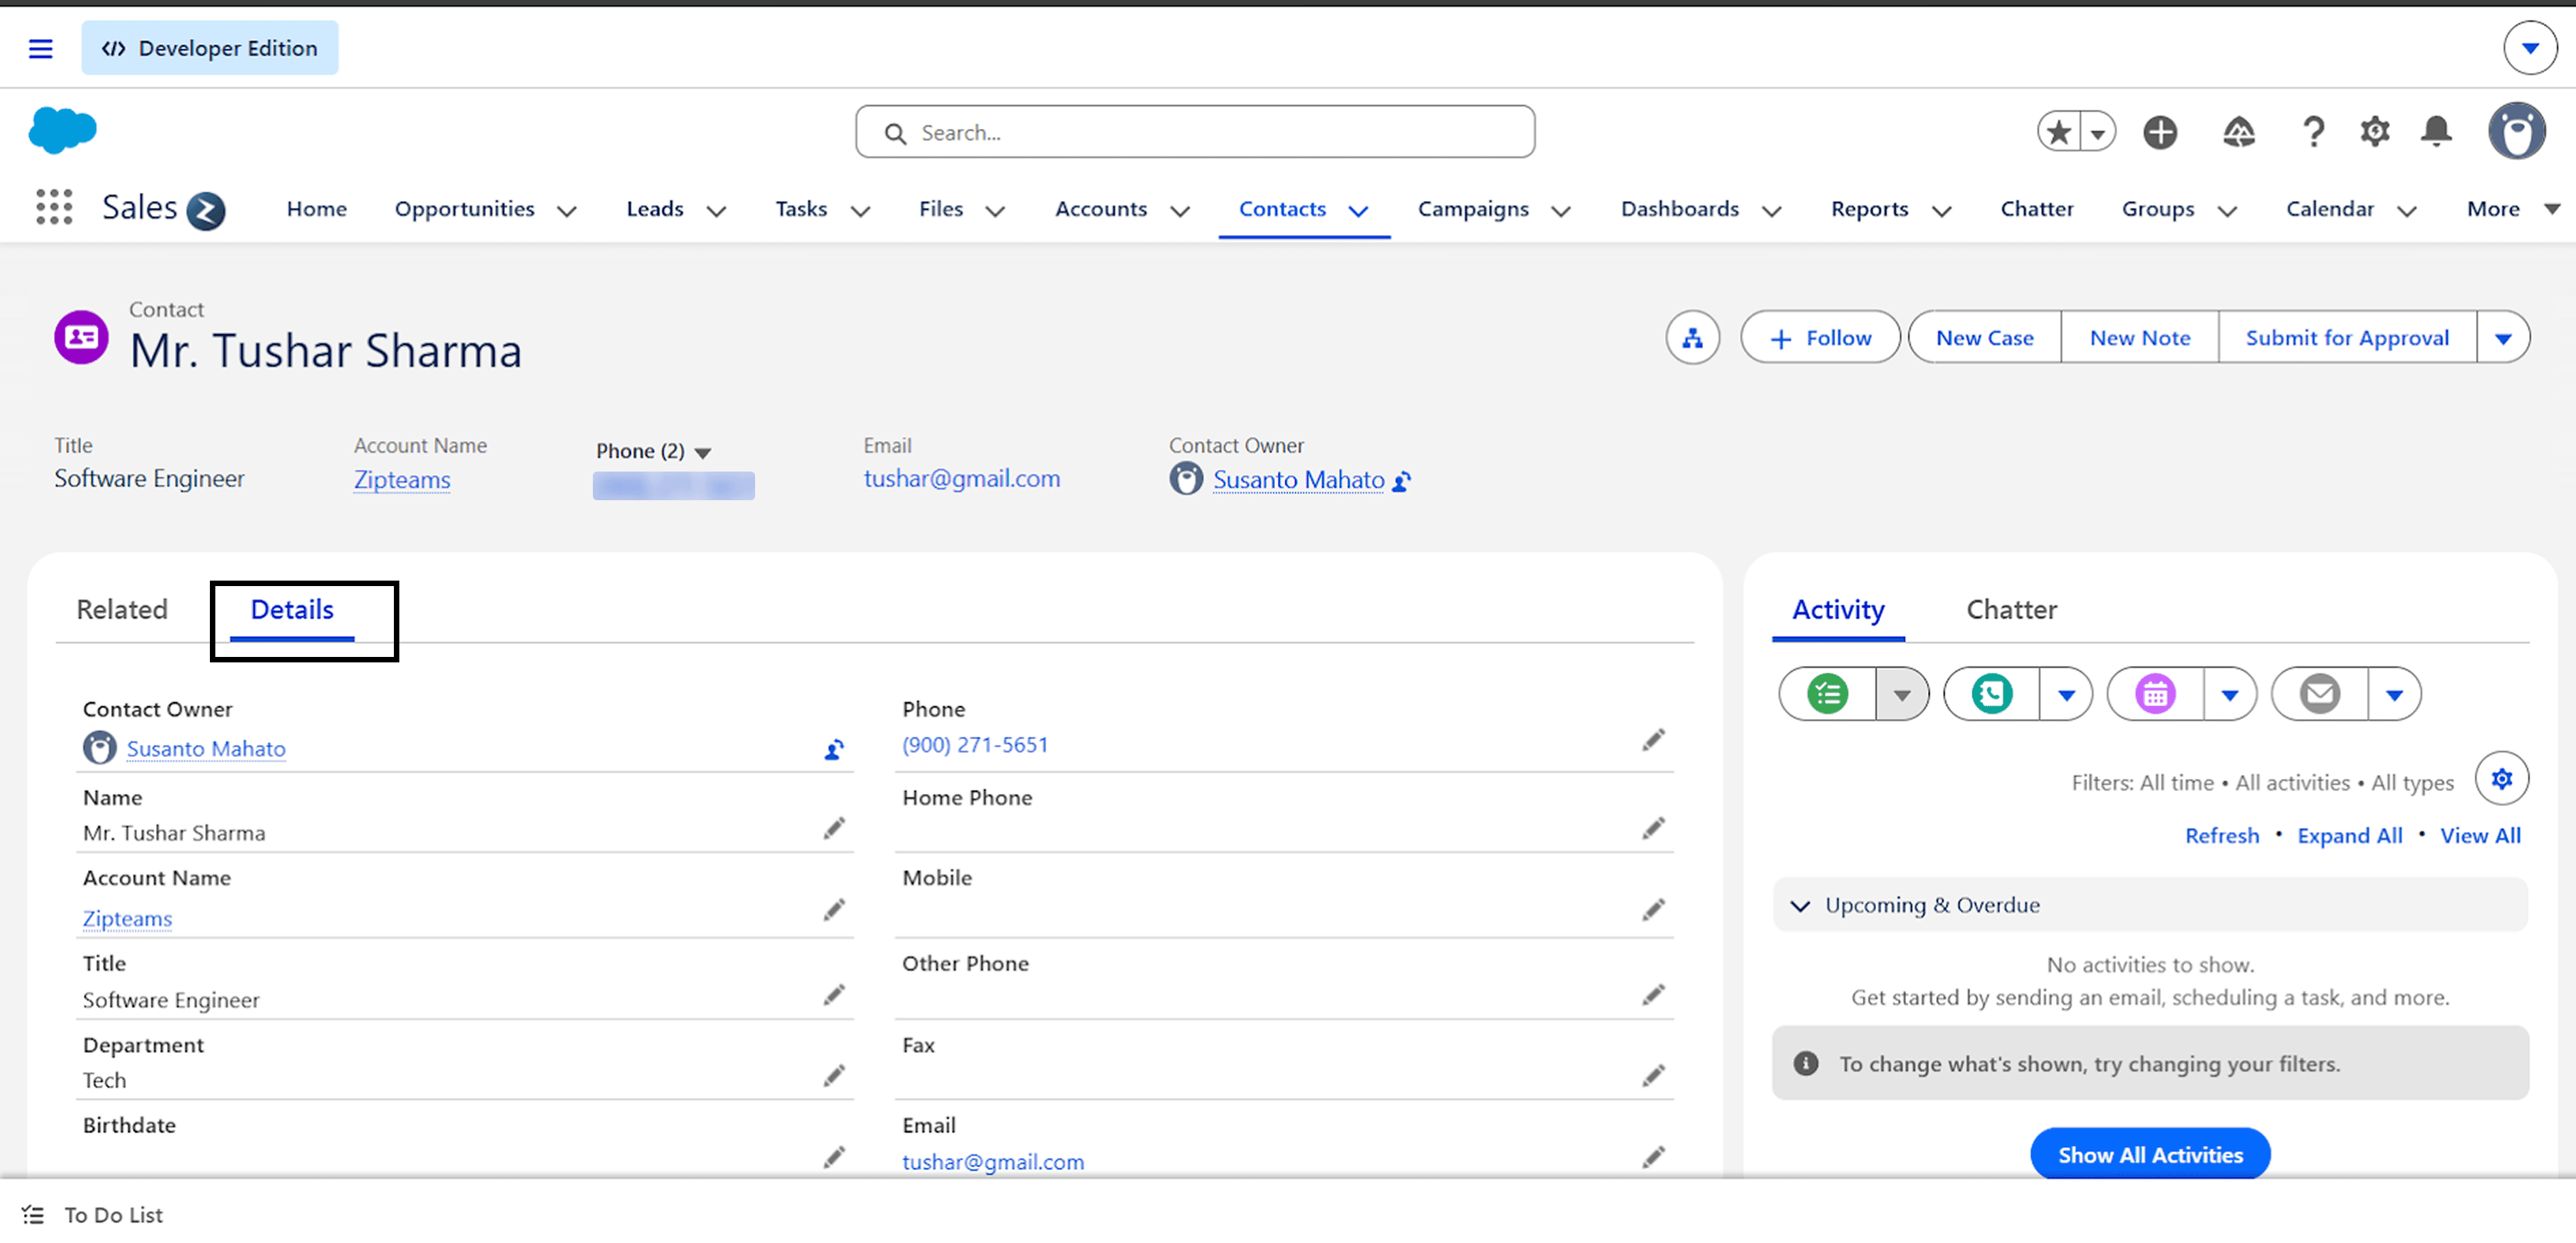
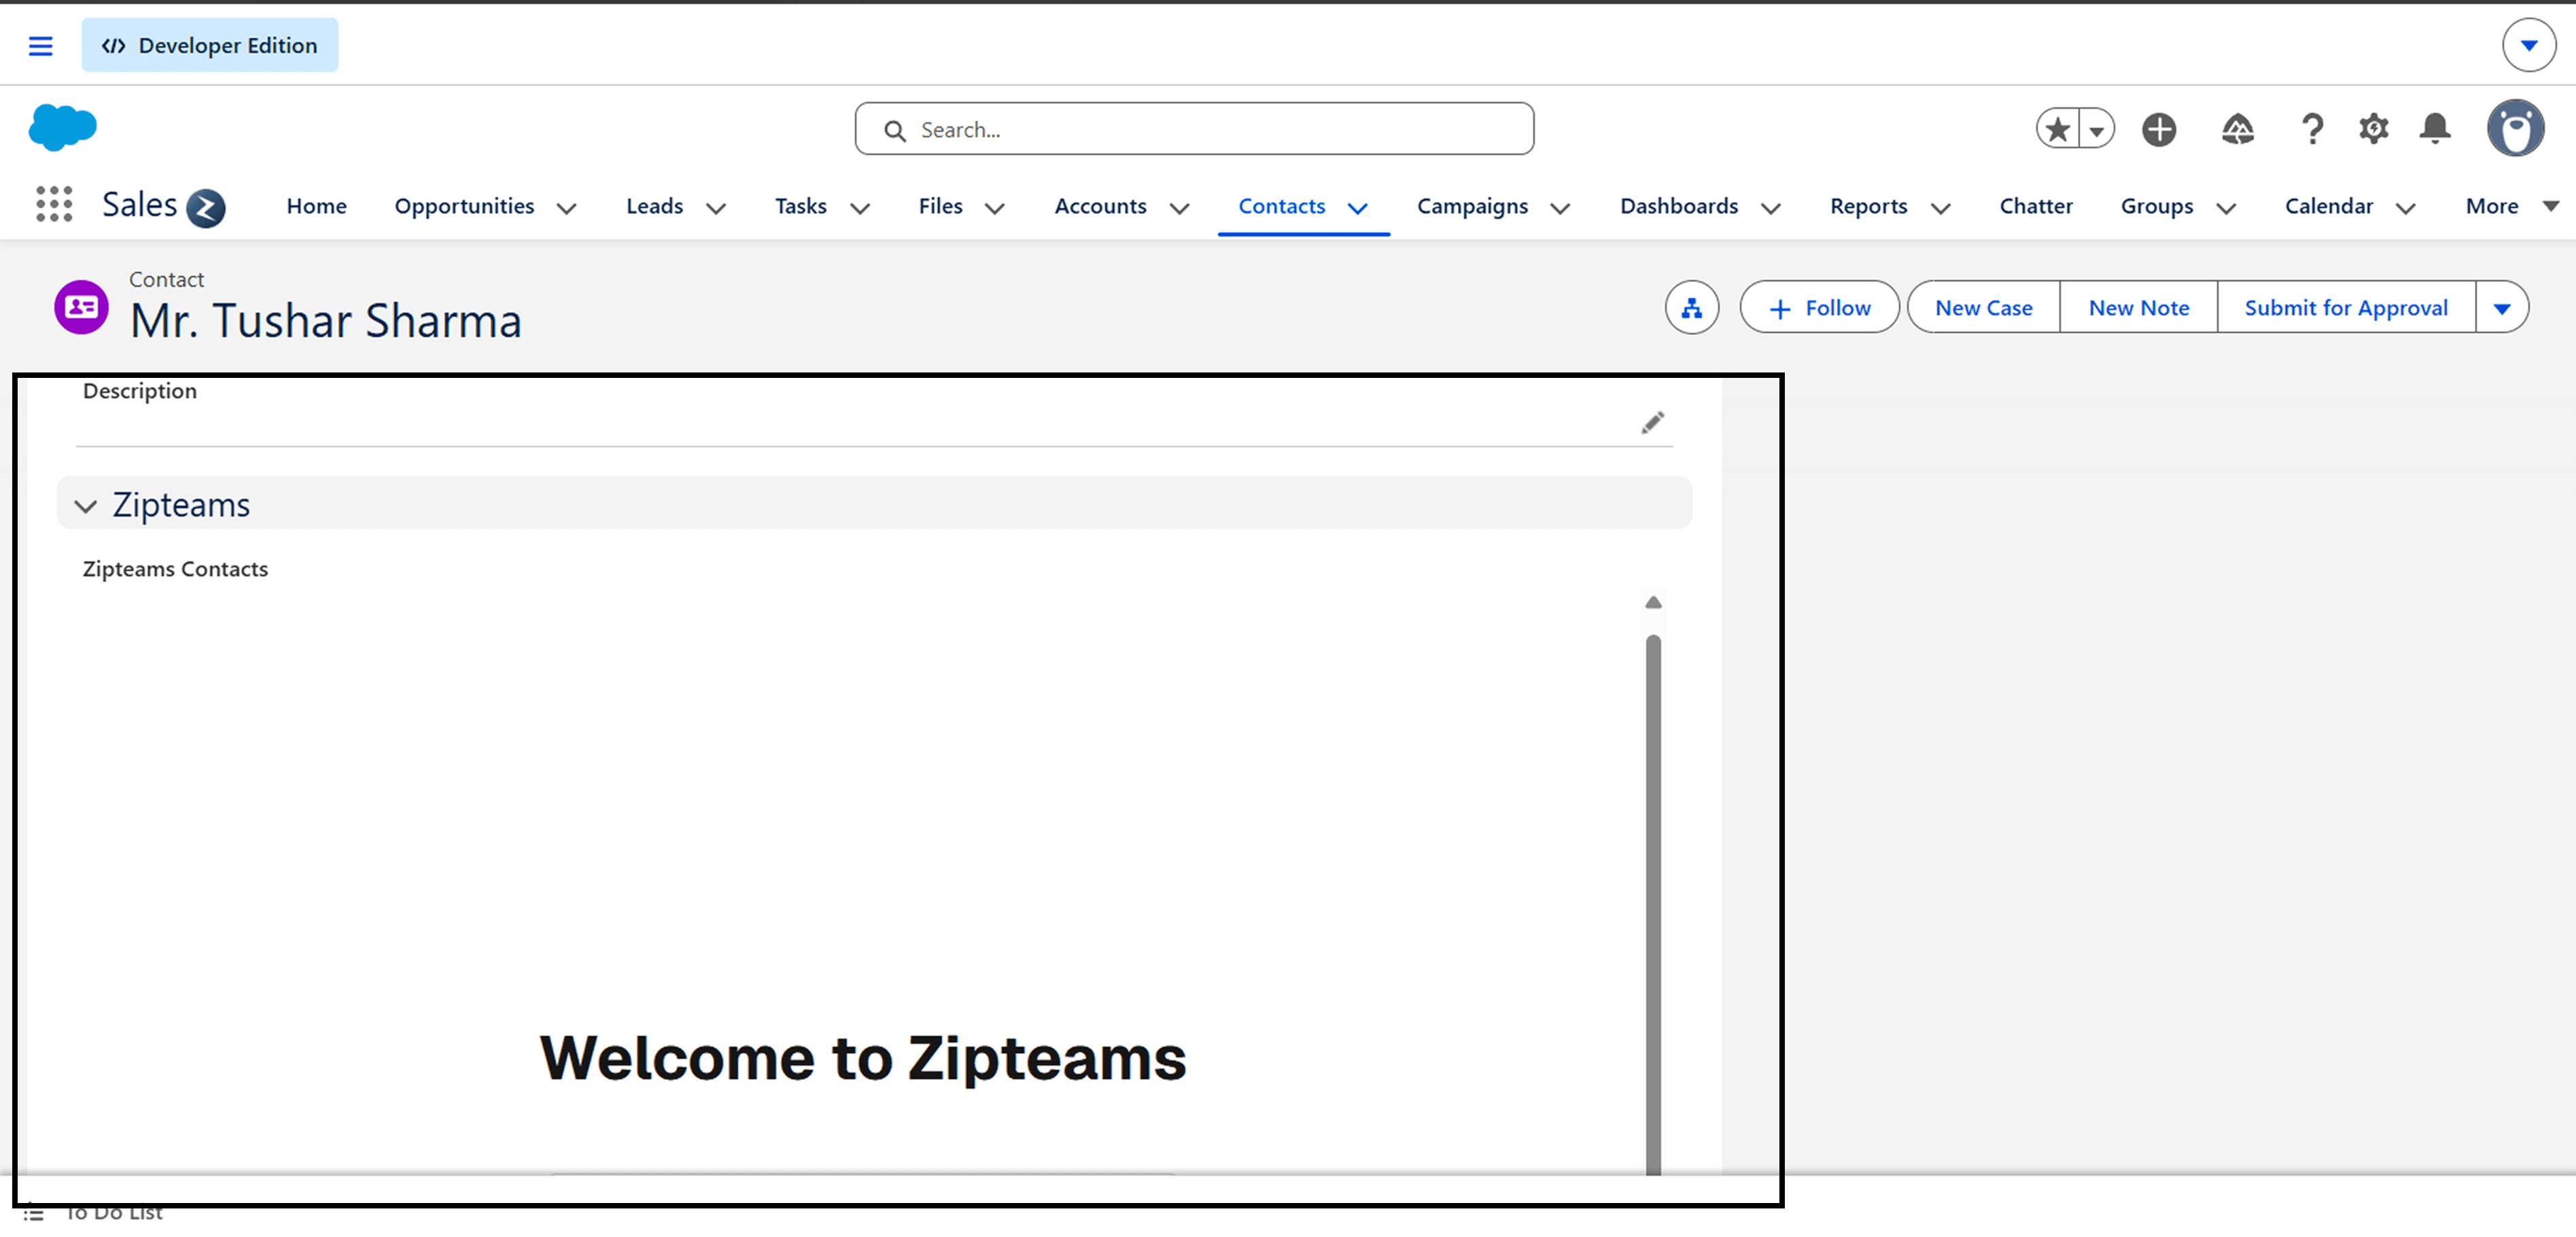
Now scroll down to Zipteams section, your Zipteams iframe is now in Salesforce, login to start using.
Section 4 - Other Configuration Settings
If you use Opportunity flow on Salesforce and want to sync disposition status from Opportunity stage field. Please enable 'Opportunity Level Syncing' flag on ‘Connect Your CRM’ page on Zipteams.

To start creating followup tasks on Salesforce, enable Salesforce Task Creation' flag on ‘Connect your CRM’ page on Zipteams.

To send processed call analysis results from Zipteams back to your CRM automatically after each call, enable 'Sync Analysis to CRM' flag on Zipteams.

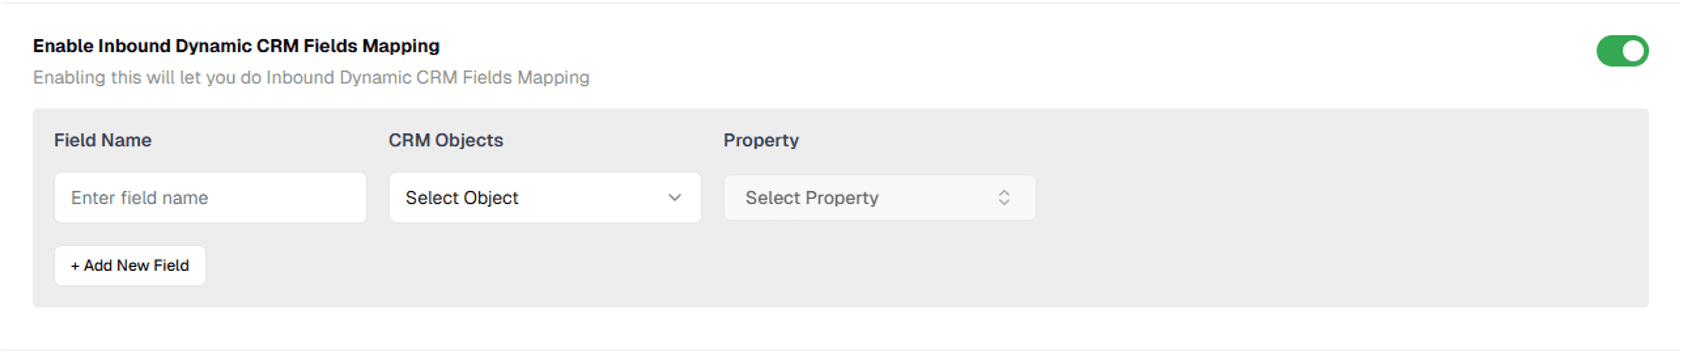
If you want to sync some extra data from Salesforce to Zipteams, use inbound dynamic form. Enable the 'Inbound Dynamic CRM Fields Mapping' flag on Zipteams.

Click on Add new field and select object and property from the dropdown to start syncing that particular data field onto Zipteams
Congratulations! You’ve successfully integrated your Salesforce with Zipteams.
Get started using our sales acceleration features and for any feedback or issues, talk to us instantly at zipme.at/zipteams or write to us at hello@zipteams.com.
Important guidelines:
For the integration to work, your Zipteams account should be connected to Salesforce through an account that has admin access to Salesforce.
All users who need to be assigned to Zipteams meetings should sign up at app.zipteams.com/signup using the email IDs they used to sign up on Salesforce.
New contacts will be created on Salesforce automatically for all Zipteams meetings if the contact doesn’t exist on Salesforce. The user assigned to the meeting will be made the contact owner on Salesforce.
If a contact who scheduled Zipteams meetings is already present on Salesforce, the meeting will be assigned to the existing contact owner on Salesforce.
In case the existing owner is not active for instant meetings, the contact will be asked to schedule a meeting, which will be assigned to the existing contact owner only.
If the existing owner is not signed up on Zipteams, the contact will not be able to schedule the meeting.
If you need any changes in any of the above settings, you can contact us at zipme.at/zipteams or hello@zipteams.com